Sep 27, 2017

Double the Portion Please, These Eggless Chocolate Chip Cookies Were Gone in Seconds in My Household

Only If I would have known that these cookies were so popular...

This recipe makes about a dozen eggless chocolate chip cookies, but please, please do double the ingredients. Speaking from my own experience, these cookies can be gone in no time, especially when the baker herself (raising my hand!) cannot stop "tasting" freshly baked cookies.

Eggless chocolate chip cookies -


Ingredients (makes about 12 cookies)?

  • 1/2 stick or 1/4 cup unsalted butter
  • 1/3 cup raw sugar
  • 1/4 cup brown sugar
  • 3/4 cup all purpose flour
  • 1/2 cup bittersweet chocolate chips
  • 1/2 teaspoon baking soda
  • 1/2 teaspoon vanilla extract
  • 1 tablespoon vegetable oil
  • 1/2 tablespoon water


How? 

Preheat the oven to 350 degrees Fahrenheit. Line the baking sheet with parchment paper. Bring the butter out first and rest in room temperature so it'll be soft enough to mix.


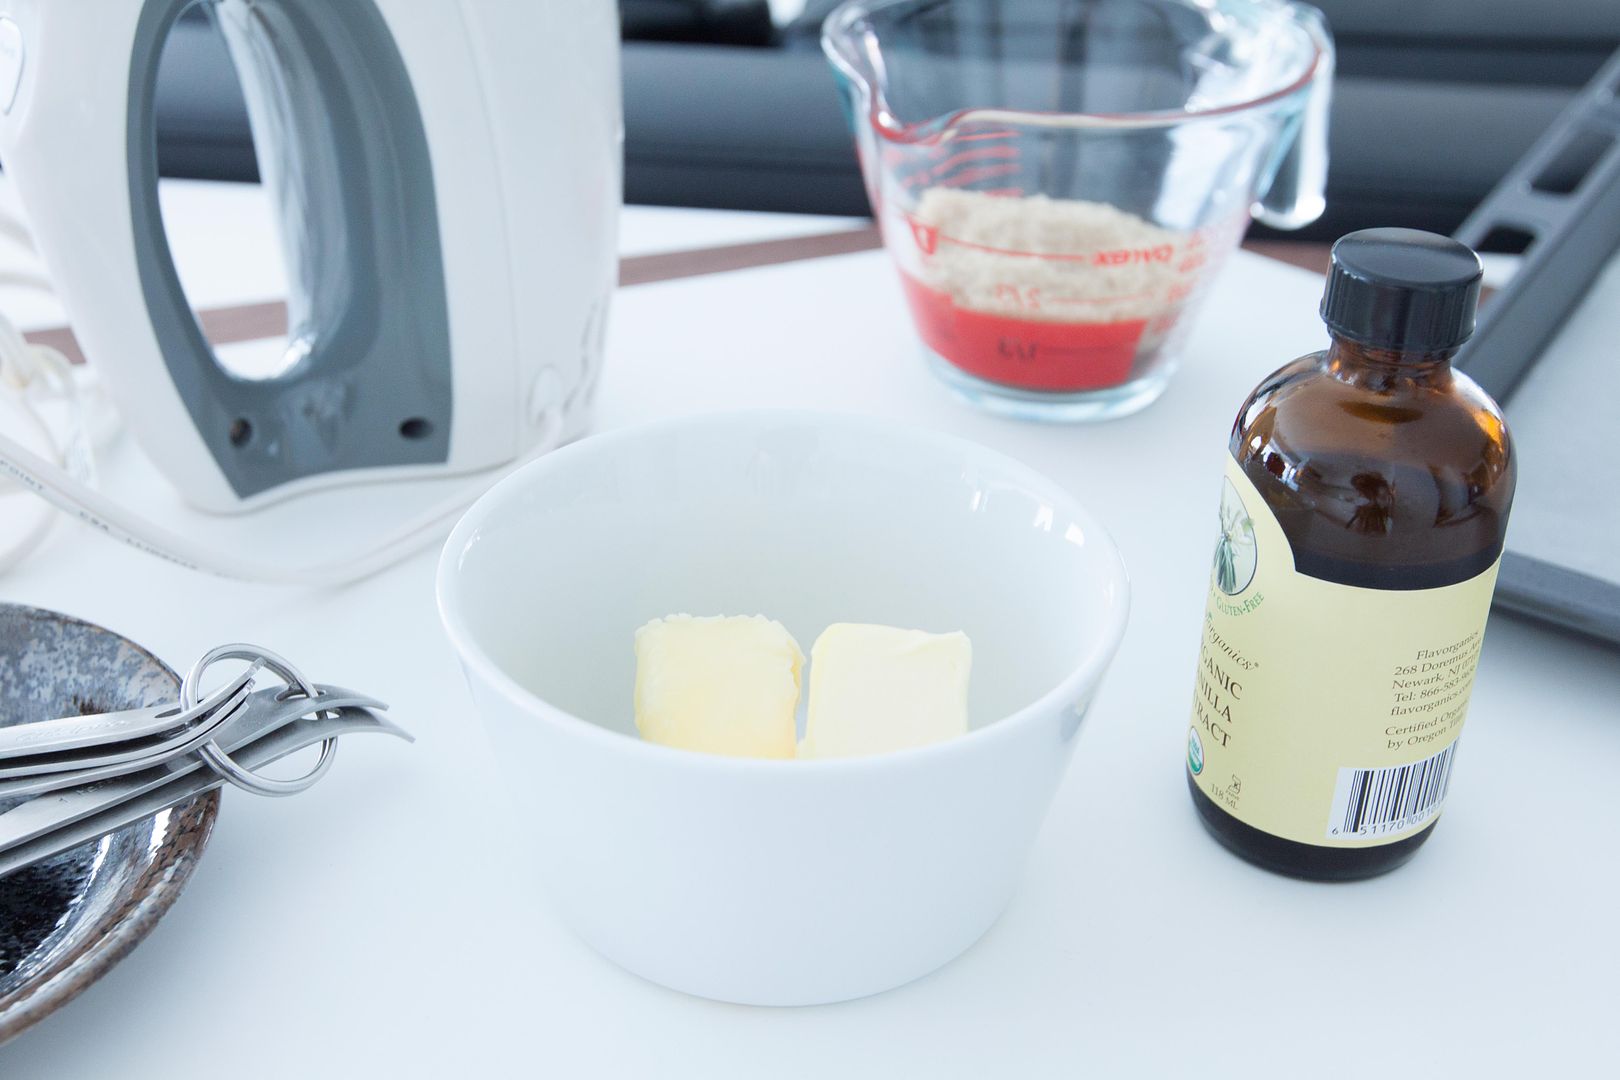
Simply use the bowl attached with the stand mixer, or use a large bowl instead, add in the butter along with raw sugar and brown sugar. Mix till creamy.

Sift in the flour and baking soda. Mix till nearly incorporated.

Add in water, vegetable oil, and vanilla extract. Continue to mix till fully incorporated.

Fold in bittersweet chocolate chips.

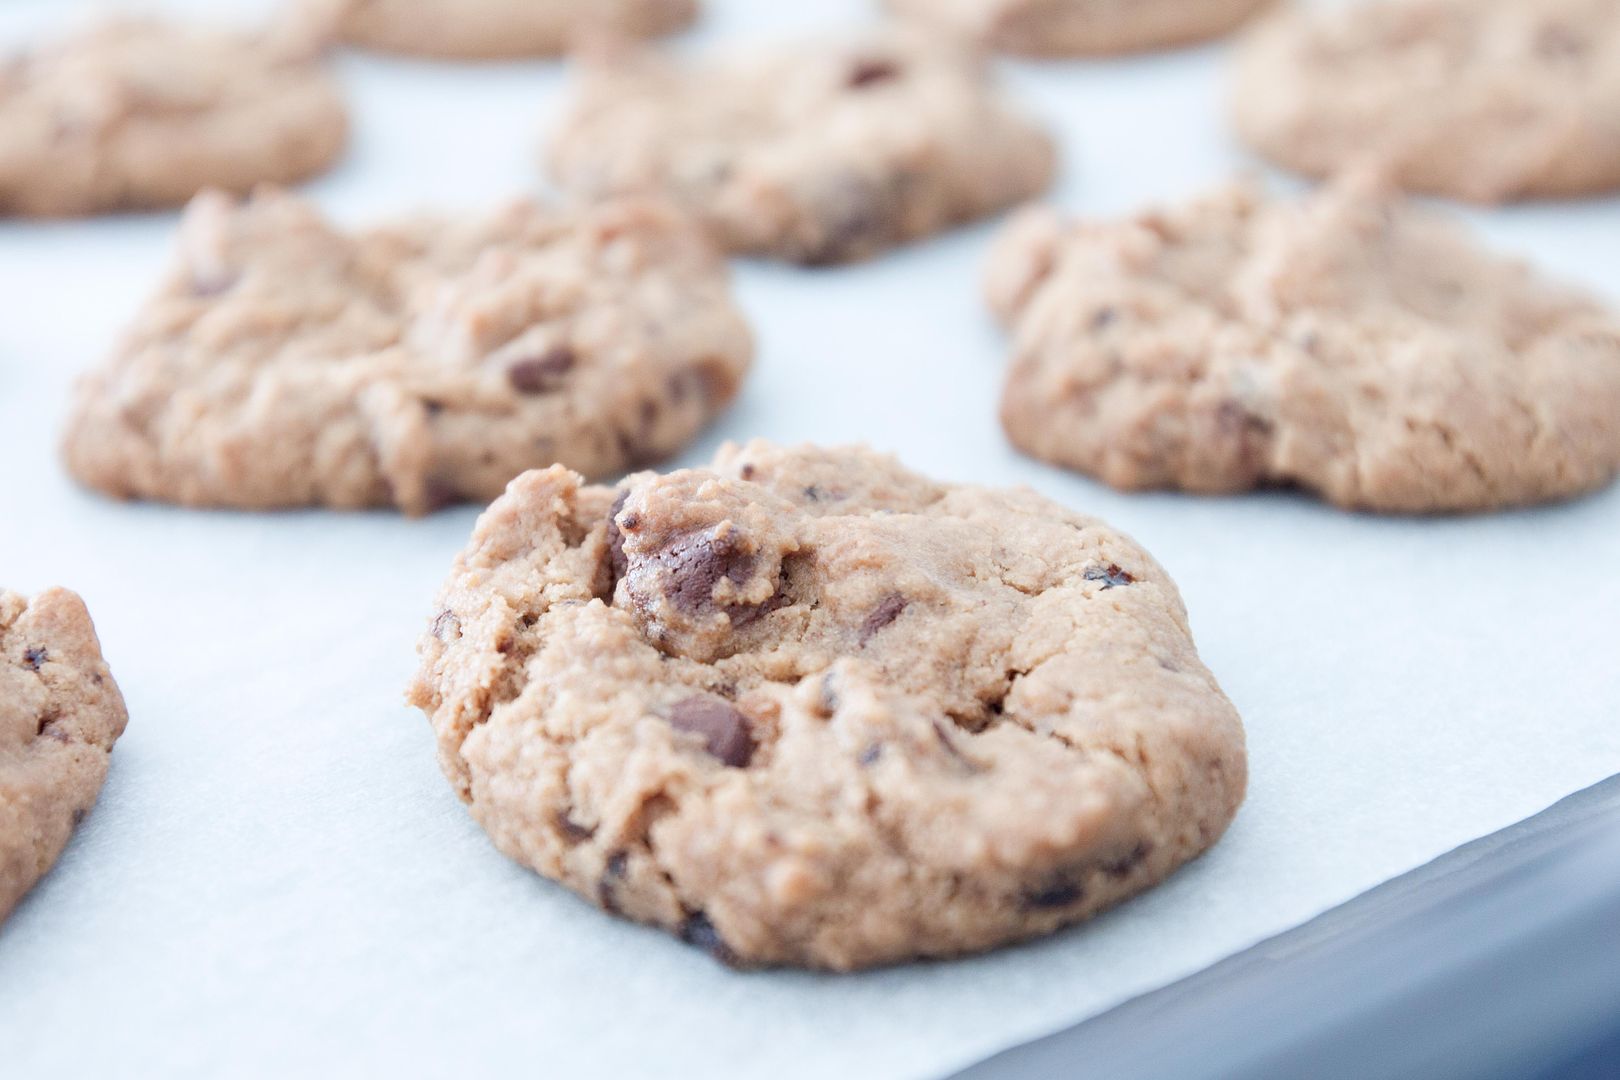
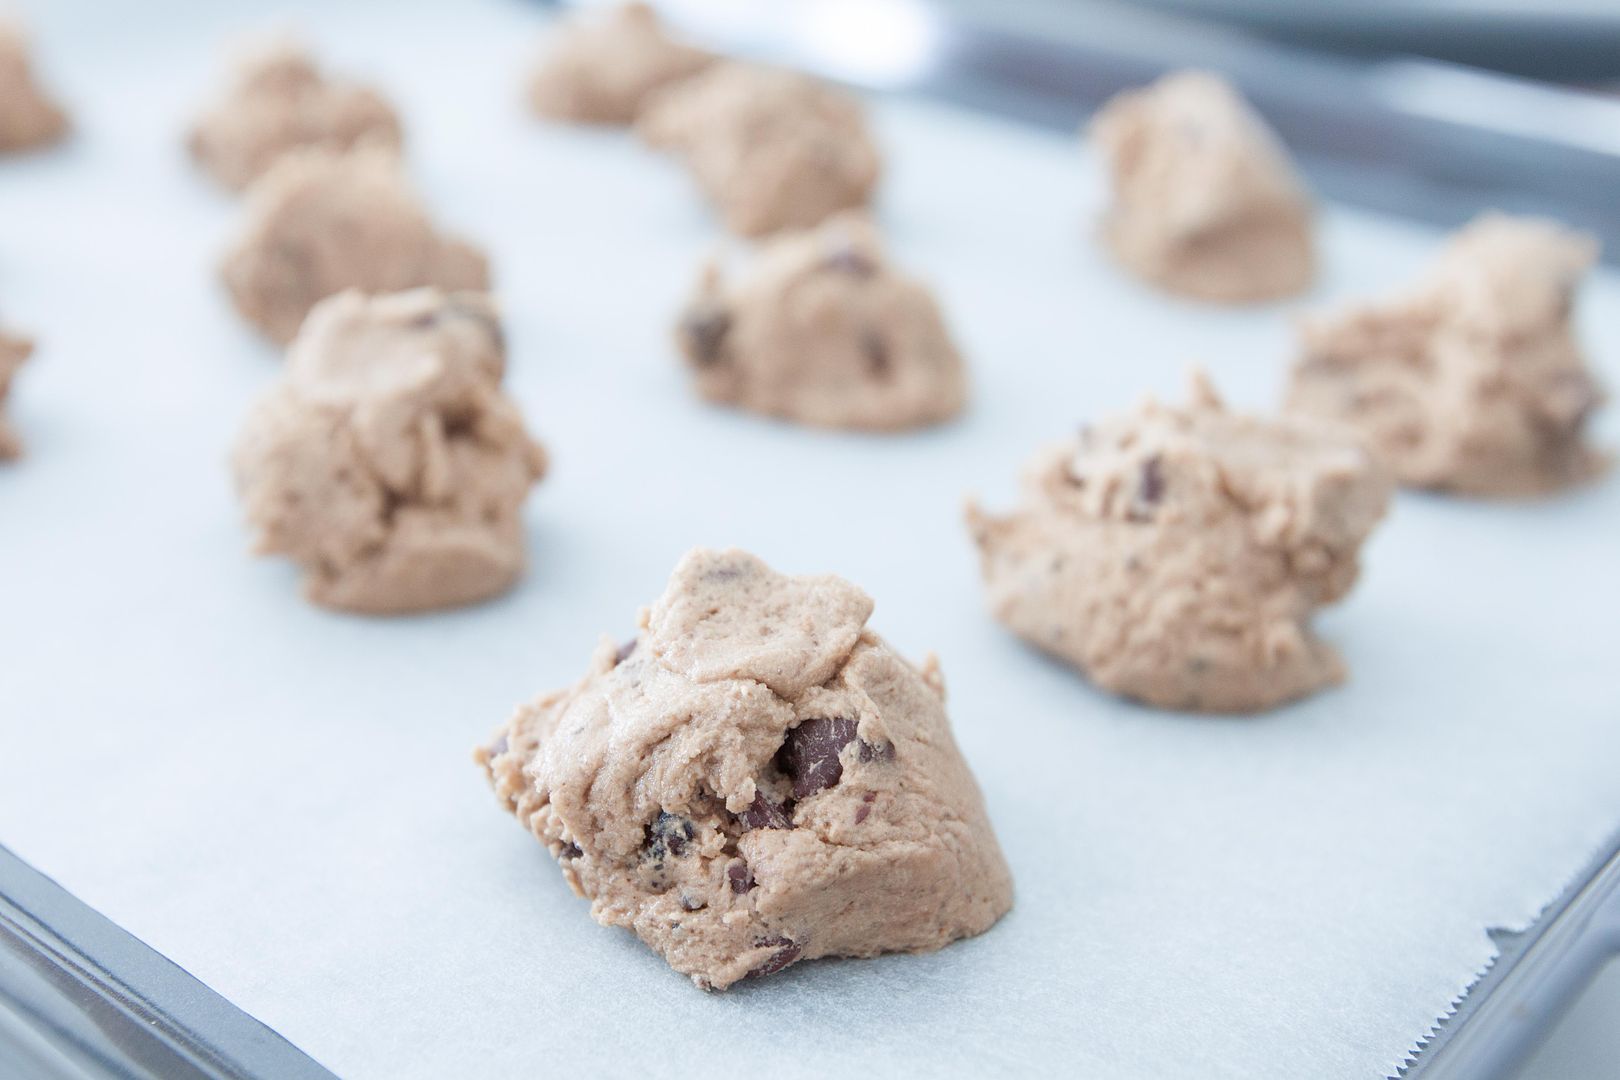
Scoop out the mixture and form little balls onto the baking sheet. It'll form about 12 dollops. 


Into the oven and bake for 10 to 12 minutes. Once ready, remove from heat and let the cookies cool down before storing - if not devoured right on the spot.


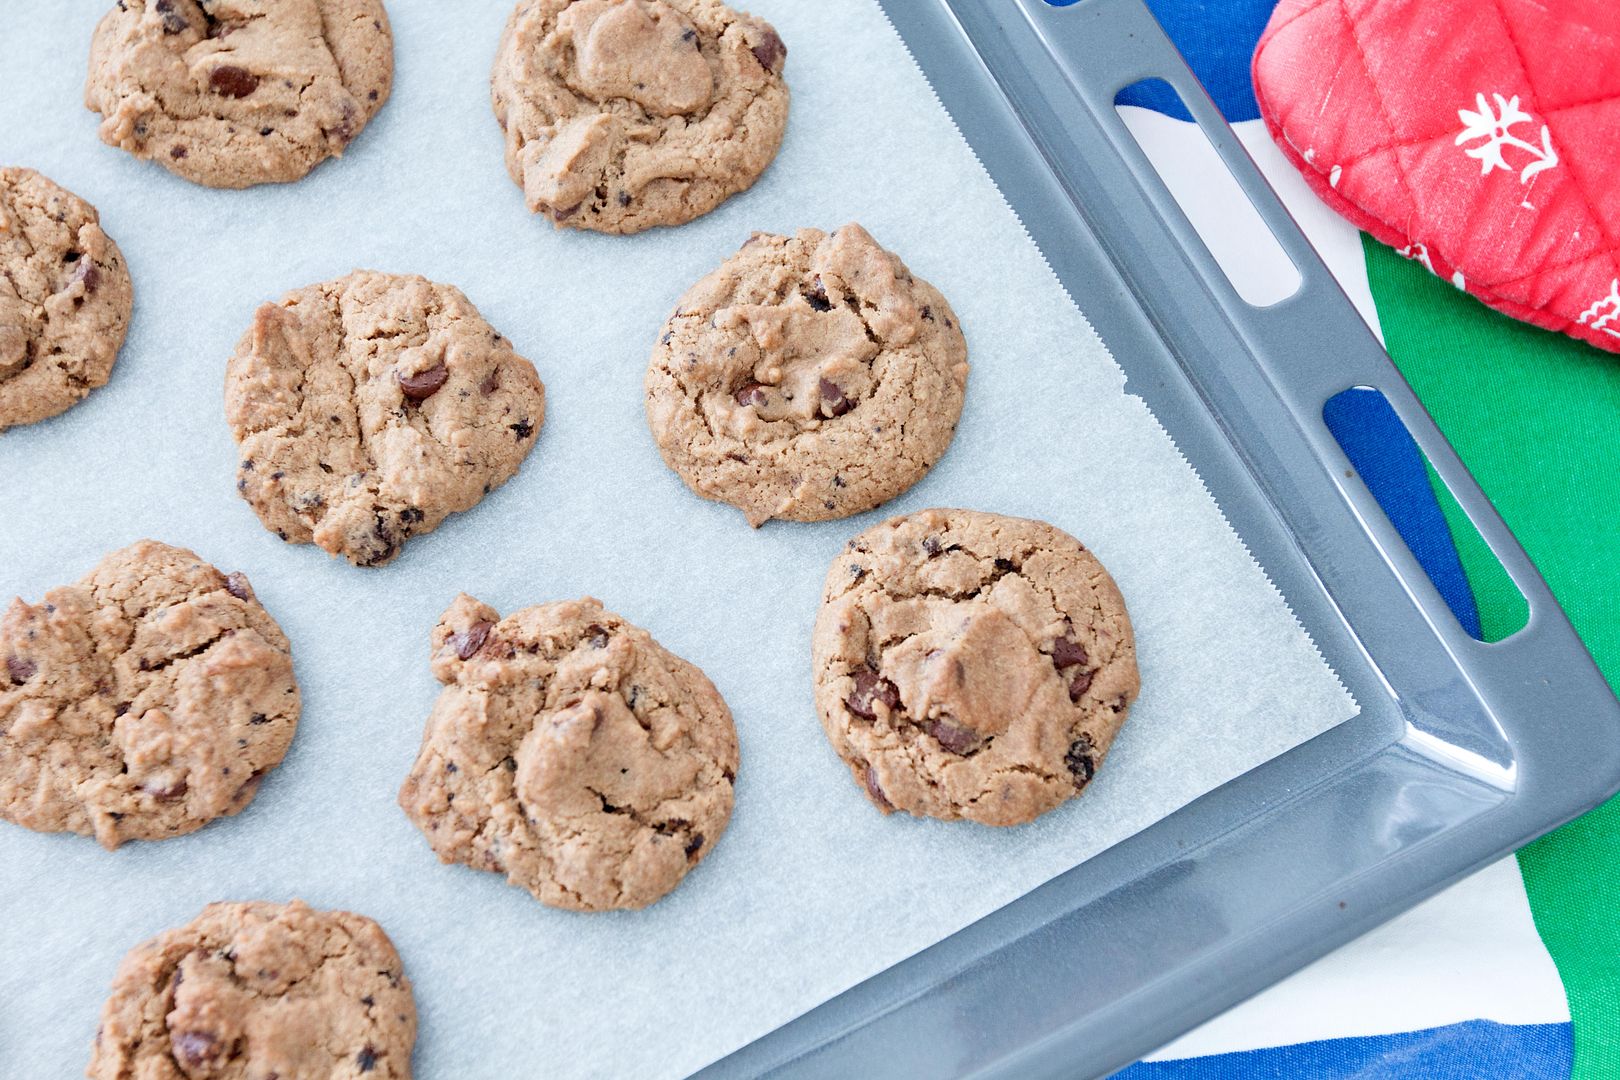
The dough might appear soft still after 10 or 11 minutes, but trust me, the cookies are done. Do not worry too much about it, you'll end up with warm and soft cookies. On top of oozing chocolate chips, nothing beats freshly baked cookies and that lovely smell permeating every corner of the house. 


Other chocolate recipes:


Sep 21, 2017

Beef Tongue Rice Bowl with Lemon Onion Sauce (牛タン丼)

Got two fine pieces of trimmed beef tongue the other day. No need to worry about pre-boiling the tongue or peeling the outer membrane. Even though the size was smaller than expected, but the already prepped meat did save a lot of cooking time. Few steps closer to mealtime, no complaints there.

Beef tongue rice bowl with lemon onion sauce - 


Ingredients (for two servings)?
  • 0.7 lb/about 300 grams trimmed beef tongue
  • 1/4 small onion
  • 2 stalks scallion
  • 1 to 2 tablespoons Japanese tsuyu 
  • 2 to 2 1/2 tablespoons lemon juice
  • 1/2 yellow or orange citrus
  • 2 portions basmati and quinoa rice 
  • Some salt
  • Some olive oil

How?

The ingredients can be modified based on what's available in the kitchen. It doesn't have to be fancy basmati rice and quinoa mixture, simply plain steamed white rice will do. 

However, for the beef tongue, if you can use all the end section of the tongue, that will be wonderful. Tips can be very chewy and better to be sliced as thin as possible. The ends are more tender and can cut into thicker slices, which translates to fuller bites. The ones I got here are half of the tips and half of the ends.

One note on slicing the tip of the tongue. Try to slice it when the meat is still half frozen. The meat is easier to handle and will not slide around when slicing. The ends don't need to be thinly sliced, but try to keep it less than half inch thick. You can tell that I failed to slice the tip as thin as I would imagined - I over-defrosted it and refused to wait one hour longer to pop the tongue back into the freezer.


Prepare enough rice for two portions.


Peel and cube the onion. Soak the onion in icy cold water for about 10 minutes. Drain and pat dry with paper towel. This step helps mellow out the flavor and reduce the oniony aftertaste.


Trim off the scallion stems and fine chop the remaining section. Mix the scallion together with onion cubes, lemon juice, about 1/2 tablespoon citrus juice, and tsuyu. Citrus is key here since this sauce needs a gentle tap of fruity sweetness to balance off the lemon sourness. Taste and adjust the flavors if desired.

Brush some olive to coat the surface of a grill pan and heat it up using medium high heat. Make sure the tongue is rested under room temperature for at least 5 minutes before searing. Sprinkle some salt on both sides of the tongue slices.

Once the pan turns hot, transfer the tongue slices over, piece by piece. Cook till lovely grilled marks are shown. The thinner tips cook faster of course, so remove them from heat first and continue to cook the ends till ready to serve. Let the meat rest for few minutes before serving.

Scoop the rice to the serving bowl and lay the seared beef tongue on the sides. Spoon some lemon onion sauce in the middle. Garnish with some grated yellow citrus throughout.


The sauce doesn't need to be too salty since the tongue pieces were already seasoned with salt on both sides. The key is the crunch from the onion and a touch of refreshing scent from the lemon.


The ends are especially delicious, tender yet bouncy bite every time. Let me try to get only the end part in the future, it should be a great ingredients for curry. 


Other rice bowl recipes:

Sep 15, 2017

Not so Devilish but Still Comes with a Kick - Red Oil Wontons (紅油抄手)

Can't even remember when was the last time when I worked with these Chinese wrappers, perhaps a year ago? It's been too long and my rusty wrapping skill is visibly shown in these images. Luckily, a good seal is more important than its appearance based on how I fold the wontons. The wrappers are so thin, once boiled, little flaws here and there can be easily overlooked. 

The true or more so authentic Sichuan style red oil wontons come with much more devilish color compare to the ones I have here. The spiciness and oil used were toned down a bit, to suit the taste of Mister at home. However, customize the sauce based on preference can be an easy task. A tap of chili sauce, perhaps more black vinegar, maybe freshly grind Sichuan peppercorn or some peanuts, you can play around the combinations freely. 


So the post here is mostly for the wonton itself. How to wrap the wontons, and the basic ingredients for the red oil sauce. Once you have grasped the basic ideas, go wild and make your own version of Chinese wontons.


Red oil wontons 紅油抄手 -


Ingredients (makes about 30 to 32 wontons)?


For the fillings:


  • 1 lb ground pork (avoid lean meat)
  • 1 stalk scallion
  • 1 1/2 tablespoons finely chopped or grated young ginger
  • 3 to 4 tablespoons chicken stock
  • 1 teaspoon salt


For the sauce:


  • 4 tablespoons soy sauce
  • 3 tablespoons black vinegar
  • 1 teaspoon Sichuan peppercorn oil
  • 1 teaspoon homemade chili sauce
  • 1 teaspoon sugar
  • 1 teaspoon sesame oil


Some suggestions for the toppings and sides:


  • Some chopped scallion (optional)
  • Some dried seaweed threads (optional)
  • Some dried and crushed peanuts (optional)
  • Some Chinese cabbage (optional)


How?


The way I wrapped these wontons can hold up more fillings and doesn't require skillful artist's hands to do so. There is one other popular way of making wontons - the triangular method. The wrapper is folded into a triangle first, which looks prettier but doesn't hold as much fillings. Also for the triangular method, it's safer to wrap the wontons nicely, because its shape generally stayed the same once boiled. That means if you made a crooked wonton, you will end up with not so eye-pleasing wonton in the end.


Those being said, for beginners, just follow my lead and fold the wontons using the "rectangular" way. Better safe then sorry.


Start with the fillings first. Destem and finely chop the scallion. Mix the scallion along with ground pork, grated young ginger, salt, and a little bit of chicken stock at a time. Similar to massaging the meat, the chicken stock will get absorbed by the pork during the process, which helps moisturized the filling. Add more chicken stock and keep mixing, and use more chicken stock if needed. Cover the mixture with cling foil and let it rest in the fridge for few hours up to overnight.


Make sure to use the wonton wrappers and not the dumpling wrappers. Wonton wrappers are very thin compared to dumplings, they cook faster too. 


Spoon some filling to the center and tap half side of the wrapper edges with water. It's ok to start out with just a tiny spoonful of the pork mixture. You can be greedier and use more filling once you get a hang of the wrapping work.


Fold the wrapper to form a rectangular shape. Tightly seal the edges, the water will help binding the wrapper together. Use more water or press harder to help with the sealing.


Bring the two bottom corners together, perhaps with a tap of water to help sealing them together. The wonton should somewhat look like a hat at this moment.


Keep repeating the steps till all the fillings are gone. I did get greedy and start using more fillings after some trials and errors. In the end, I got about 32 wontons. However, if using the triangular way, since it can't hold up as much fillings, you should be getting about 40 to 45 wontons for the same amount of fillings.


Bring a big pot of water to a boil and drop the wontons into the water one by one. 


While the wontons are cooking, mix all the sauce ingredients and make sure the sugar has been fully dissolved. Taste and adjust per your preference. Scoop some sauce to the serving bowls first.


The wontons are ready when they float. Drain and transfer to serving bowls. I've also blanched some Chinese cabbage and add to the bottom of the bowls.


Drizzle more sauce over the wontons, garnish with chopped scallion or other preferred toppings.


The fillings are not too salty since the highlight also lies on the sauce. If you are not afraid of heavy tasting sauce, be brave and just go for the chili sauce, vinegar, Sichuan peppercorn, and even the granulated sugar. Even though adding more sugar to savory dishes might not be the norm, but it will truly enhance the flavors for other seasonings. In fact, my dad would use at least double the amount of sugar, chili sauce, and some freshly ground Sichuan peppercorn if he were the one making the sauce.


These wontons can also be made ahead and store in the freezer. Remember to dust the storing container or plate with flour before putting the wontons on top. Also dust some more flour on the wontons to prevent sticking.  


Sep 10, 2017

Versatile Chimichurri Sauce Recipe (Makes About 1 Cup)

Making versatile sauces ahead of time can be a lifesaver sometimes, especially free time is nearly squeezed out by tremendous amount of work and chores. Take this vibrant chimichurri sauce for instance, the most classic way is to serve it with steak. However, for a quicker and easier cleaning meal, baked white meat is the way to go. Chimichurri can also be used as bread spread, but with additional protein and salad greens, a comforting sandwich is made. 

Best part, this can be a make-ahead sauce and should last for few days in the fridge. You can even store the sauce in ice cube trays and just thaw a couple green cubes whenever in need.


Chimchurri sauce -


Ingredients (makes about 1 cup)?


  • 1 cup packed flat leaf parsley (a small portion can be substituted with cilantro)
  • 1/4 lemon (juice)
  • 1/2 cup extra virgin olive oil
  • 1/3 cup red wine vinegar
  • 2 garlic cloves
  • 1 red chili
  • 1/4 red onion
  • 1/2 teaspoon salt
  • 1/8 teaspoon dried Italian seasoning


How?

I couldn't find fresh oregano at the grocery store so I used dried Italian seasoning instead. Not the norm to do so but the end result was still fragrant and delicious. If you can get a hold of fresh oregano, just leave the dried seasonings behind.


Peel and roughly chop the red onion. Peel and roughly chop the garlic. Roughly chop the herbs too. Destem and roughly chop the red chili. Juice 1/4 lemon.


Add all the ingredients to a food processor. 


Give it a few pulses first. Scrape down any coarse bits or herbs sticking on the side then blend till smooth.


I was especially fond of chimuchurri's bright aroma and that kick of sourness from the vinegar. And don't you just like that vibrant green color? 


Here are some other ways to utilize chimichurri sauce. Besides fish, chicken, steak, and all the protein options - as a sauce for fresh pasta. Just remember to grate a generous amount of Parmigiano Reggiano all over.


Are you ready for it?


Similar recipe:


Sep 4, 2017

Asian Dried Anchovies and Five-Spice Bean Curd Stir-Fry

While many western countries marinate and/or preserve anchovies in oil, the dried version is more common in Taiwan. Asian dried anchovies can be used in many ways to boost flavors in Taiwanese dishes. Some like to soak and pat dry the anchovies first, then use in steamed recipes. The anchovies come out soft and easy to swallow. Some add it to stir-fry dishes and by doing so, the anchovies become crunchy and packed with savory aroma.

The Asian dried anchovies and bean curd stir-fry here is one of the classic recipes incorporating dried anchovies. Pair with red chilies and salted black beans, you'll be even happier with ice cold beer on hand.

Asian dried anchovies and five-spice bean curd stir-fry 炒小魚豆乾 -


Ingredients?

  • 4 squares ready-to-eat five-spice bean curd
  • 1 1/2 cups dried anchovies
  • 2 garlic cloves
  • 1 to 2 red chilies
  • 1 stalk garlic sprouts
  • 2 tablespoons olive oil
  • 1 tablespoon salted black beans 豆鼓
  • 1 tablespoon soy sauce
  • 1/2 tablespoon Chinese cooking wine
  • 1/2 teaspoon salt
  • 1 teaspoon sugar
  • Small pinch white pepper powder


How?

Gently rinse the dried anchovies and soak for about 5 minutes. Drain and pat-dry with kitchen towel.

Trim off the stem of garlic sprouts and slice the remaining part diagonally into about 2 inch long sections. Trim off red chili stems and slice diagonally too. Peel and finely chop the garlic cloves. Slice the bean curd.


Drizzle some olive oil to the pan and turn to medium heat. Add in garlic sprouts, chopped garlic, chilies and give them a quick stir. Wait till the aroma comes out but be careful not to burn the garlic pieces. 

Add in dried anchovies and keep stir-frying till the fish appear nearly dried up. Turn up the heat if needed. Wait till the color of the anchovies darkens and the texture turns slightly crunchy. It might take a few minutes.


Add in the bean curd and give it a quick stir. It won't take long since the bean curd was already cooked-through before packaging.

Add in Chinese cooking wine, soy sauce, sugar, salted black beans, and white pepper powder. Mix gently and cook till the bean curd slices absorb all the seasonings.


Plate and serve right away, but this dish can be eaten cold too. If you really making sure to stir-fry the anchovies till almost completely dried up and crunchy on the edges, that crunchiness still holds even when the dish was out for a while.  


Other tofu product recipes: