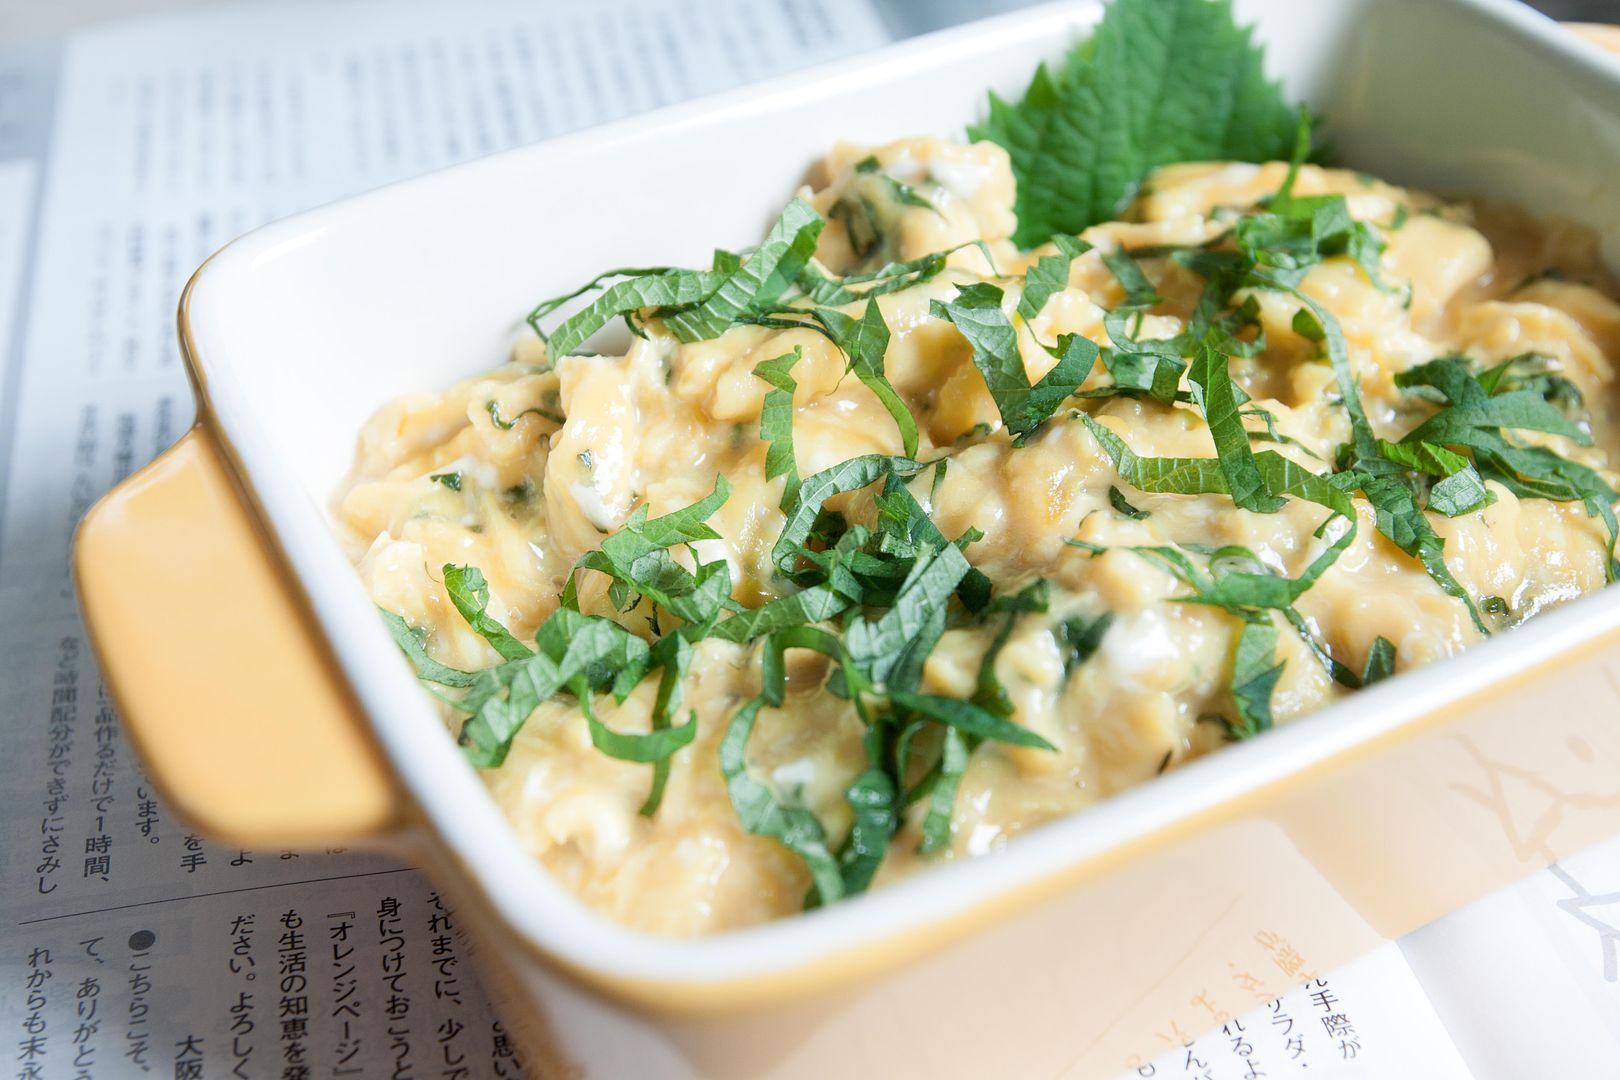
Like using dill and chives, shiso (perilla) can also be an aromatic addition to softly scrambled eggs. Some people love its airy, floral, lemony, and almost minty aroma, while others turn away from the strong scent. But do give it a try, the butter used here helps in smoothing out the taste, and if you're not a big fan of shiso, just use half of the portion indicated on the recipe. In a case of shiso leaves, a little goes a long way.
Buttery scrambled shiso eggs -
Ingredients?
- 6 large eggs
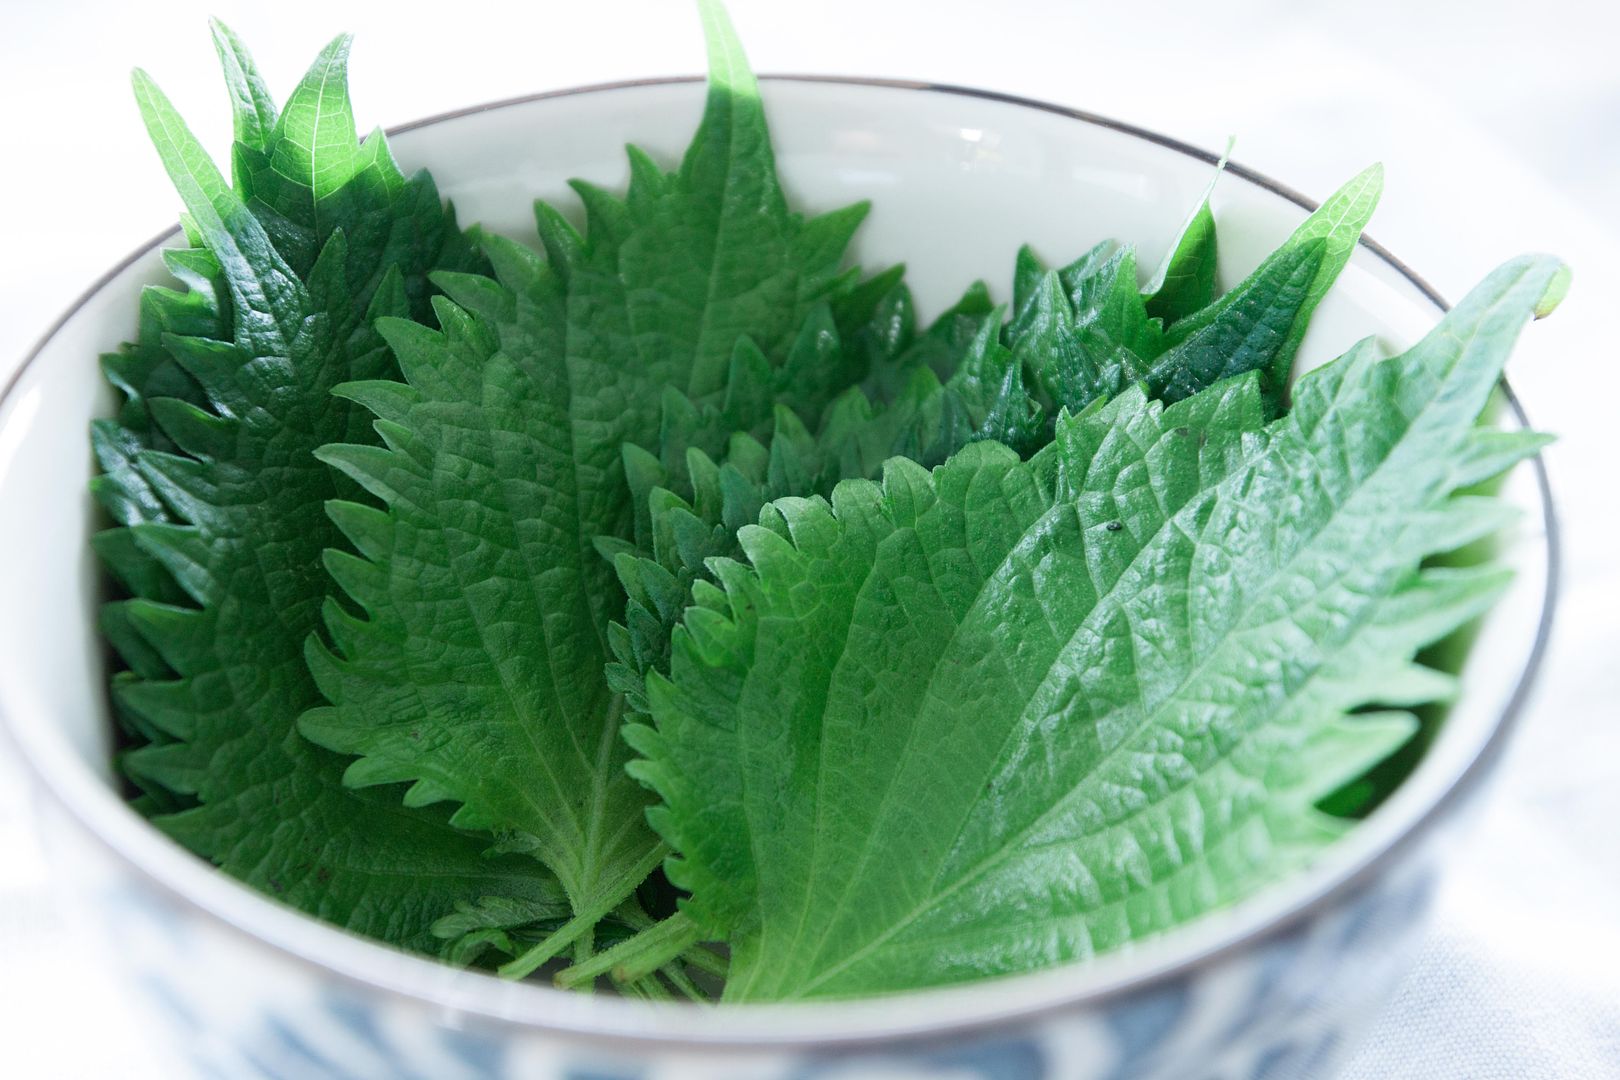
- 10 shiso leaves
- 2 tablespoons unsalted butter
- 1 teaspoon water
- 1/2 teaspoon salt
How?
Prep the shiso leaves first. Use just 5 leaves if a lighter herbal scent is preferred.
Chiffonade the shiso leaves by laying them on top of each other, roll up into a tube shape then thinly slice it.
Beat all the eggs in a medium sized bowl. Add most of the shiso, but save some to sprinkle on top of the scrambled eggs later. Add a splash of water, also sprinkle tiny pinch of salt and beat well.
It's very important to use a non-stick pan if you're not sure about oil/heat control. It'll tremendously help preventing the eggs from sticking onto the pan. Add the butter and turn to medium low heat. Once the butter melts, pour in the shiso egg mixture and softly scramble it.
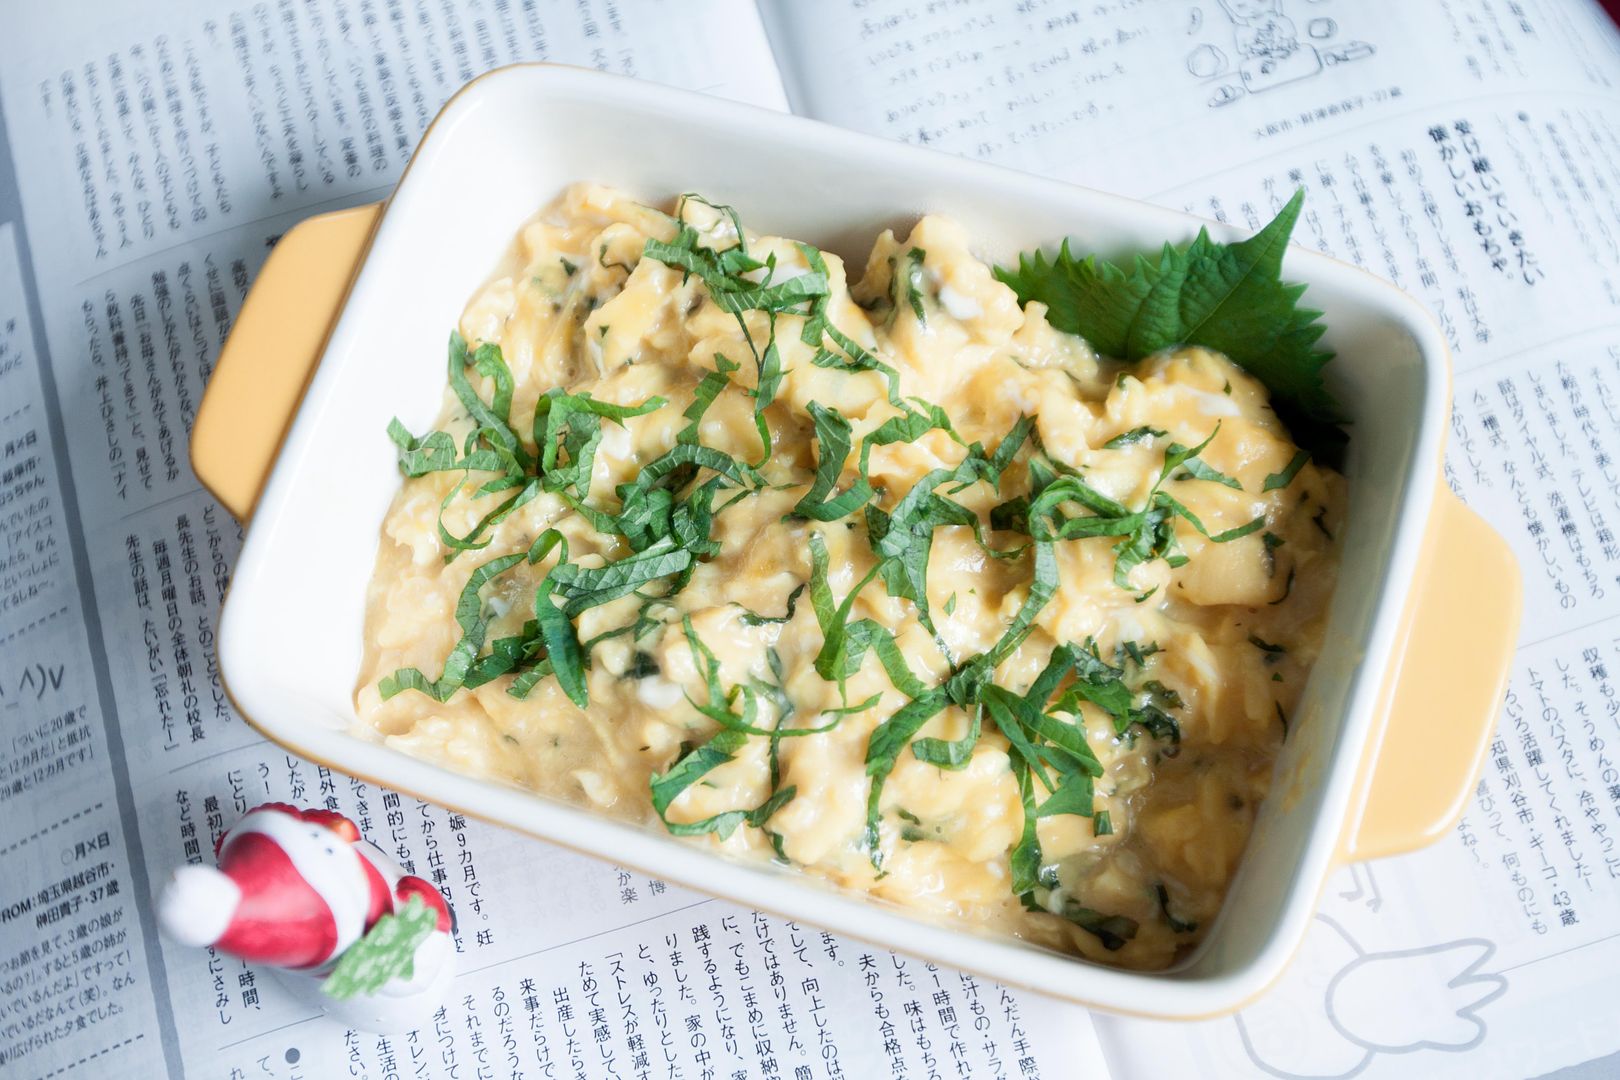
Keep gently folding the eggs around to prevent any single spot from overcooking. Not stir-frying it, but slowly folding the uncooked part to the heated area. Lower the heat a little if needed. The eggs are ready when the mixture is still slightly runny. Once removed from the pan, the residual heat will continue to cook the eggs, and the texture should be just about right when serving.
Garnish with the remaining shiso -
The amount of salt used here yields a very light-tasting scrambled eggs. Use more salt while beating the eggs or just sprinkle some salt over finished product at the table.
By the way, belated Merry Christmas!
Other egg recipes:
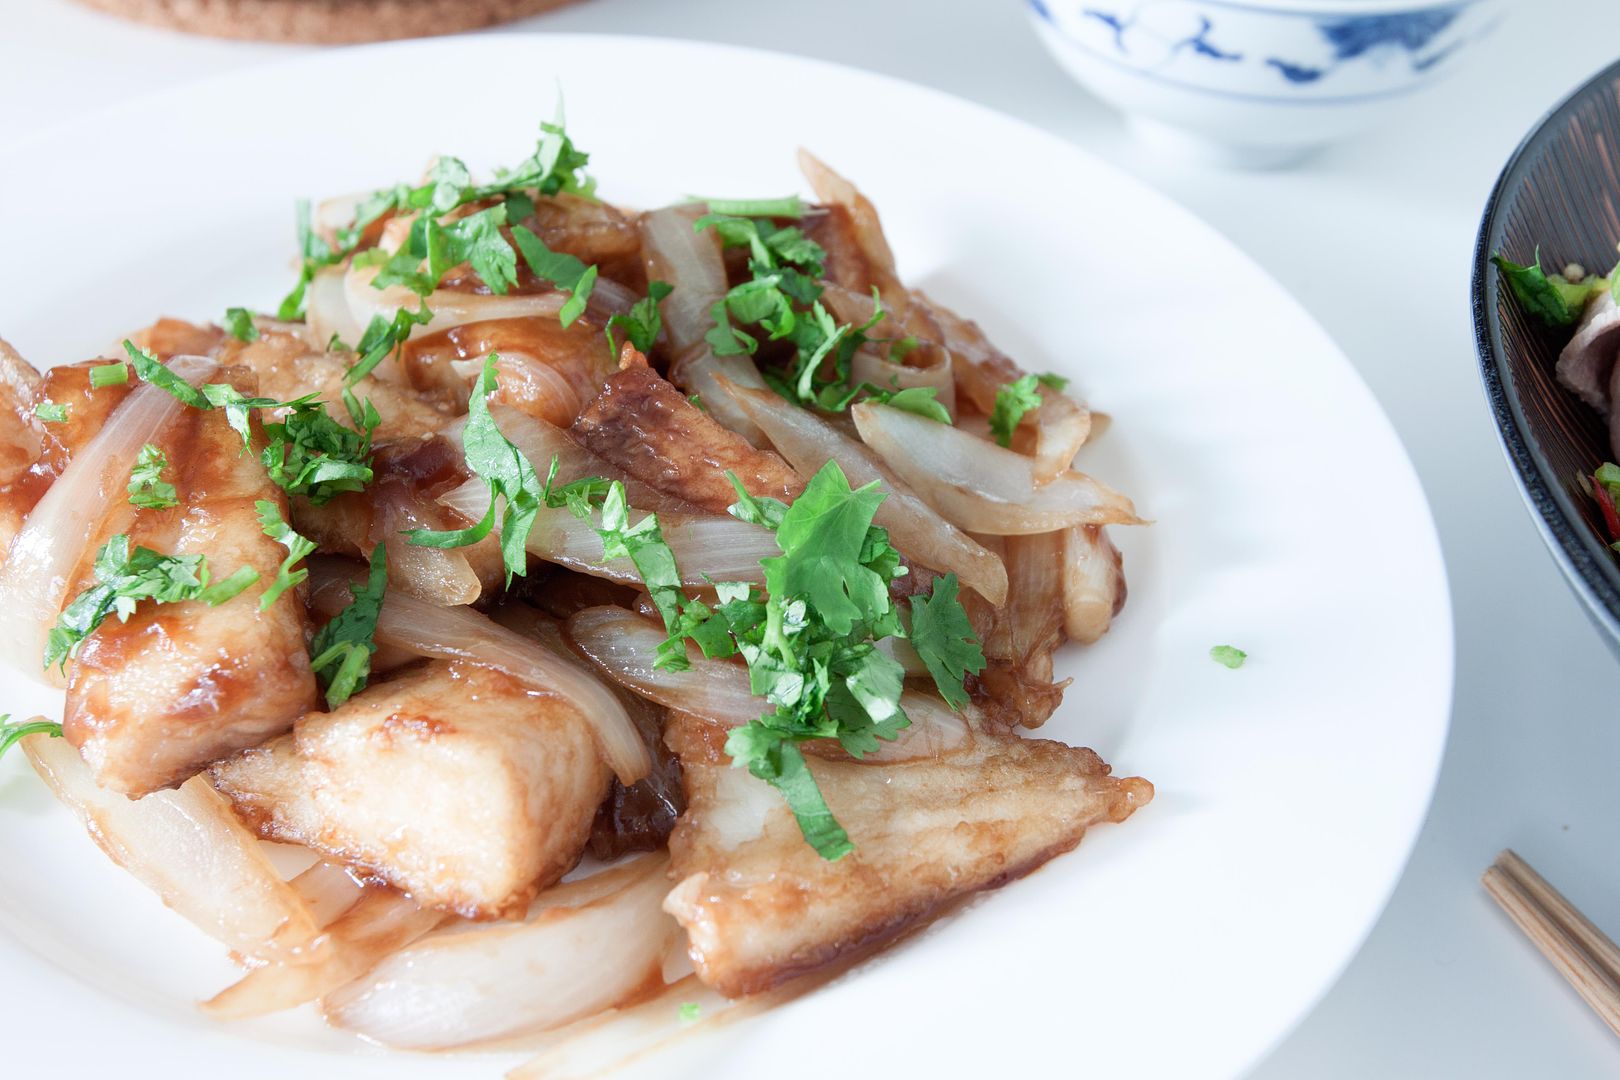
Frankly speaking, I'm not a fan of the taste and texture of farm raised snapper. It can be bland and a little too tough for my preference. However, these characteristics made it an ideal ingredient for heavy seasoning dishes, such as Chinese sweet and sour sauce.
No ketchup needed sweet and sour snapper -
Ingredients?
- 2 medium sized snapper fillets
- 1/2 onion
- Some olive oil
- Some corn starch
- Some salt
- Some chopped cilantro
Marinade -
- 1 tablespoon Chinese rice cooking wine
- 1/8 teaspoon grated ginger
- Tiny pinch salt
Sauce -
- 1 tablespoon soy sauce
- 1 tablespoon oyster sauce
- 1 tablespoon black vinegar
- 1 tablespoon lemon juice
- 1 tablespoon sugar
How?
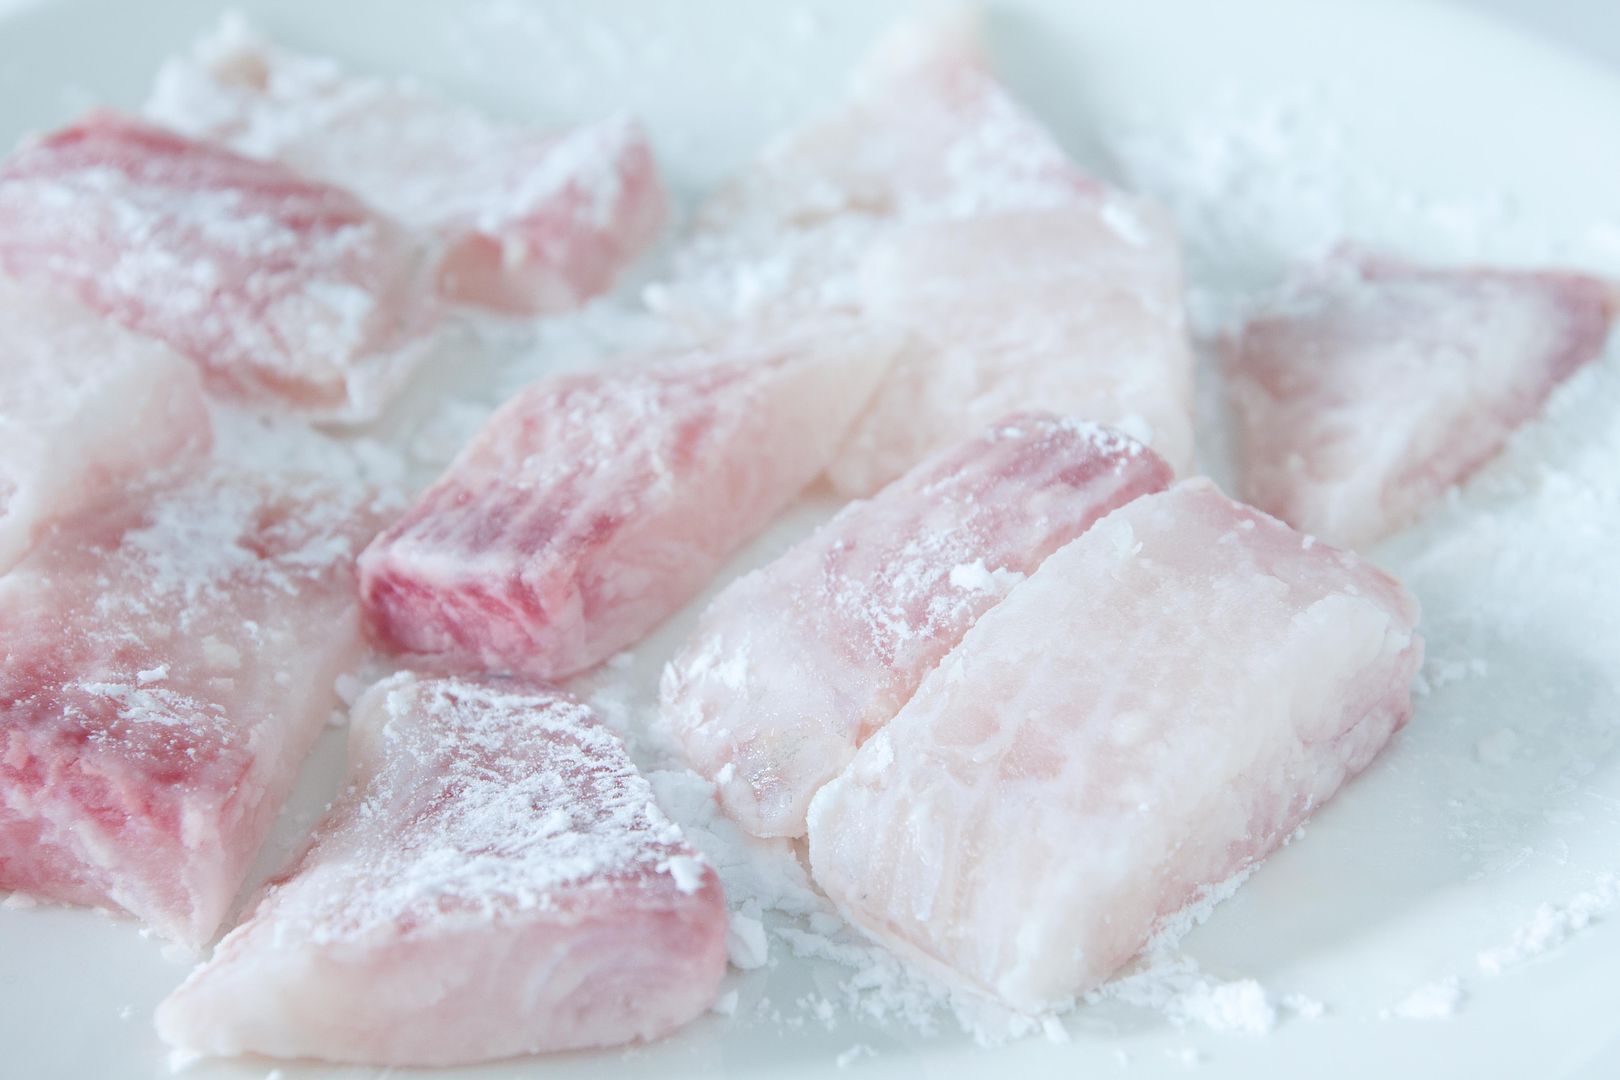
Cut the fish fillet into large bite size pieces. Mix all the ingredients under the "marinade" section and transfer the fish over. Marinate for about 5 minutes.
Meanwhile, peel and slice the onion. Grate the ginger and chop some cilantro.
After marinating the fish, pour some corn starch onto a plate and coat the snapper piece by piece with it. Gently shake the fish to remove excess corn starch.
Drizzle some olive oil to the pan, the amount used should be more than simply coat the bottom, about 4 to 5 tablespoons. Turn to high heat and wait till the oil gets hot. Carefully add in the fish one by one and sear till slightly golden.
Line a dish with kitchen towel and transfer the fried fish over. The kitchen towel will absorb extra oil dripping.
Scoop out some oil and just save about 1 to two tablespoons in the same pan. Add in the onion along with a tiny pinch of salt. Sear till the onion turns translucent.
Mix all the "sauce" ingredients and pour to the pan. Bring to a boil then lower the heat just a bit, continue to cook for 30 seconds or so.
Transfer the fried snapper back to the pan and cook for another 30 seconds or so.
Mix some corn starch with small amount of water as thickening agent. Pour this corn starch water to the pan and gently stirring the sauce at the same time to prevent lumps. Cook till the sauce turns gooey. You might want to add just a little bit of corn starch water mixture at a time in case the whole thing turns to one lumpy mess. Gradually add the thickening agent till the sauce reaches desired texture.
The corn starch dusted on the fish earlier and the corn starch added to the sauce in the end should bind together nicely. Slightly crunch on the edges, but mostly help binding with gooey seasonings. In the end, the sweet and sour snapper should all be coated with thick and flavorful sauce, neither watery nor soupy. Garnish with chopped cilantro right before serving.
Even though I'm not a fan of such fish, but with no ketchup used sweet and sour sauce, that I can do.
Some other fish related recipes:
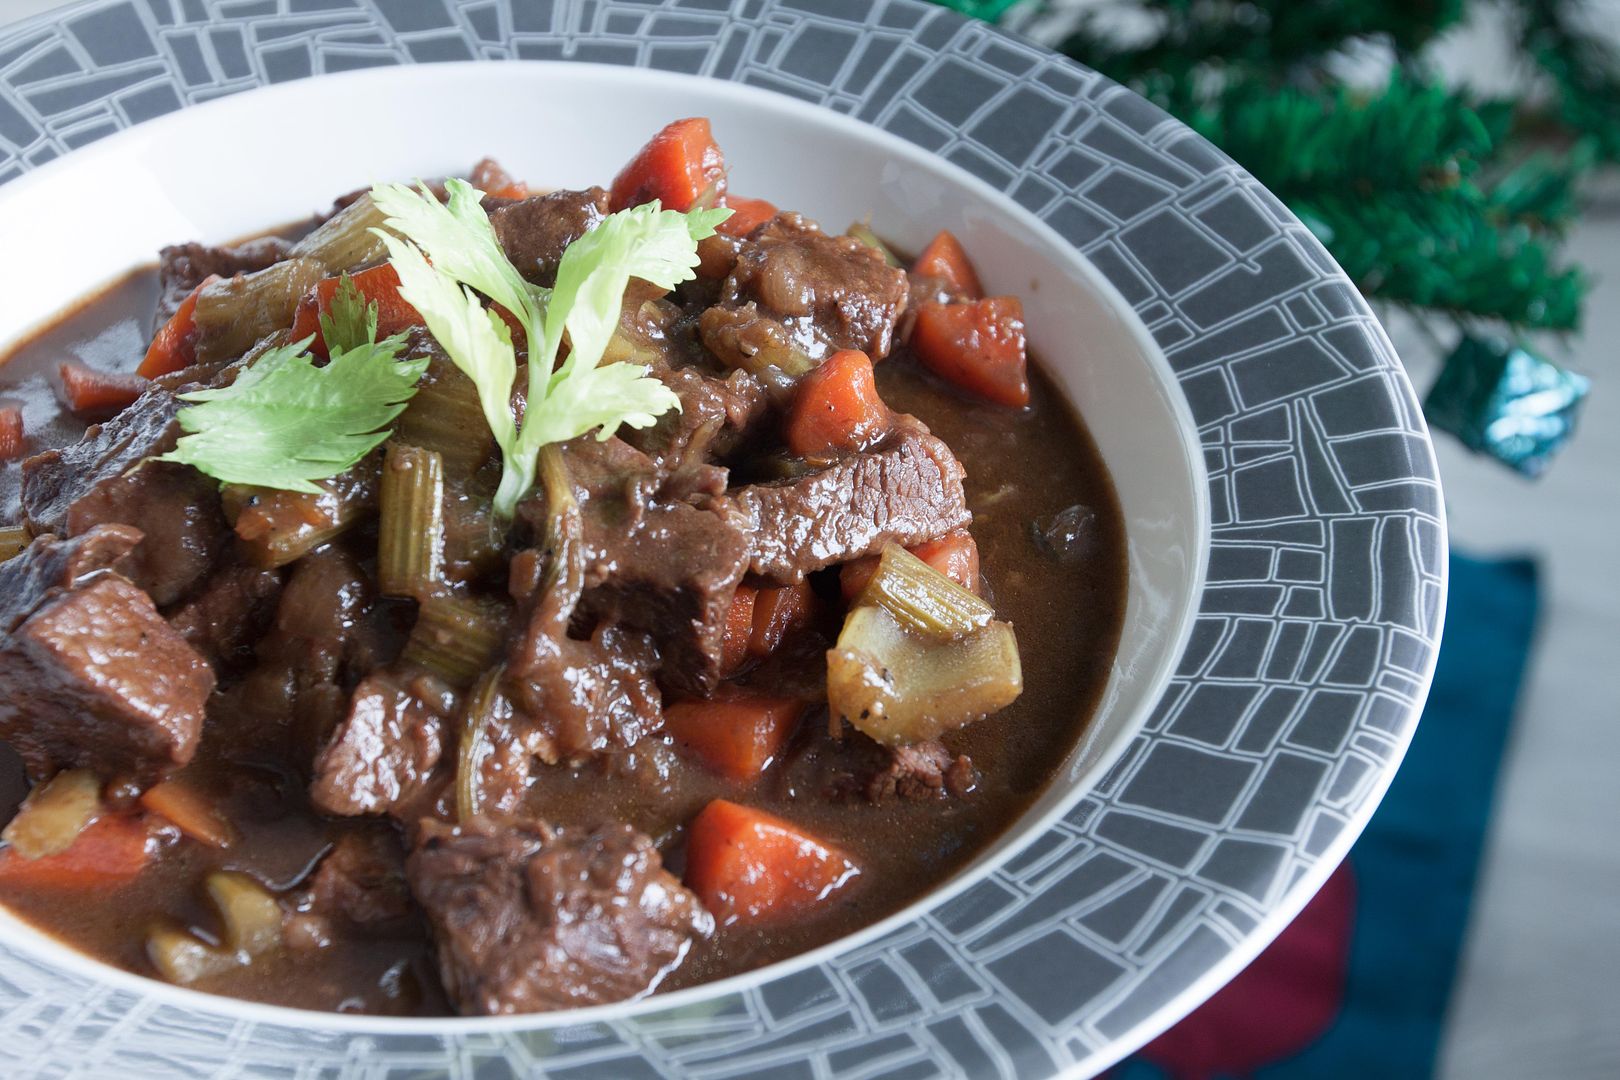
Beef with red wine, this combo can never go wrong, but how about changing gear and use allspice in beef stew instead? It's more of an old-fashioned style beef stew. The basic aromatics are the same, but instead of red wine, allspice and Worcestershire came into the picture to help boosting the flavors.
Also by choosing a more tender cut of beef, fork tender beef stew can be done in one hour. Layers of flavors are not sacrificed, still delicious, and still comforting.
Allspice beef stew -
Ingredients?
- 2 lbs beef (use more tender cut to speedy up cooking time)
- 2 1/2 cups cubed celery
- 1 1/2 cups peeled, cubed carrot
- 1 medium onion
- 1 can onion soup
- 1 1/2 cups chicken stock
- 1 bay leaf
- 2 garlic cloves
- 2 tablespoons Worcestershire sauce
- 1/4 teaspoon allspice
- 1/4 teaspoon smoked paprika
- 2 tablespoons olive oil
- 1 teaspoon salt
- 1/2 teaspoon black pepper
How?
Peel and cube the carrot, peel and cube the onion, cube the celery, peel and slice the garlic cloves. Cut the beef into large bite size pieces.
Instead of searing the beef first, scooping it out, then searing the aromatics, this is going to be a one seamless deal. Cooking the aromatics first then add the beef straight into the pot, the end result is still fulfilling for both body and mind. Trust me, after devouring the whole pot, rest assured that the beef stew is irresistible.
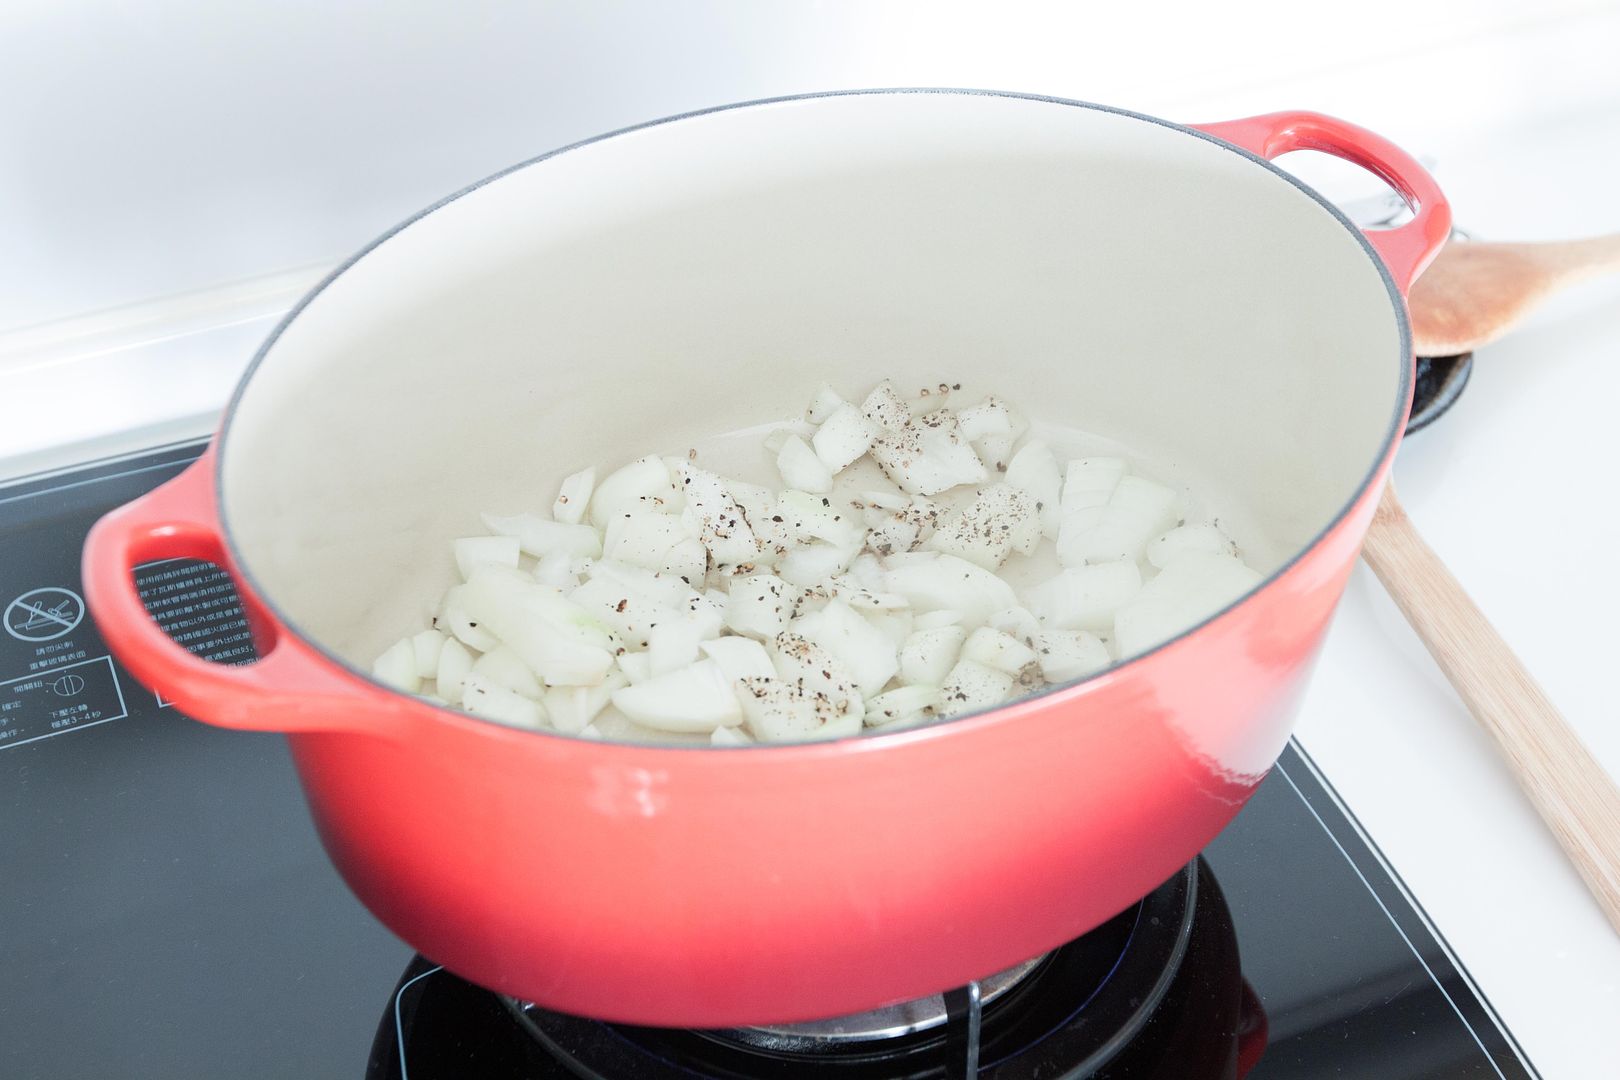
Drizzle some oil to evenly coat the bottom of the pot and turn to medium high heat. Add in cubed onion along with salt and pepper.
Cook till the onion turns translucent then add in the celery, carrot, and garlic. Cook for couple more minutes.
Add in beef and sear for couple more minutes.
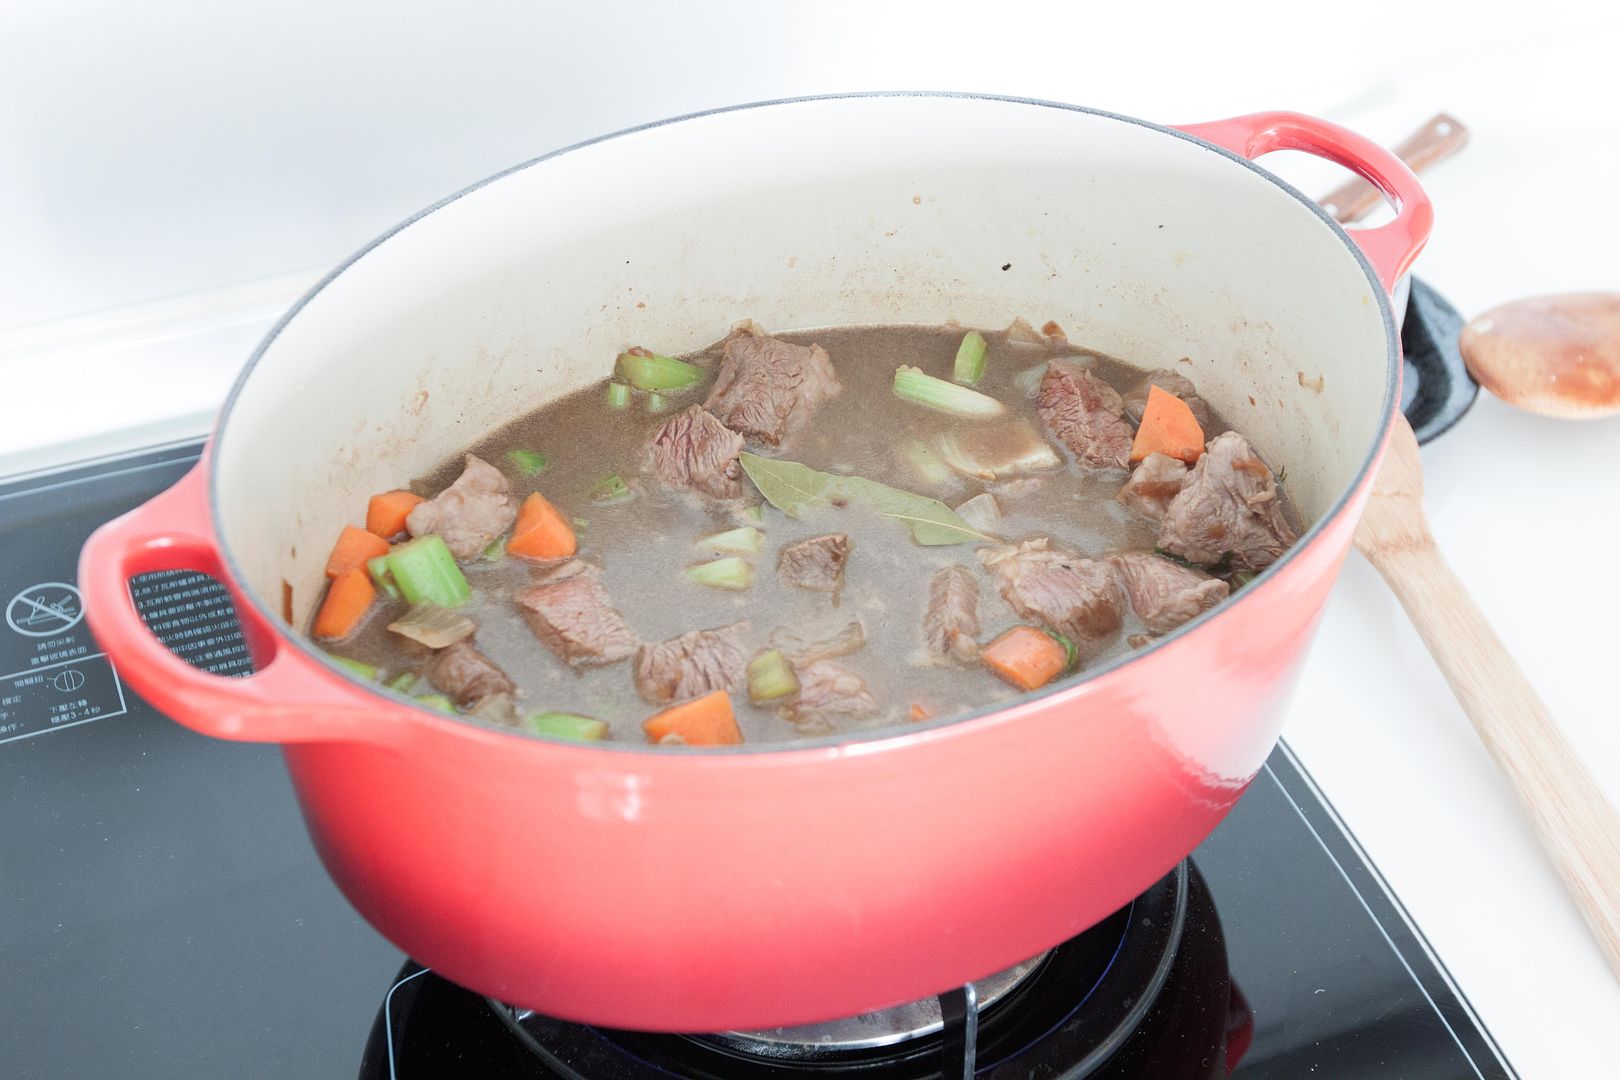
Pour in onion soup and chicken stock. Also add allspice, smoked paprika, Worcestershire sauce, and bay leaf.
Mix well, also turn to high heat to bring the pot to a boil. Skim off the foamy bits flowing on top then lower the heat a little to keep it simmering/light bubbling. Cover with lid and let it simmer till the juice has been significantly reduced but not completely dried up. The color will also get darker and more condensed over time. It took me about one hour and still left with some juice to drizzle over rice or pasta.
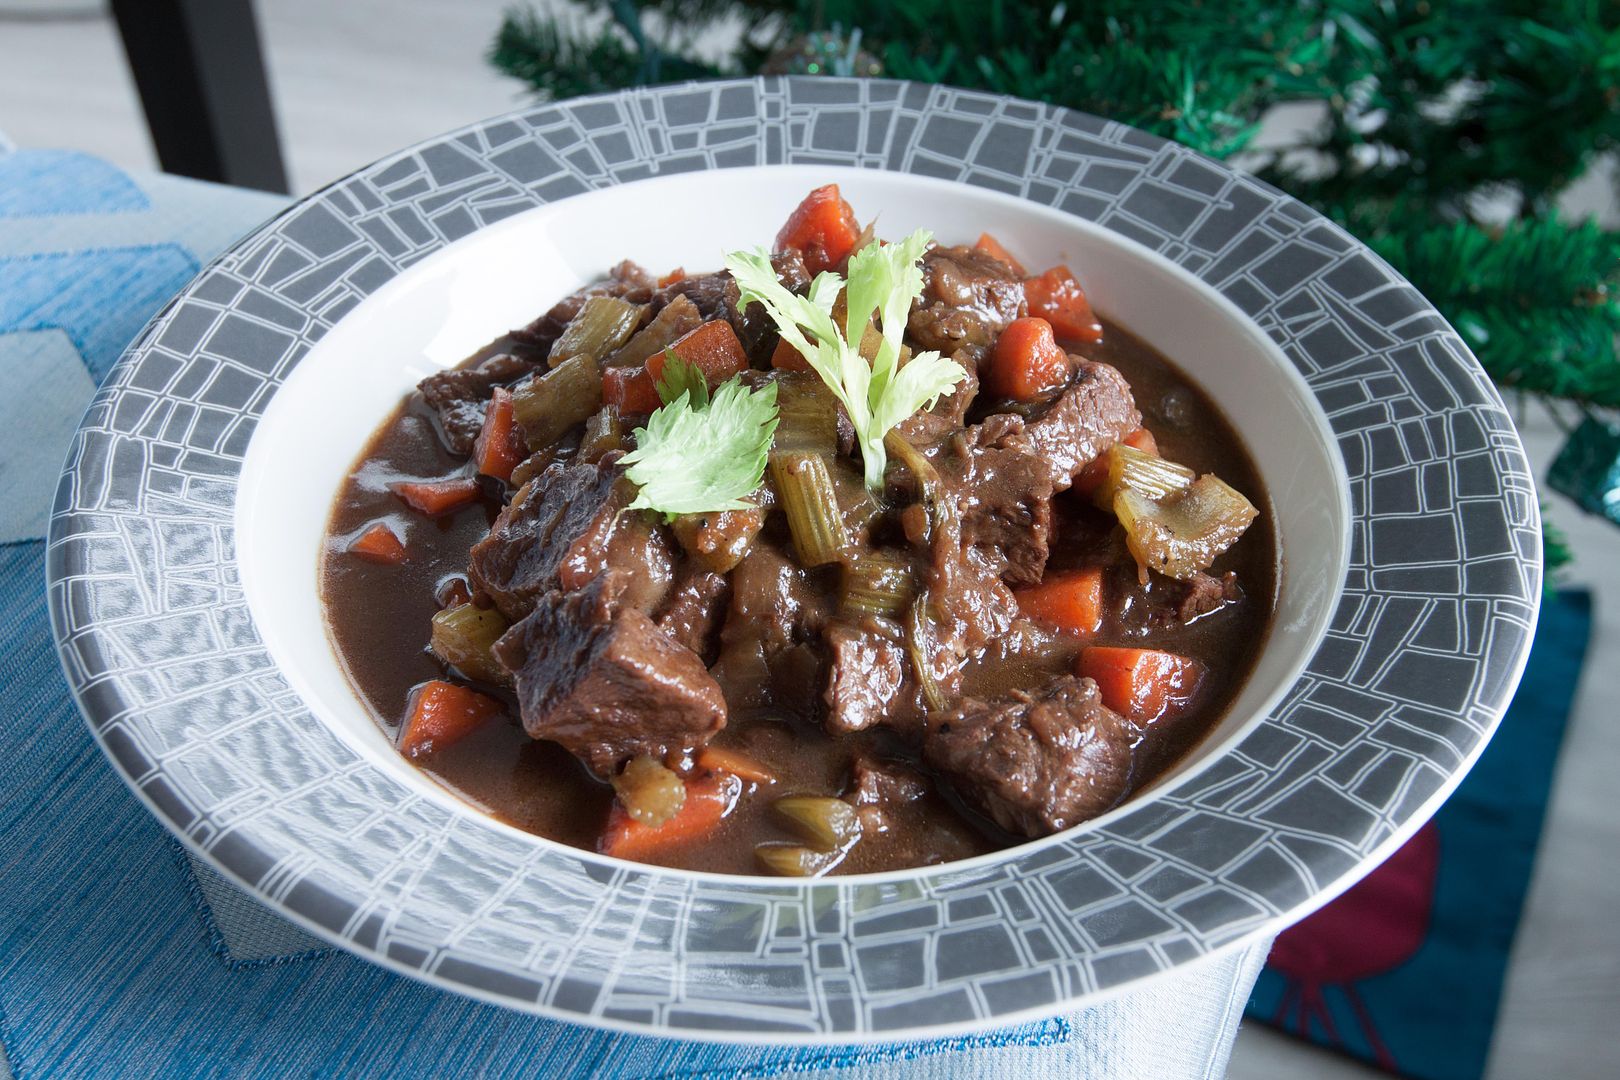
Pick out bay leaf when ready to serve. Plate and garnish with some celery leaves.
I took a sneaky sip early on and the taste of allspice was overpowering. Don't be scared, after one hour, all the aroma blended in smoothly. You probably won't even notice that allspice was used for this beef stew.
Serve it with some mashed potatoes or mix it with pasta. I served the beef stew with some rice instead, hands down it was the best dish of the night, perhaps of the month?
Going the French route? Try this beef recipe instead:
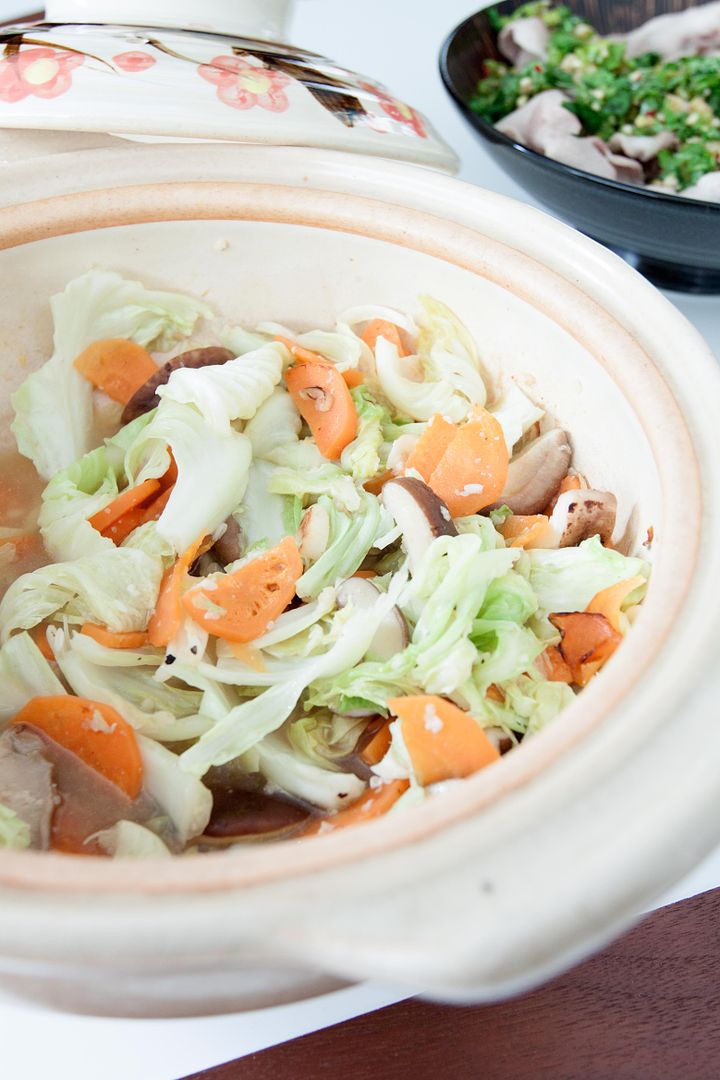
Talking about shio koji, one of the most popular ways to utilize this ingredient is making it into a marinade, usually for chicken, fish, or cucumber. This time, I'm going to use it in a cabbage stir-fry.
Cabbage stir-fry with shio koji -
Ingredients?
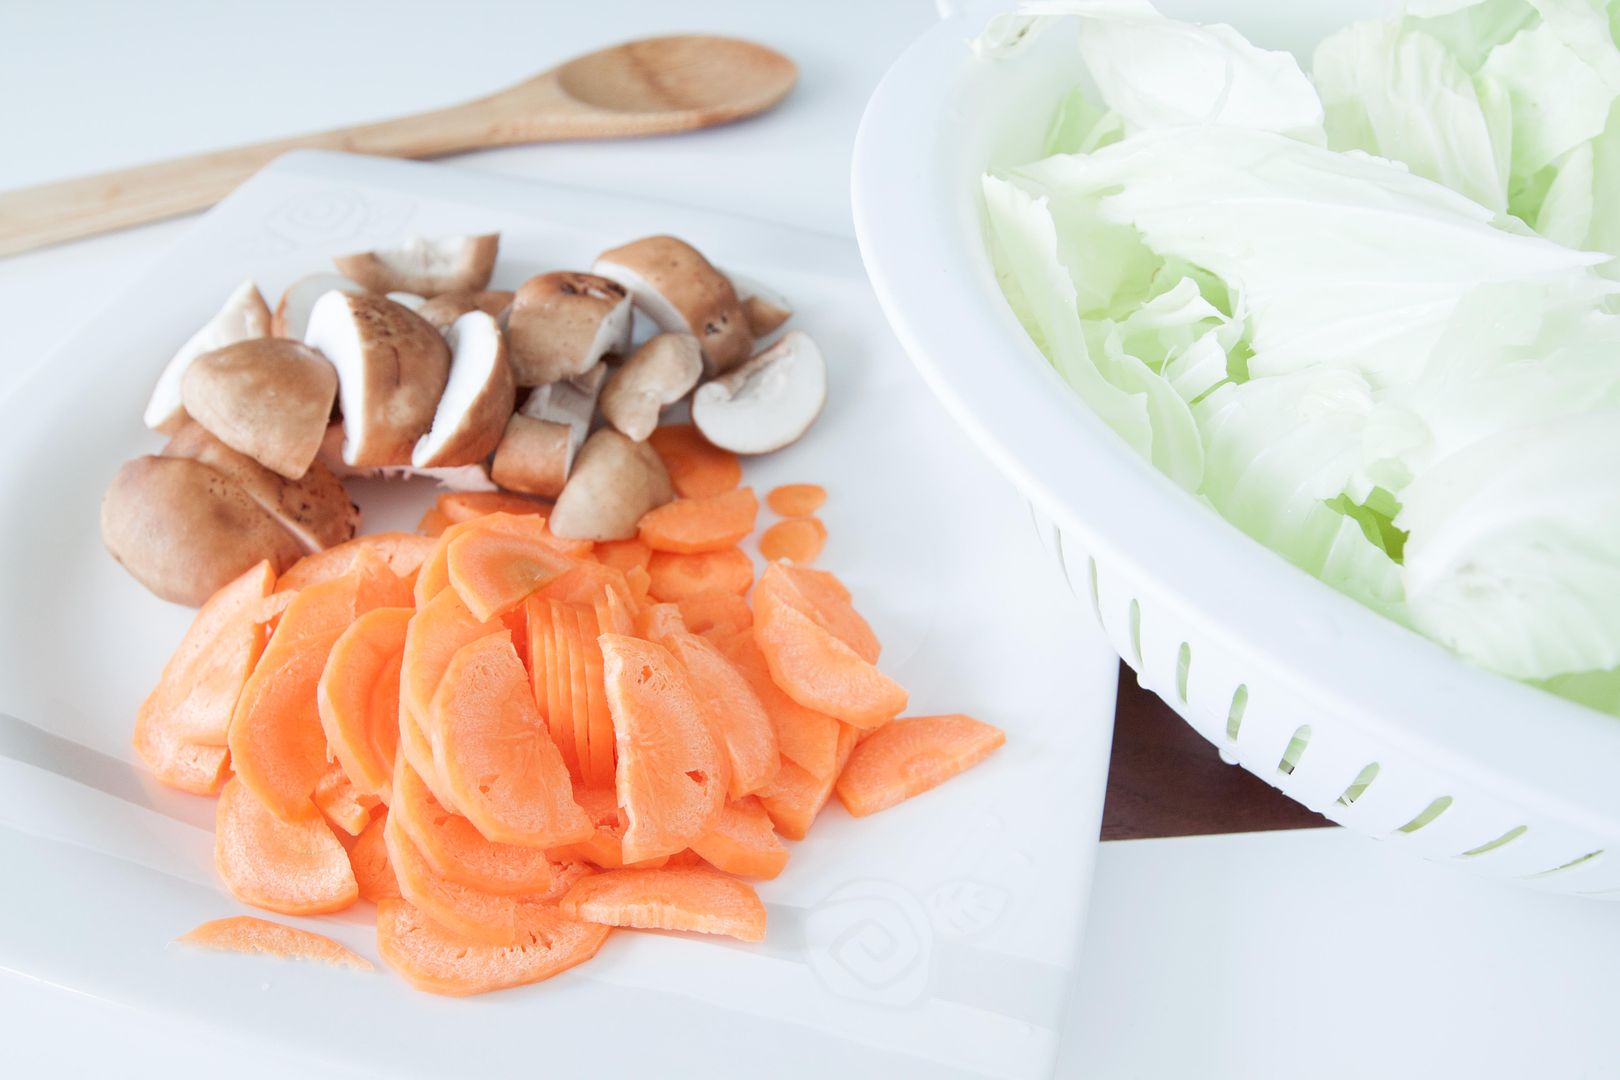
- 1 small cabbage
- 6 shiitake mushrooms
- 1 medium sized carrot
- 4 garlic cloves
- 2 tablespoons shio koji
- 2 tablespoons olive oil
- 1 tablespoon Chinese rice cooking wine 米酒
- 1/8 teaspoon salt
- 1/8 teaspoon black pepper
How?
Tear the cabbage into large bit size pieces. Peel and slice the carrot. Cut the shiitake mushrooms into thick slices, one mushroom can cut into 3 slices. Peel and slice the garlic cloves.
Drizzle some oil to a pan, add in garlic, salt, and black pepper. Turn to medium high heat and sear till the garlic turns slightly golden but not burnt.
Turn to high heat and quickly add in the mushroom and carrot, cook for 1 to 2 minutes.
Transfer all the cabbage over and drizzle some Chinese rice cooking wine. It might pile up like a tiny mountain but will soon wilted down. Once wilted a little, add the shio koji and give it a quick stir. Taste and adjust with salt if needed.
Keep cooking till the cabbage reaches desired texture. Some like it crunchy and with a distinct wok hei when cooking with high power heat/fire. Sometimes I prefer my cabbage with a softer bite like the one shown in these images.
Once heated, shio koji releases its aroma into the dish. So instead of the natural sweetness from the cabbage, you also get a mellow, deeper note of sweetness from the fermented rice, but only to an extent. It is still a savory dish after all, but one well-seasoned veggies stir-fry.
Other recipes using shio koji:
What!? Tuna and sugar together?
That's probably my first reaction before trying this snack. My host family in Minnesota used to make this chips and tuna mayo dips. As odd as it sounds, this is actually a perfect example of sweet and savory combo. Years passed, I can't recall the exact amount used for each ingredient, but my taste memory guide me through the process.
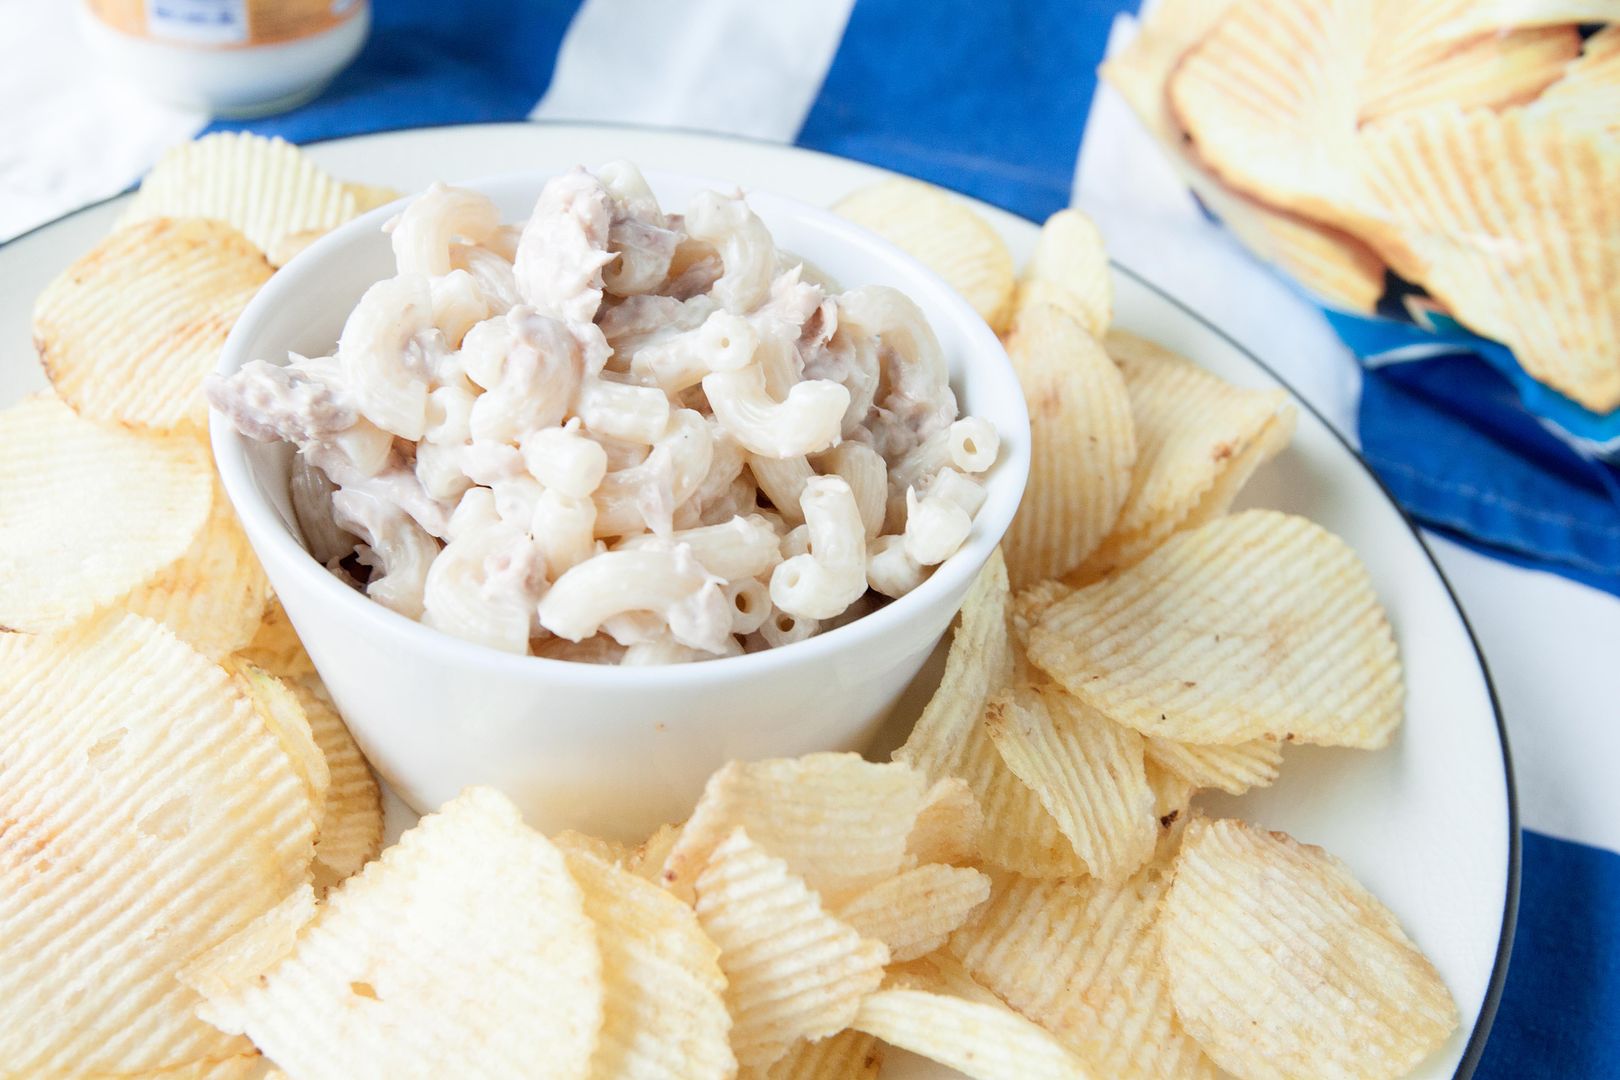
Tuna mayo macaroni and chips -
Ingredients (makes about 1 cup)?
- 150 grams/about 5.3 oz macaroni pasta
- 100 grams/1 canned tuna
- 5 tablespoons mayonnaise
- 2 to 3 teaspoons sugar
- Some salted thick cut wavy chips
- Some salted thick cup
How?
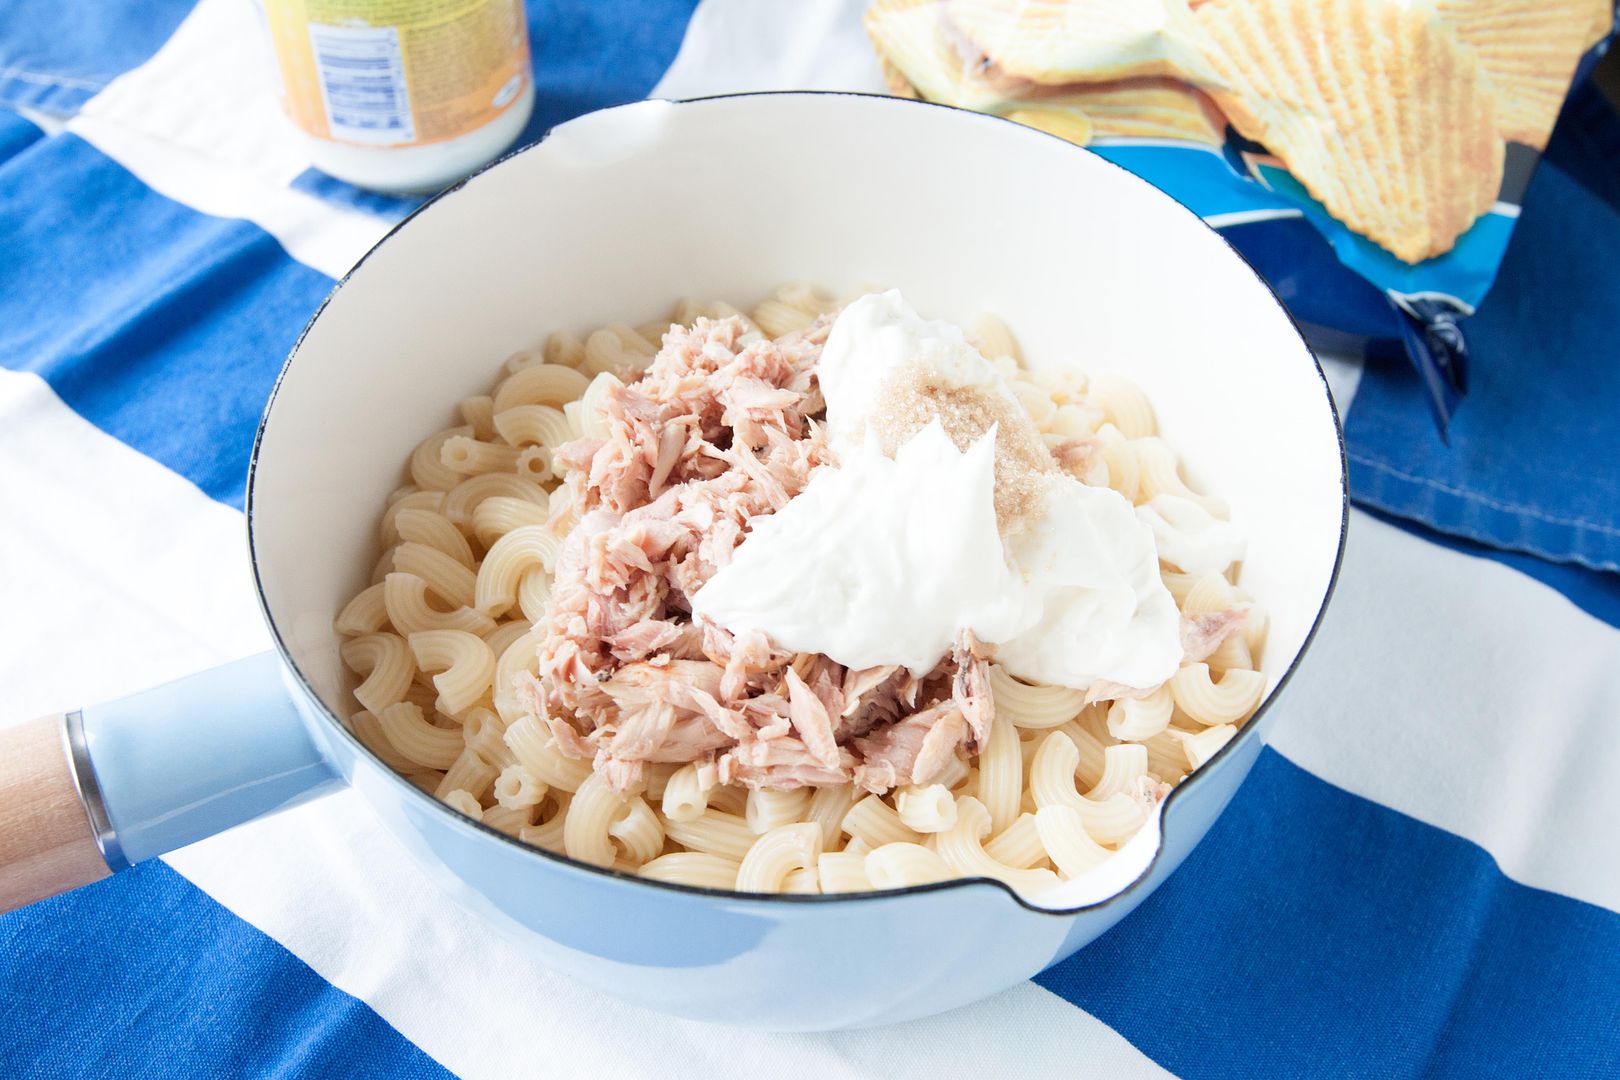
Salt a pot of water and bring to a boil. Cook the macaroni according to package instruction, but don't cook till al dente this time. Overcook the pasta a couple more minutes. The macaroni should be on the softer side but still with a slightly chewy texture. When ready, drain well and transfer to a big mixing container.
Open the can and drain out the liquid from the tuna, add to the mixing container. Also add some mayonnaise, sugar, and a tiny pinch of salt.
Mix well. Take a breadth and taste it, you'll be amazed that canned tuna works so well with creamy mayo and sugar. Adjust the flavors. If the mixture doesn't seem salty enough, instead of using more salt, maybe try to open up second canned tuna and add to the mixture. Do keep in mind that the chips are salty too.
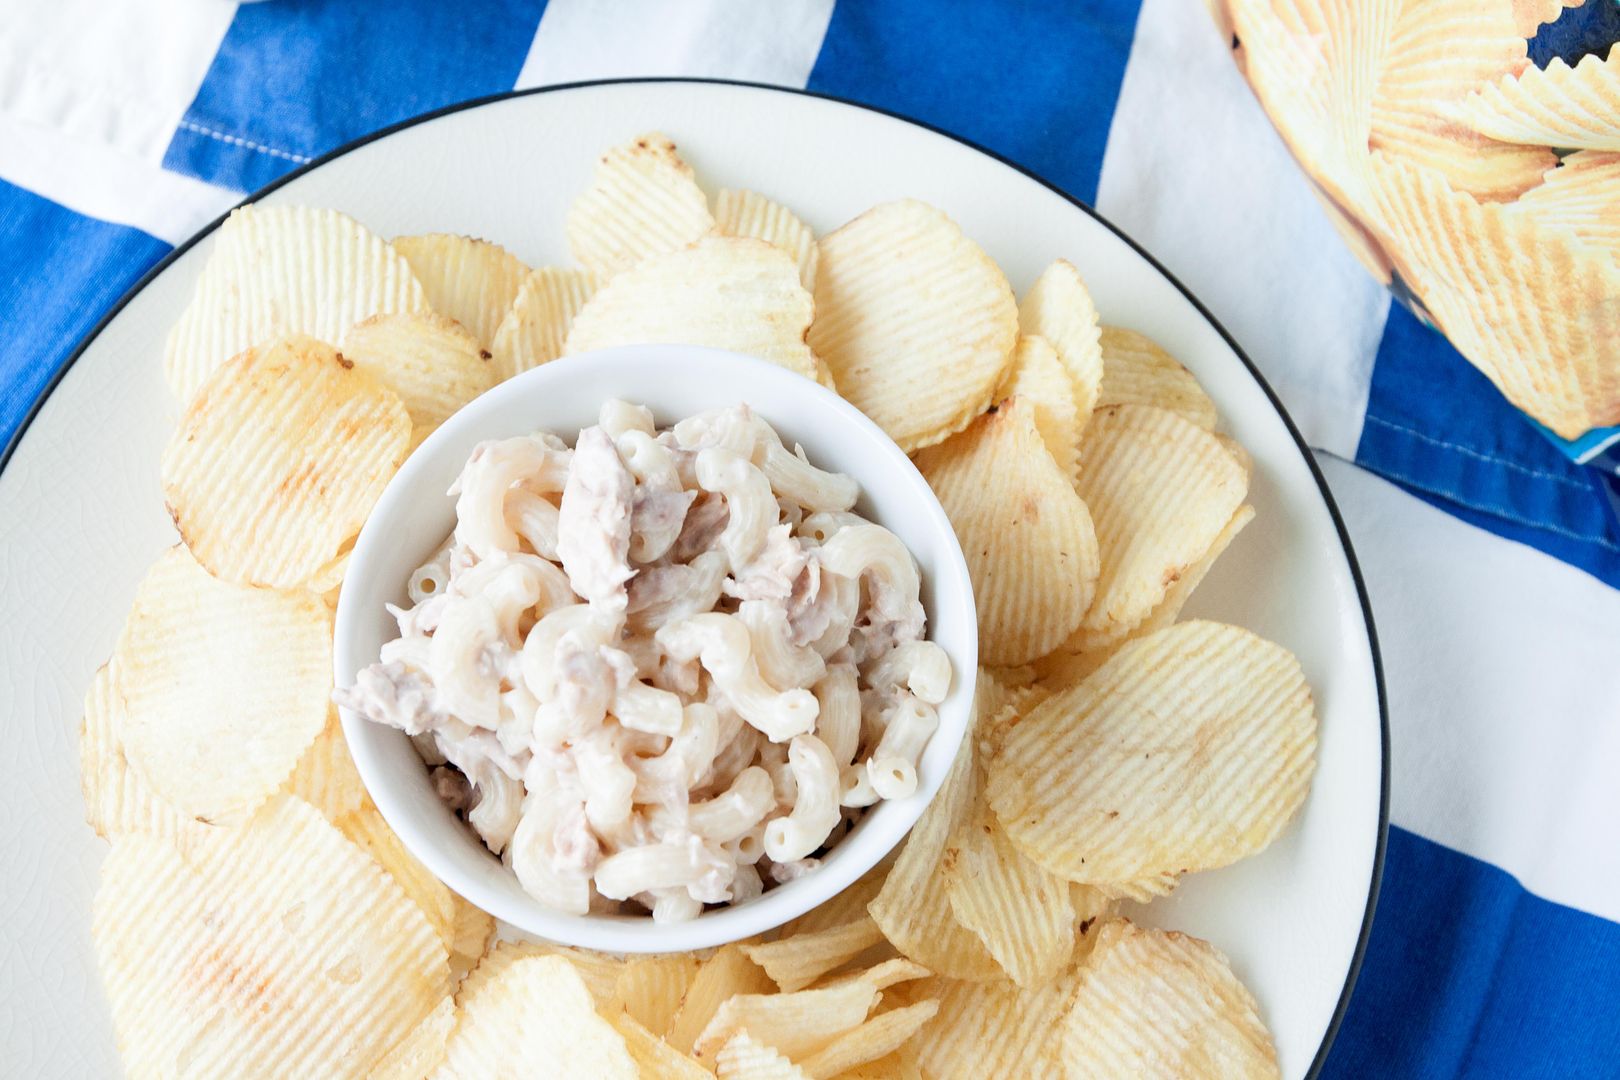
Serve with thick cut chips on the side. Use the chips to scoop out the macaroni dips, enjoy this unexpected sweet and savory snack.
Nostalgic indeed. This tuna mayo chips definitely is a walk down memory lane for me. Don't be shy on the sugar, sweeter taste can further help enhancing the savory note from the tuna. Plus a stronger tasting dip is always welcomed when serving with chips right?
Other recipe using canned tuna: