May 28, 2016

Up to Another Level - Cured Pork Tongue and Sprouted Garlic Stir Fry

Don't get intimidated by the look of cured pork tongue, it's just like cured bacon but in the form of a chewier part of the muscle -


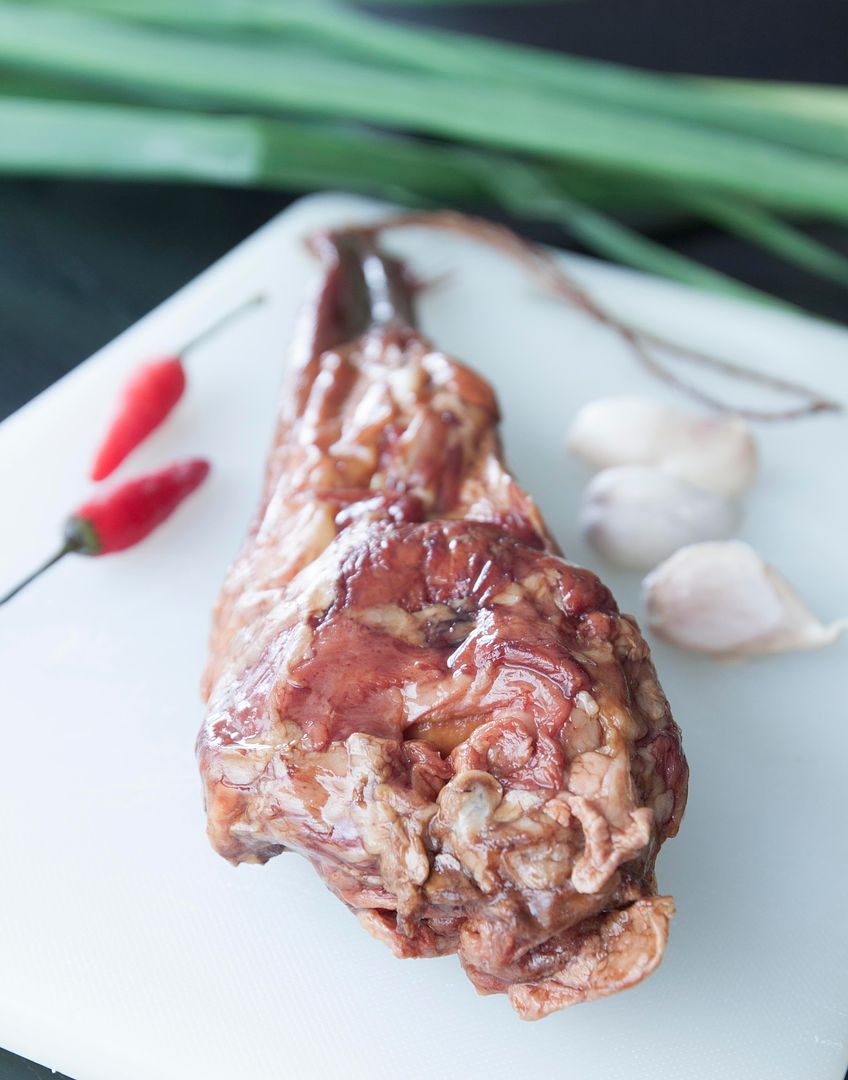
I came across this ingredient while venturing a local market specialized in a wide variety of cured products. The preparation for cured tongue is similar to more common cured bacon.

Bring a pot of water to a boil and add in the cured tongue, this process is fairly fast, about 10 seconds. Remove the tongue from water and use the back of the knife to run down the surfaces, removing any grayish bits if any. Let the tongue cools down then slice the middle section as thin as possible. 


Leave out the rubber-like tip and the cartilaginous back-end section. Save these two parts for stock or sauce making in the future.


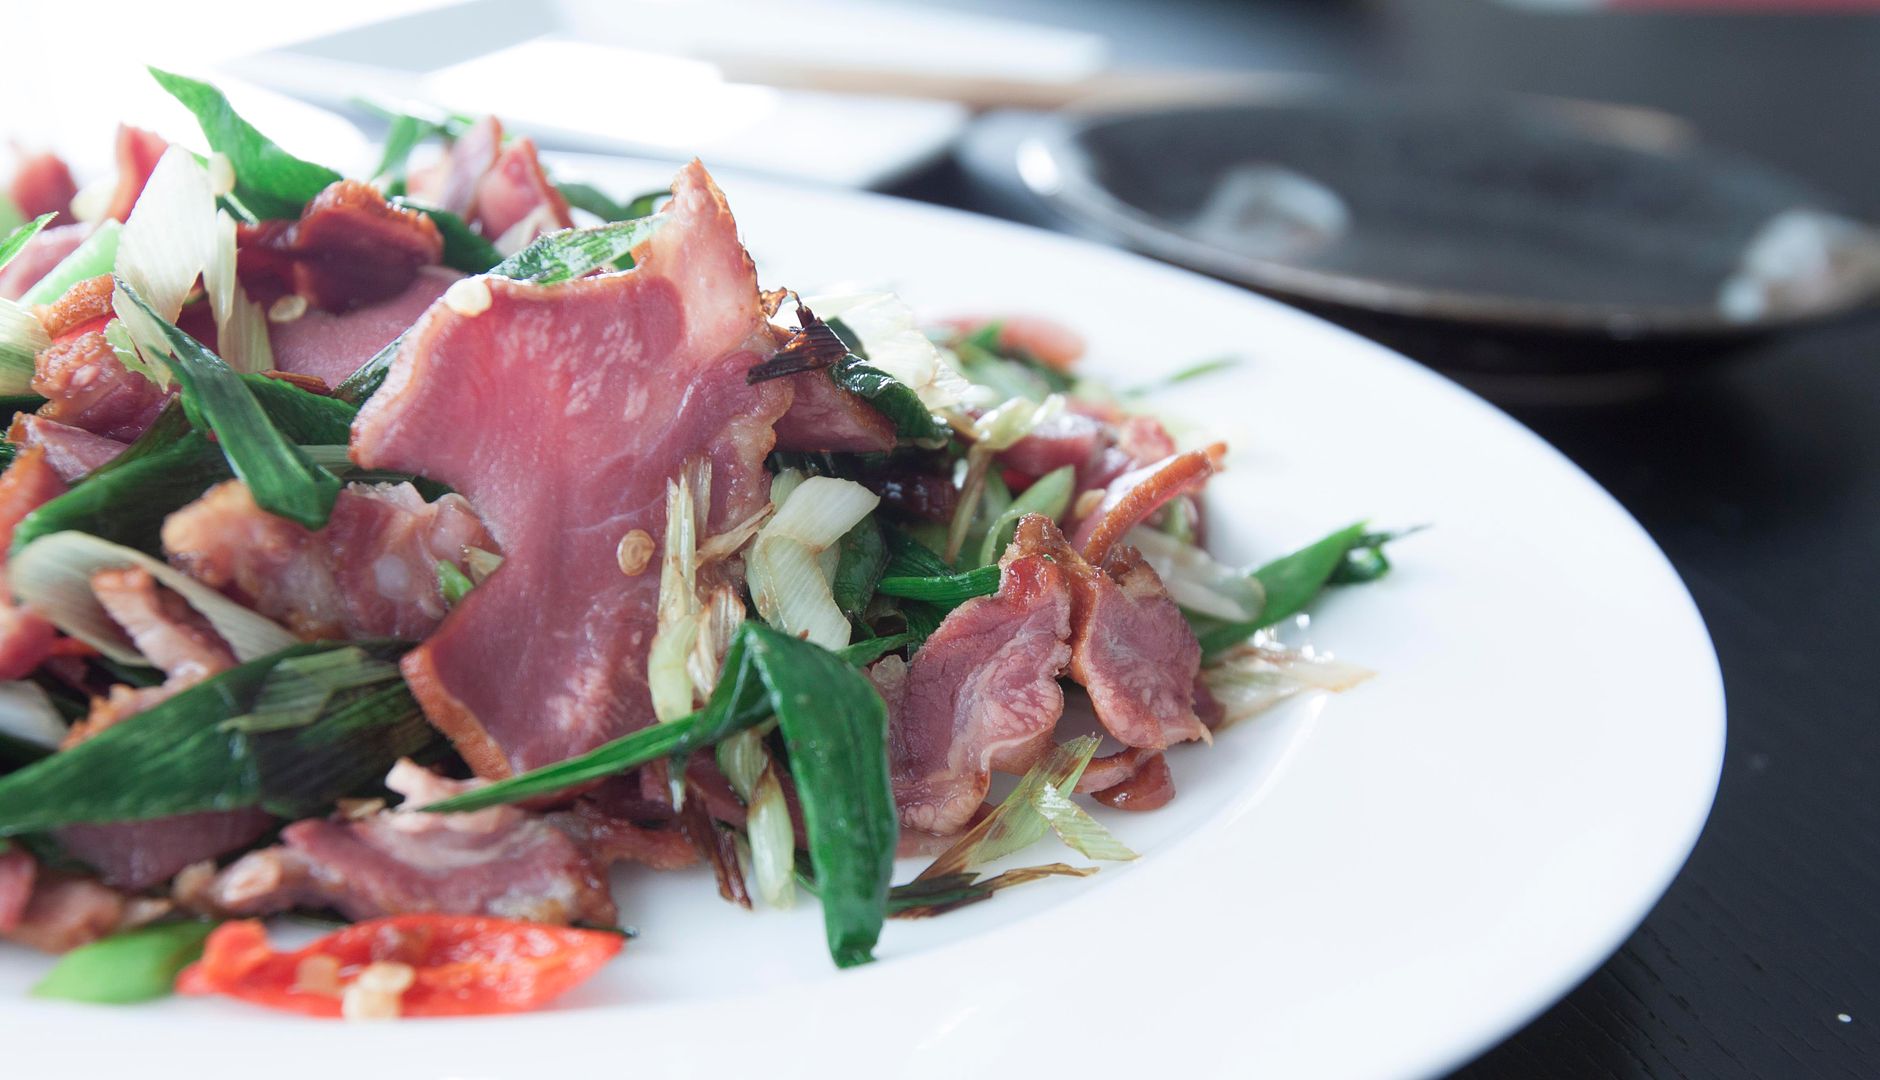
Cured pork tongue and sprouted garlic stir fry -


Ingredients?


  • 1 sprouted garlic
  • 1 cured pork tongue
  • 3 garlic cloves
  • 2 red chilies
  • 2 tablespoons olive oil
  • 1/4 teaspoon granulated sugar


How?

Discard the sprouted garlic stem and chop the remaining diagonally into shorter sections. Discard the chili stems and also chop the remaining diagonally. Peel and give the garlic cloves a few chops. 


Drizzle about two tablespoons of olive oil to a pan and turn to medium high heat. Add in sprouted garlic, chopped garlic, and chillies. Cook till the aroma comes out but not burning the garlic. 


Add in sliced cured pork tongue along with granulated sugar. The sweetness from the sugar helps balance off the salty cured meat. Stir fry for one minute before serving. 


During the prepping process, boil the cured tongue for few more minutes or leave it in hot water for an extended period of time should help in drawing out some salty taste.


Other Asian stir fry recipes:


May 22, 2016

Afternoon Snack - Buttery French Baguette with Nutella and Brie

The short cooking video, usually around one minute is getting its popularity on the Internet. I can see it on Facebook almost on a daily basis. One day I came across a video using French baguette, Nutella, and Brie for a quick snack and the idea stuck on my mind ever since. Finally got a chance to give it a try and the result was very comforting, and fattening. 

Buttery French baguette and Nutella and Brie - 


Ingredients (makes four)?

  • 1 small or 8 slices French baguette
  • 4 thick slices Brie
  • 4 tablespoons unsalted butter
  • 8 dollops Nutella
  • Some caster sugar (optional)


How?

Slice the baguette diagonally, two slices make one portion. In addition, I'm using chunky round shaped Brie so half of the cheese works perfectly for one baguette sandwich. 

Take a non-stick pan, add in two tablespoons of butter and turn to medium heat. Once melted but not reaching the smoking yet, add in the baguette slices and sear till the bottom edges turn slightly browned. Remove from heat immediately.

Take four baguette slices with seared side up, add one portion of Brie and top with one dollop of Nutella. Repeat for the remaining 3 baguette slices. Top the semi-finished sandwiches with the other four baguette slices, this time seared side down. That way you'll end up with 4 baguette sandwiches with all seared sides in the center.


Using the same non-stick pan and melt two more tablespoons of butter. Carefully transfer the Nutella and Brie baguette sandwiches back to the pan and sear both the top and bottom till slightly colored. 

Use a spatula to press down the sandwiches during the process. Don't be afraid of melted ingredients bursting out, just the thought of overflowing Brie and Nutella make my mouth watering. 

Once ready, transfer onto a serving plate and dust with caster sugar if desired. Also slice the baguette sandwich in half if preferred.


Crunchy on the outside with buttery, cheesy, and velvety oozing goodness in the center, definitely my type of afternoon snack. 


Other recipe using Nutella:


May 16, 2016

A Refreshing Twist with Jinhua Ham Infused Chicken Stock

Chicken stock is one of my must have ingredients in the household. Freshly made stock remains on the top spot but canned version and make ahead frozen homemade stock are always welcomed. 

This recipe uses Chinese version chicken stock infused with Jinhua ham, a type of dry cured ham from China. 

Quickly dip a small to medium sized chunk of Jinhua ham to boiling water then take the back of the knife to scrape out any grayish bits from all sides. Add the ham into 1/2 pot of water, bring to a boil then lower the heat to keep it simmering for 30 minutes. 

Add in 1/2 free-range chicken or Silkie chicken to the pot. Bring to a boil then lower the heat again to keep it at a simmer. Scoop out any grayish bits floating on the surface. Soak some dried mushrooms with cold water for about 15 minutes. Once the stock has been cooked about one hour, add in soaked mushrooms and continue to simmer for another 30 minutes. There you have it, a pretty straightforward Chinese style chicken stock. 

Then we move on to a refreshing version of this luscious stock.

A refreshing twist with Jinhua ham infused chicken stock -


Ingredients (for two)?

  • 3 cups of Chinese style chicken stock
  • 0.5 pound ground chicken
  • 1/4 teaspoon lemon zest
  • 1/8 teaspoon grated ginger
  • 6 fried triangular tofu
  • 1/4 small cabbage


How?

Mix ground chicken with grated ginger and lemon zest. Blend in some crushed semi-firm tofu if a softer texture is preferred. Form the ground chicken mix into small meatballs, makes about 8 here -


Bring 3 cups of chicken stock to a boil then add in cabbage pieces - 


Cook till the cabbage softens a little then add in triangular tofu. Grilled or firm tofu can be two other alternatives. Once the cabbage is about done, meaning reaching preferred texture, add in chicken meatballs and wait till they get fully cooked through, about 5 minutes.

Dust with additional lemon zest before serving.


Other Asian soup recipes:


May 10, 2016

Pesto Sauce and Rotisserie Chicken Focaccia Sandwich (Freeze the Pesto Sauce for Future Recipes)

It's been so many years and I just found out recently that pesto sauce could be stored in the freezer. That's probably one of my biggest breakthroughs over the past few months. Eagerly to give it a try, I've decided to use freshly made pesto as a sandwich spread and freeze the rest for a quick fix pasta dinner. 

Pesto sauce and rotisserie chicken focaccia sandwich -


Ingredients (1 to 2 portions)?

Pesto sauce:

  • 2 cups basil leaves
  • 1/2 cup grated Parmigiano Reggiano
  • 1/4 cup toasted pine nuts
  • 1/2 cup extra virgin olive oil
  • 2 garlic cloves
  • 1/2 teaspoon salt
  • 1/4 teaspoon black pepper


Others:

  • 1 big slice focaccia bread (or 2 smaller slices)
  • 1 chicken breast (bone in, skin on)
  • 2 lemon slices
  • 3 tablespoons chopped sun dried tomatoes
  • Some salt
  • Some ground black pepper or peppercorn mix
  • Some olive oil
  • Some salad (as a side dish, optional)


How?

Preheat the oven to 400 degrees Fahrenheit. Line a baking dish with foil.

Transfer the chicken breast to the baking dish, skin side up. Sprinkle some salt, pepper, and top with lemon slices. Drizzle some olive oil then bake uncovered for 30 to 35 minutes -


Once ready, remove from heat and wait till the chicken cools off. Remove the skin (I actually ate it right away), tear or shred the meat either by hand or a fork. I prefer to use my hands and tear the meat into strips. Extra chicken meat can be stored in the fridge or the freezer for later use.

Toast the focaccia in the oven. Cut in half if needed before putting on the spreads. 

Peel the garlic cloves and give them a few chops. Add in all the ingredients under "pesto sauce" except for the extra virgin olive oil to the food processor -


Drizzle some oil at a time and pulse till desired consistency. Give it a quick taste and see if more salt is needed.

Chop the sun dried tomatoes. Take one focaccia and spread some pesto sauce on the inner side and spread some sun dried tomatoes on the other -


Arrange some rotisserie chicken on one of the focaccia bread then fold both focaccia together to form a sandwich, slice in half if needed.


Serve with salad or chips.

Best thing about this recipe, almost all the components can be make-ahead and even stored in the freezer for later use. These ingredients come in handy especially when prepping quick-fix meal in a hurry. 


Other sandwich recipes:


May 4, 2016

Onigiri Recipe: Shio Kombu and Tuna Mayo Rice Balls

Find out more about shio kombu from my earlier post: Japanese style steamed rice with shio kombu

Shio kombu and tuna mayo rice balls -


Ingredients (for two onigiri)?


  • 1 1/2 cups cooked brown rice
  • 1 medium dried seaweed sheet (or two smaller rectangular version)
  • 2 - 3 tablespoons canned tuna
  • 2 tablespoons shio kombu
  • 1 tablespoon Japanese mayo
  • Some salted water


How?


Add the shio kombu to the leftover brown rice and gently heat them up. Fold the rice a few times so the shio kombu can fully mixed together with the grains.


Drain out any excess oil or water from the canned tuna. Transfer about 2 to 3 tablespoons of tuna to a bowl and mix with 1 tablespoon of Japanese mayo.


Take one sheet of dried seaweed (nori) and cut with a sharp knife to two smaller rectangular sheets. You can also find small rectangular shaped dried nori as snacks at Asian grocery store, which work just as well but can be on the smaller side for the rice balls.


Sprinkle some salt to drinkable water and stir till dissolved.


Wet both palms with salted water before making the rice balls. It helps in preventing the grains from sticking on hands. Take one scoop of rice and gently flatten the grams on one palm. Add about one tablespoon of the tuna mayo mixture to the center. Top the tuna mayo with more rice and start forming all these ingredients into a rice ball. 


It takes a few practice to perfect the triangular shaped onigiri, but a simple round one works just as well as long as the filling does not pop out in between the grains. 


Wrap the rice balls with nori sheets right before serving.


Tuna can be substituted with grilled salmon or canned flaky salmon sold in Japanese grocery store.


Other recipe using shio kombu: