I'm not afraid to admit that since Michelin guide launched in Taipei, I've been gradually visiting these restaurants one by one. Not exactly collecting the stars, but trying to figure out what do these places have in common, or what might be standing out that caught inspectors' attention.
So here I was, inside Mandarin Oriental Taipei Ya Ge, a Chinese restaurant that was given one Michelin star honor.
The restaurant is located on the 3rd floor of Mandarin Oriental. Not necessarily spacious, but in a way elegant and tranquil.
Surprisingly, getting a table here wasn't as hard as expected. I only called two days prior trying to book a table for two on Friday, then I got it, a complete painless process.
Our table was close to the end of the restaurant, overseeing all other guests, expect for the ones inside their private dining rooms. And we got this round window facing some green views right above us.
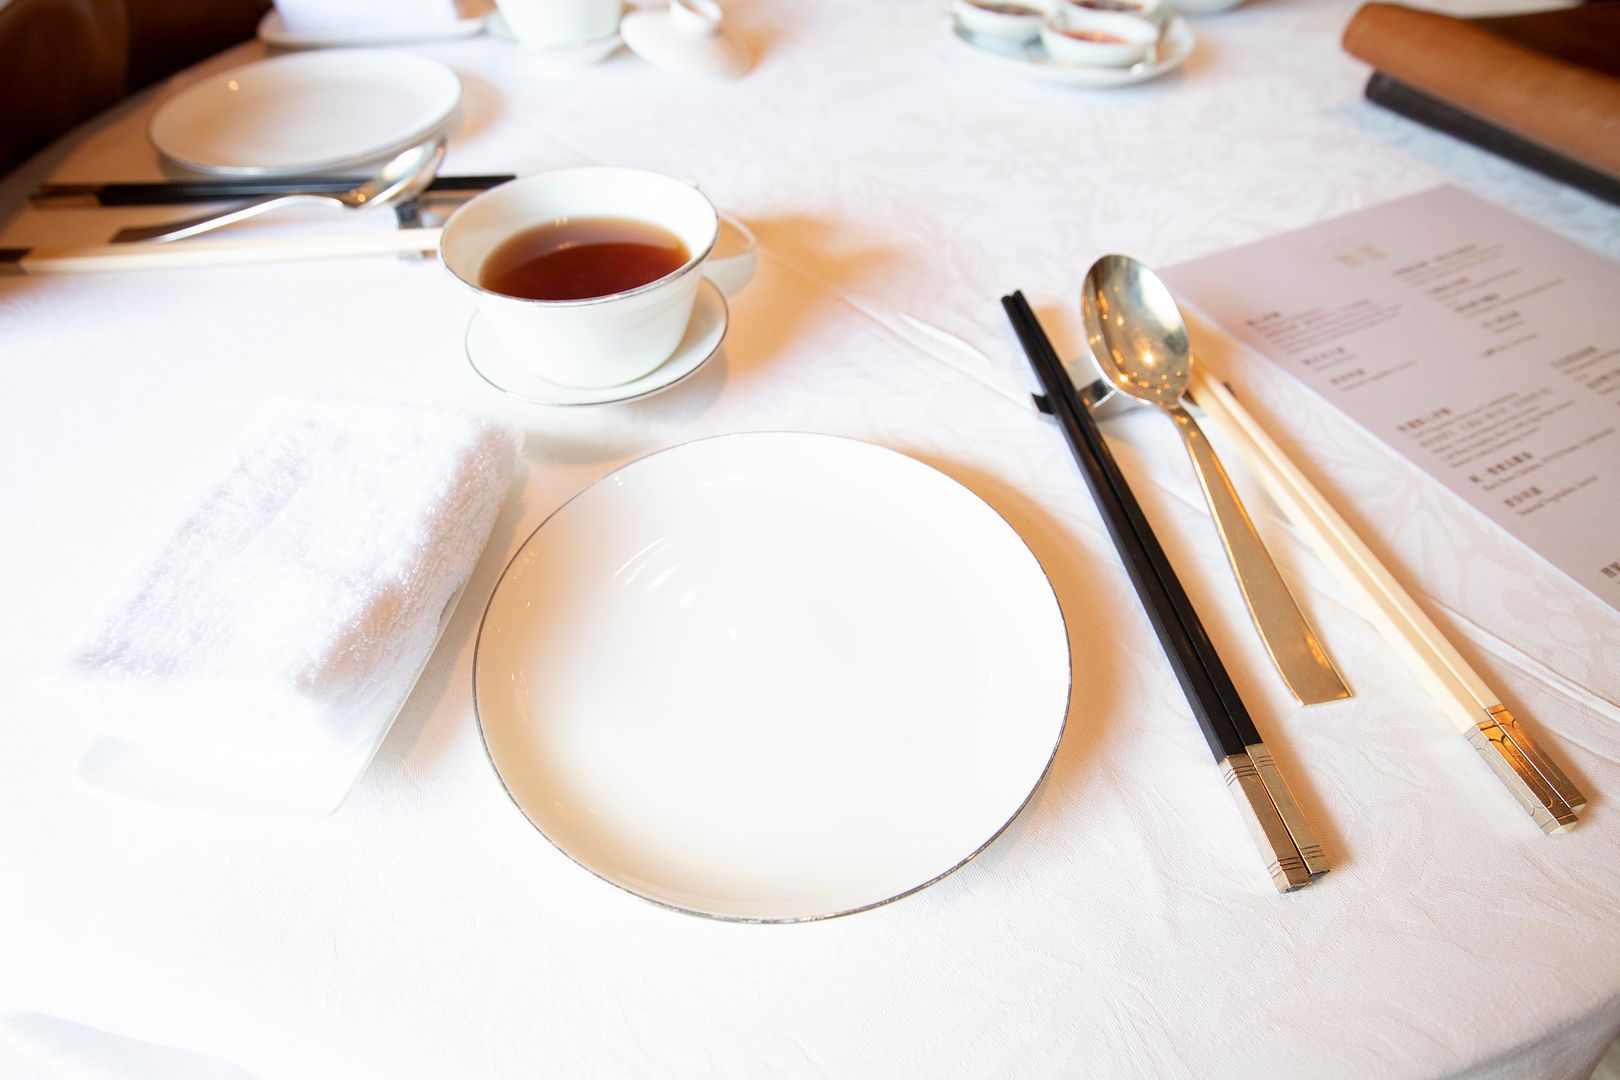
Table setting -
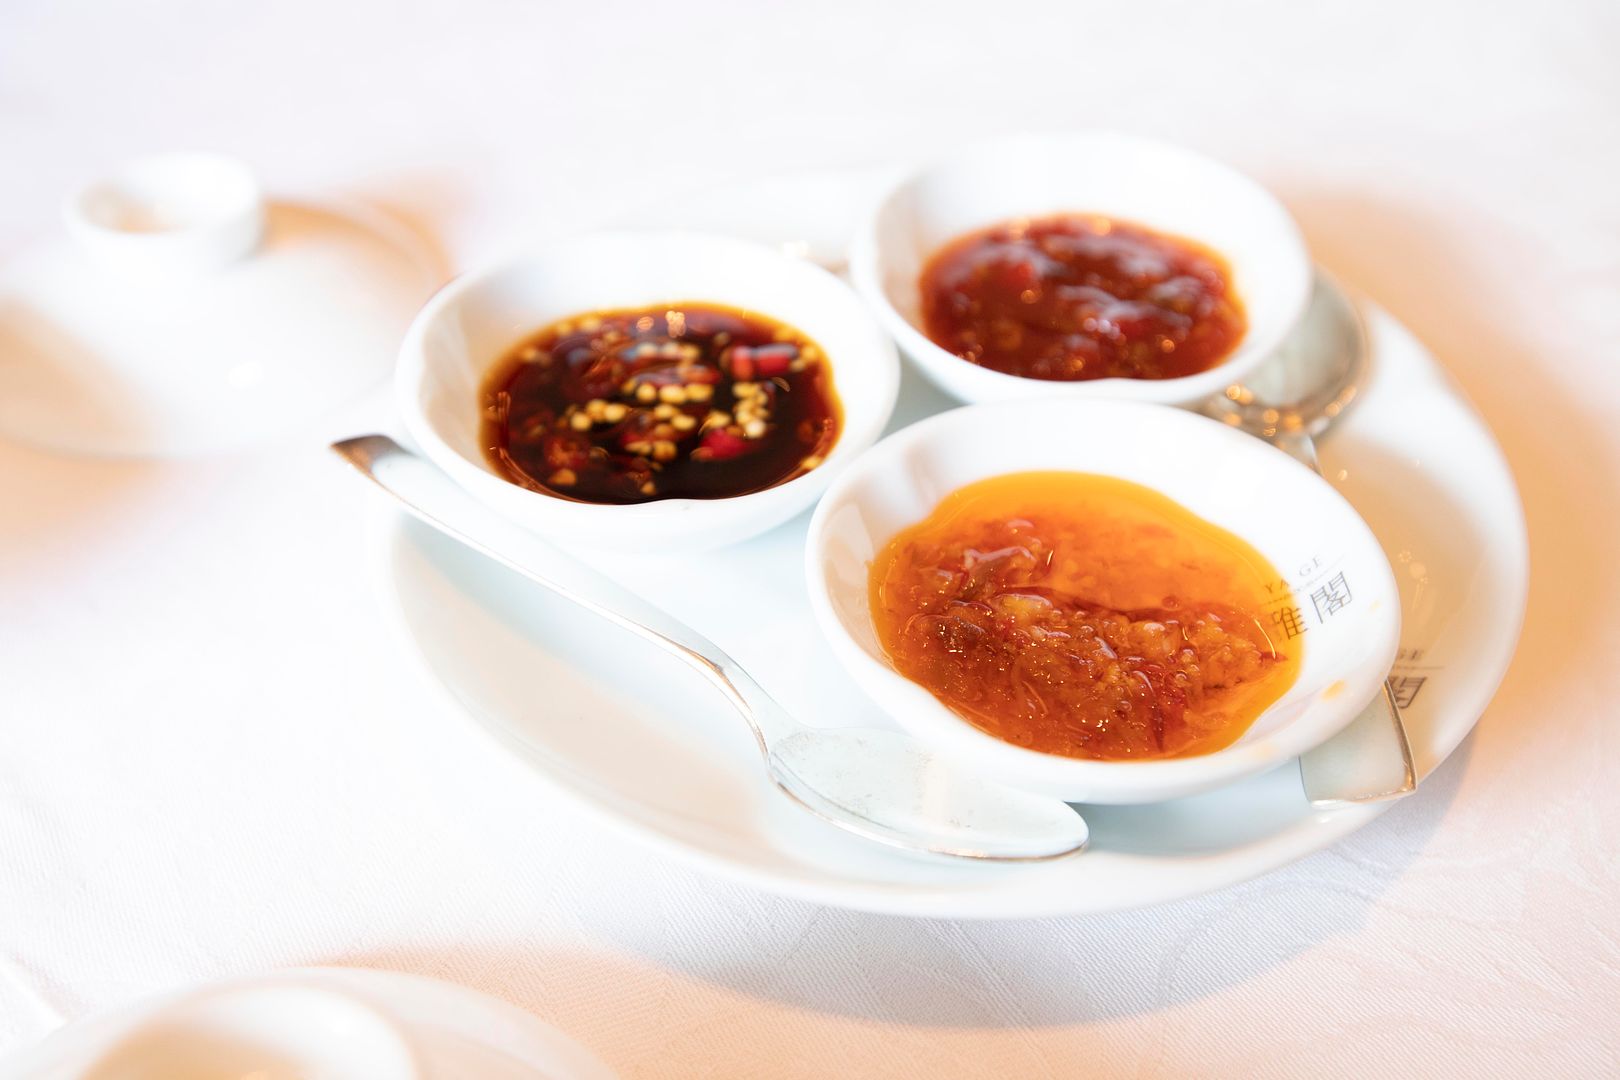
Three different kinds of spicy sauce. The one on the top right corner has a slightly sweet aftertaste from fermented beans -
Keep it simple, we went for one of the basic lunch sets instead of spending too much time on figuring out what to order. But as greedy as we were, two a la carte dishes were added to the selection. Hopefully our tummy can take in all the food.
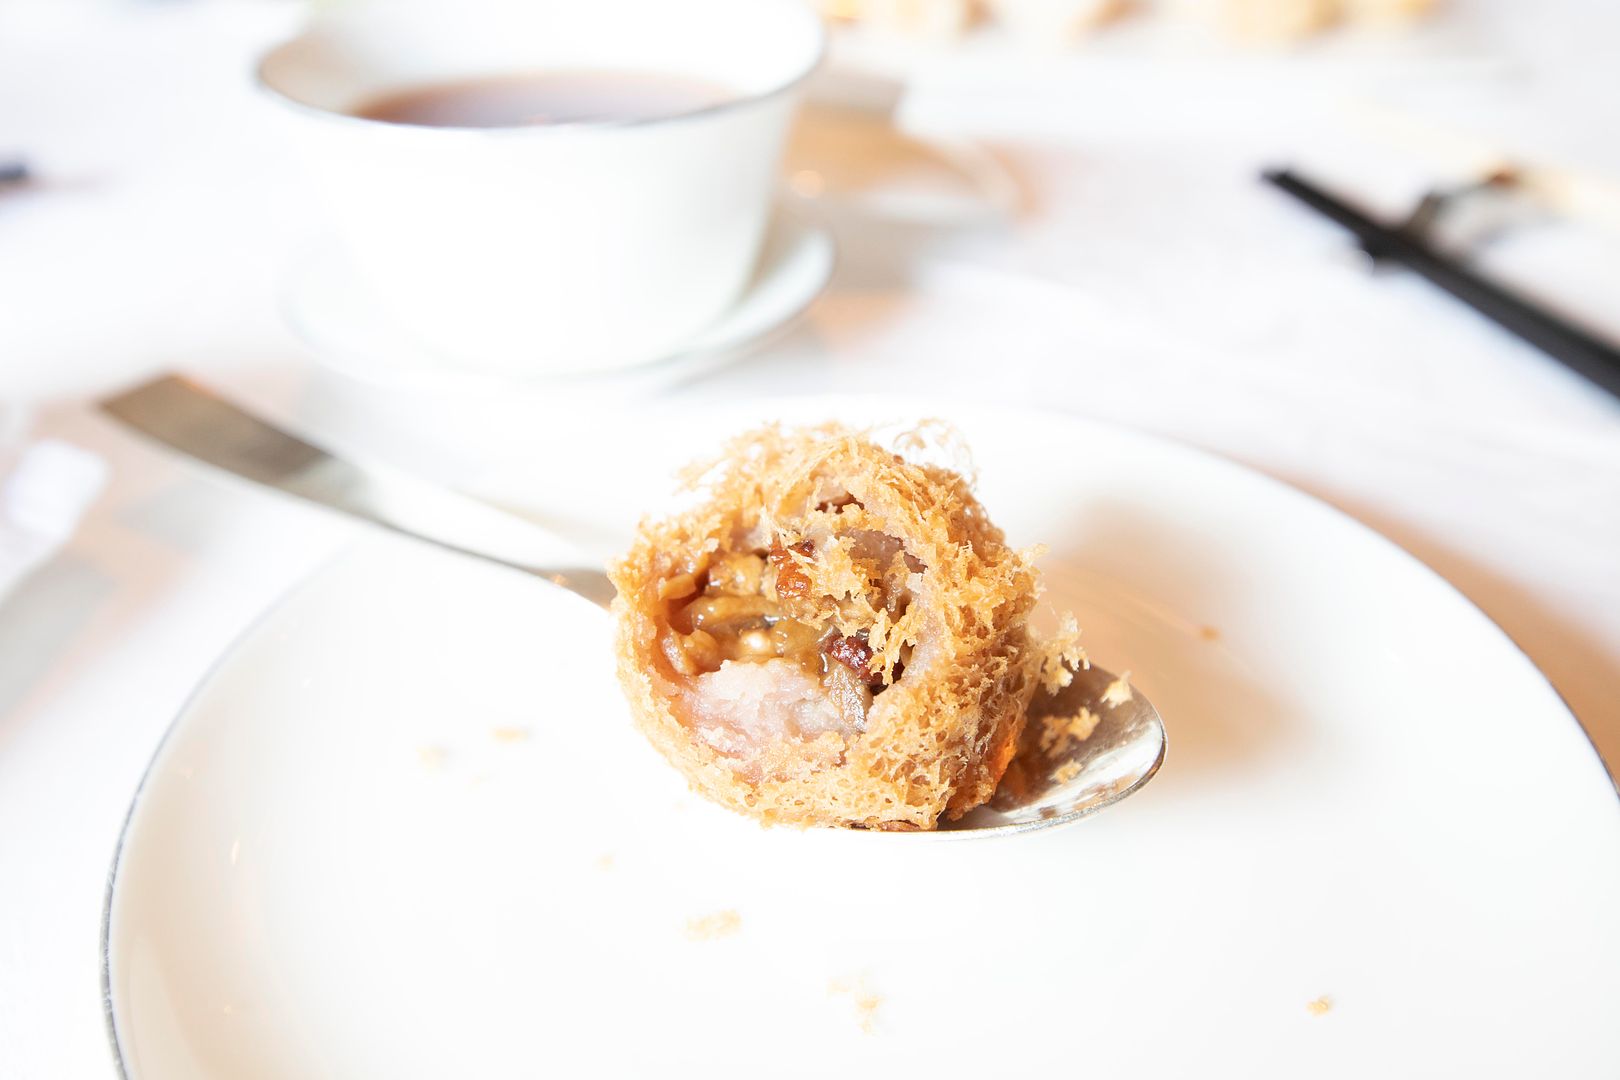
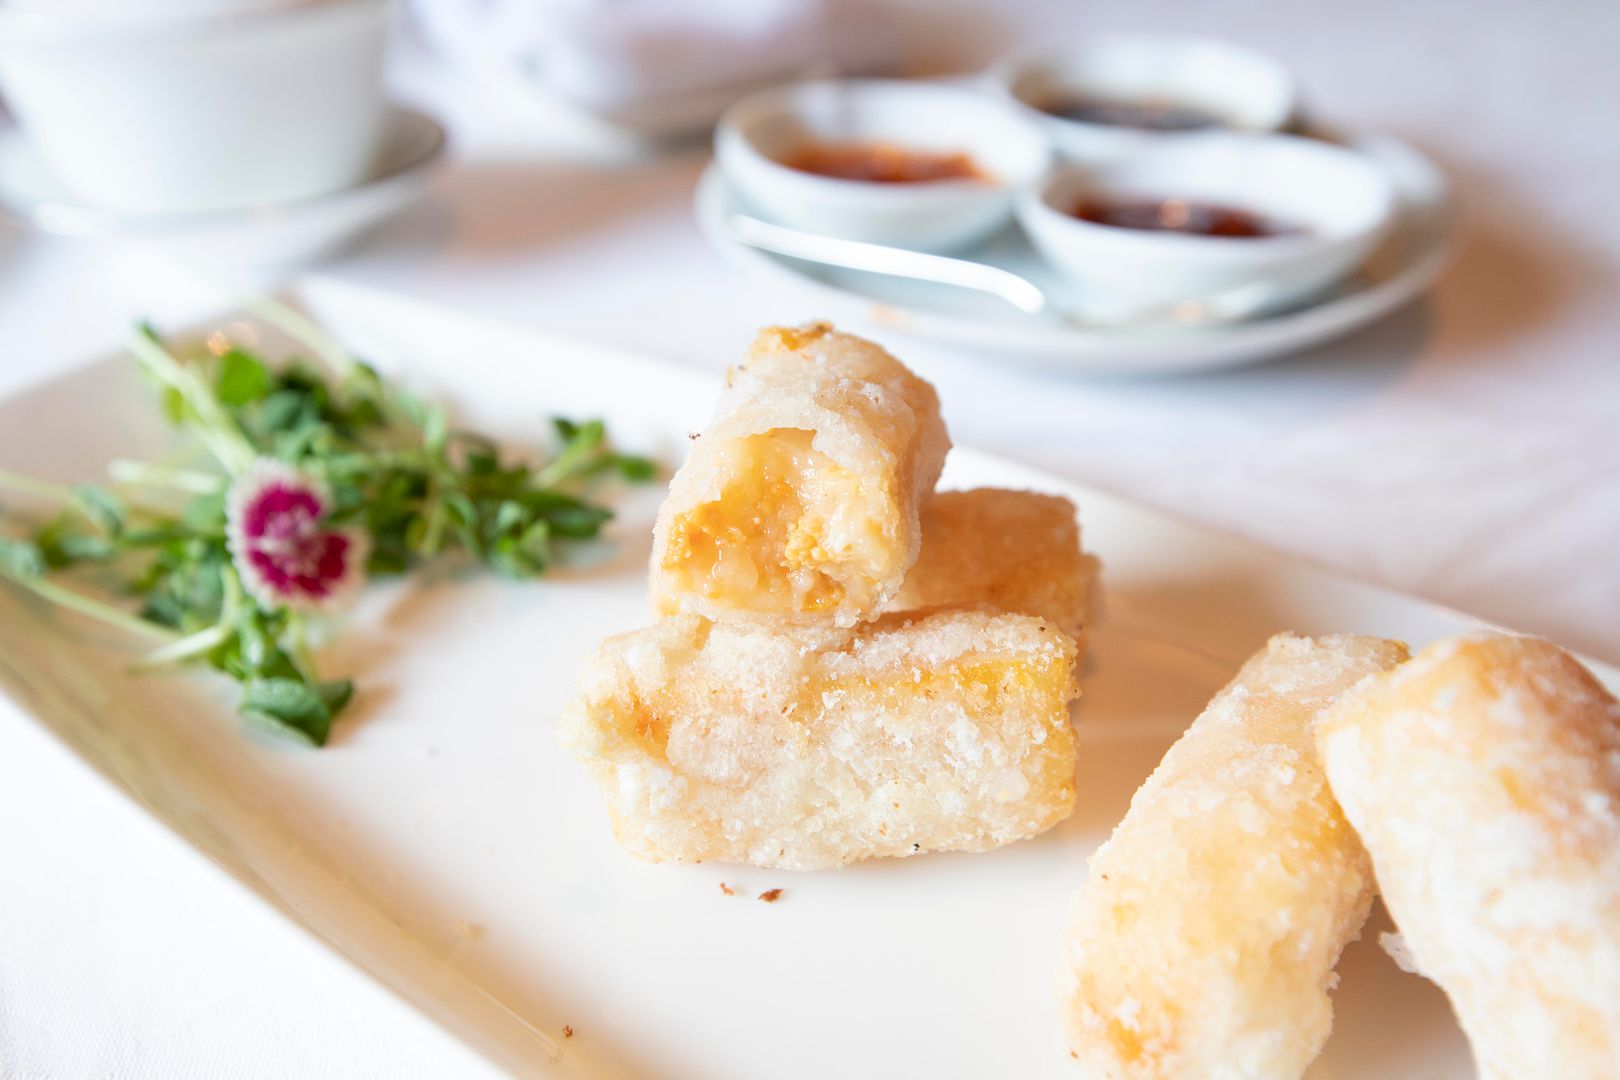
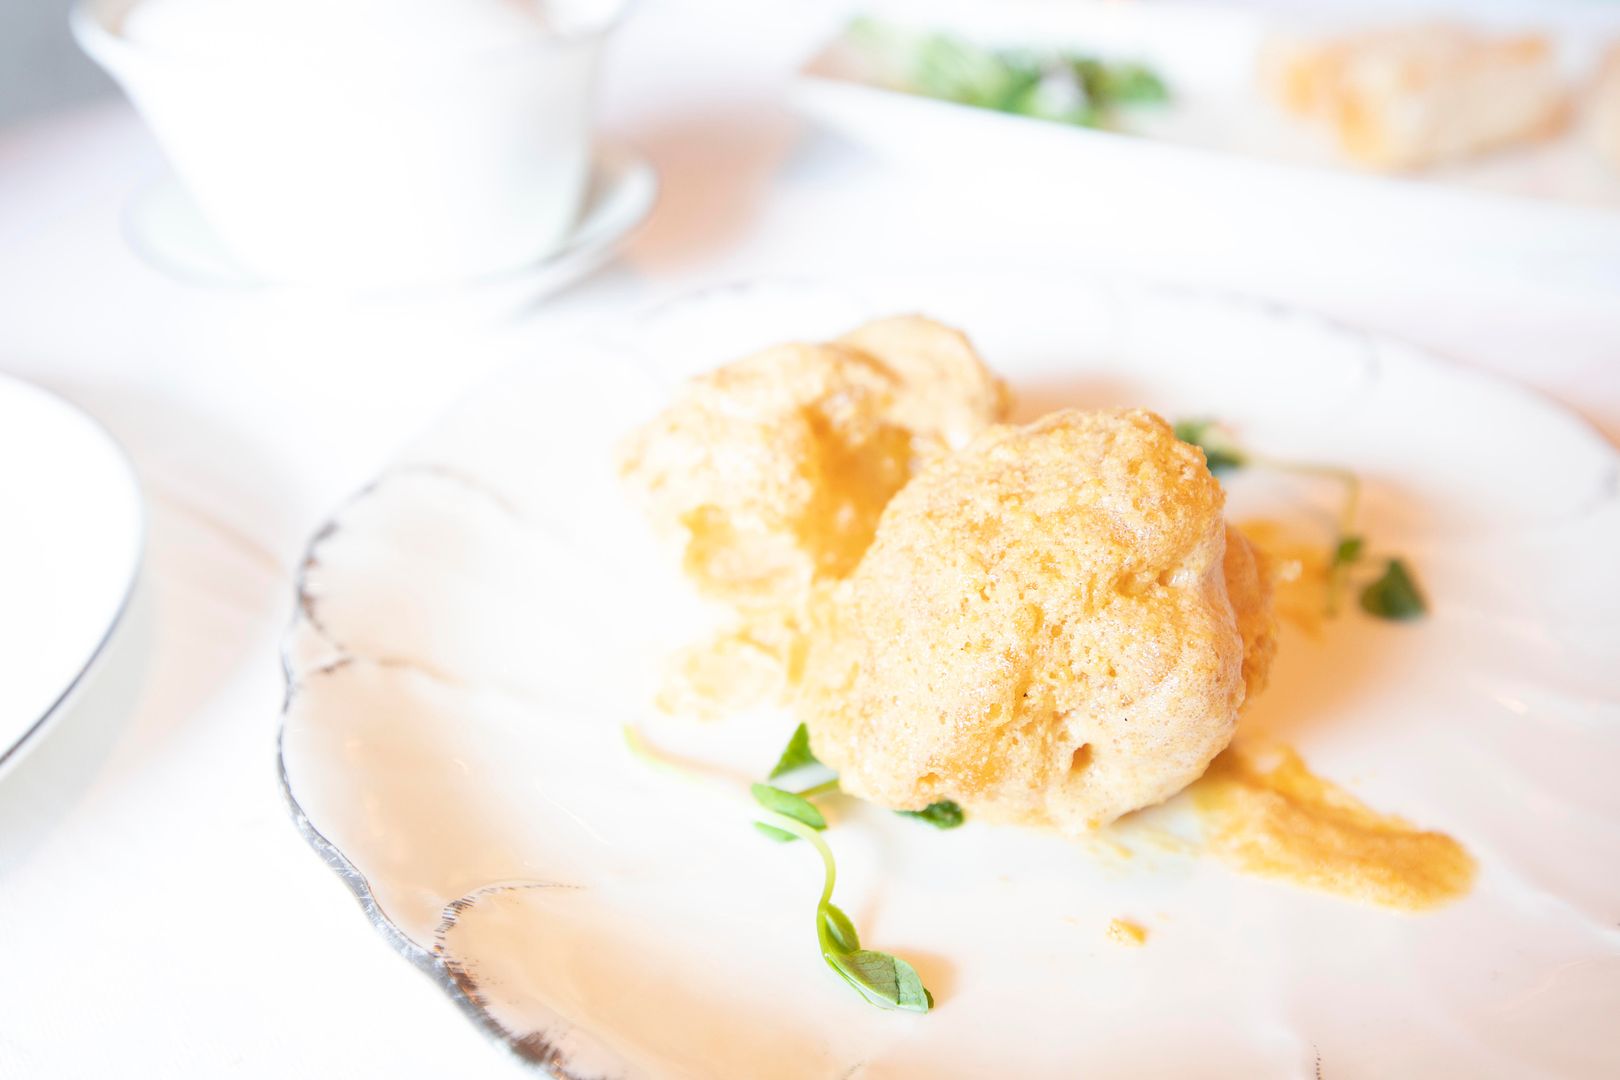
First a la carte dish -
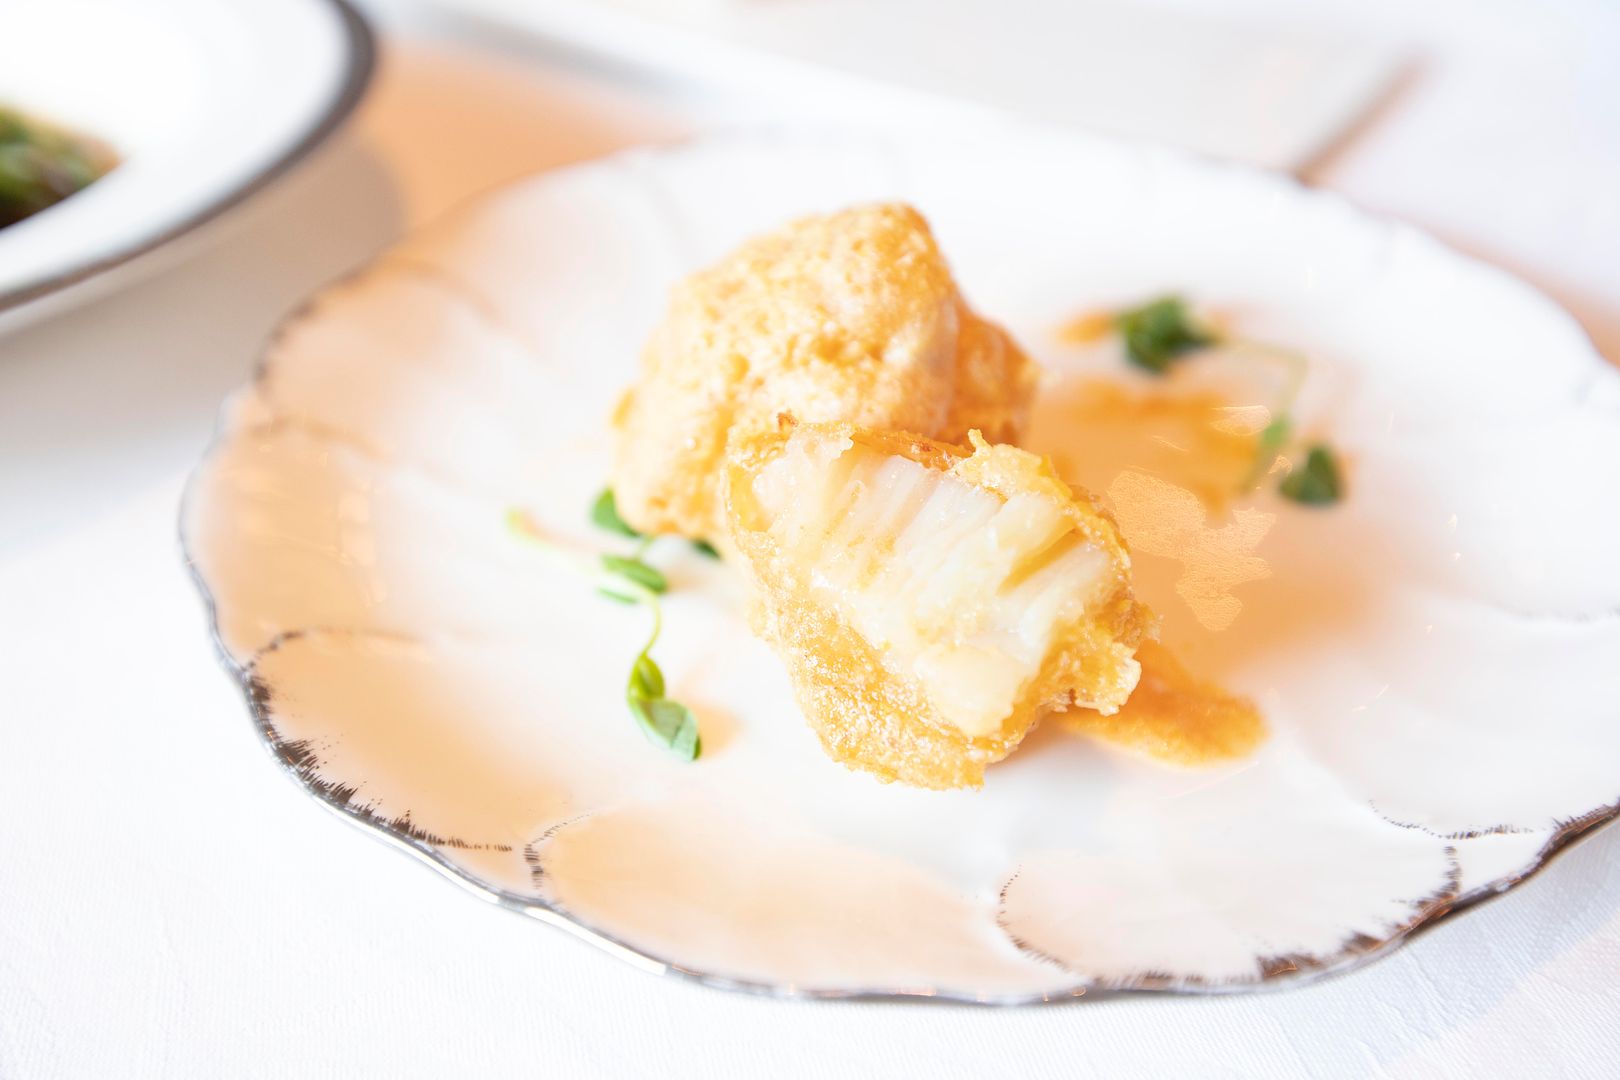
"Foie gras, fluffy taro dumpling, crispy."
This dish actually comes in three fried pieces, but our waitress overheard our conversation regarding whether or not we can finish all the food. So she customized our serving. A kind gesture without us asking.
Even though the star ingredient should be the foie gras, but it was actually the taro that shined through, aroma-wise. The foie gras here took a different role, became a smoothing agent that bound all the fillings inside. Held by very thin and crunchy coating, but once taken a bite, thick and paste-like filling took over. It easily became our favorite dish that day.
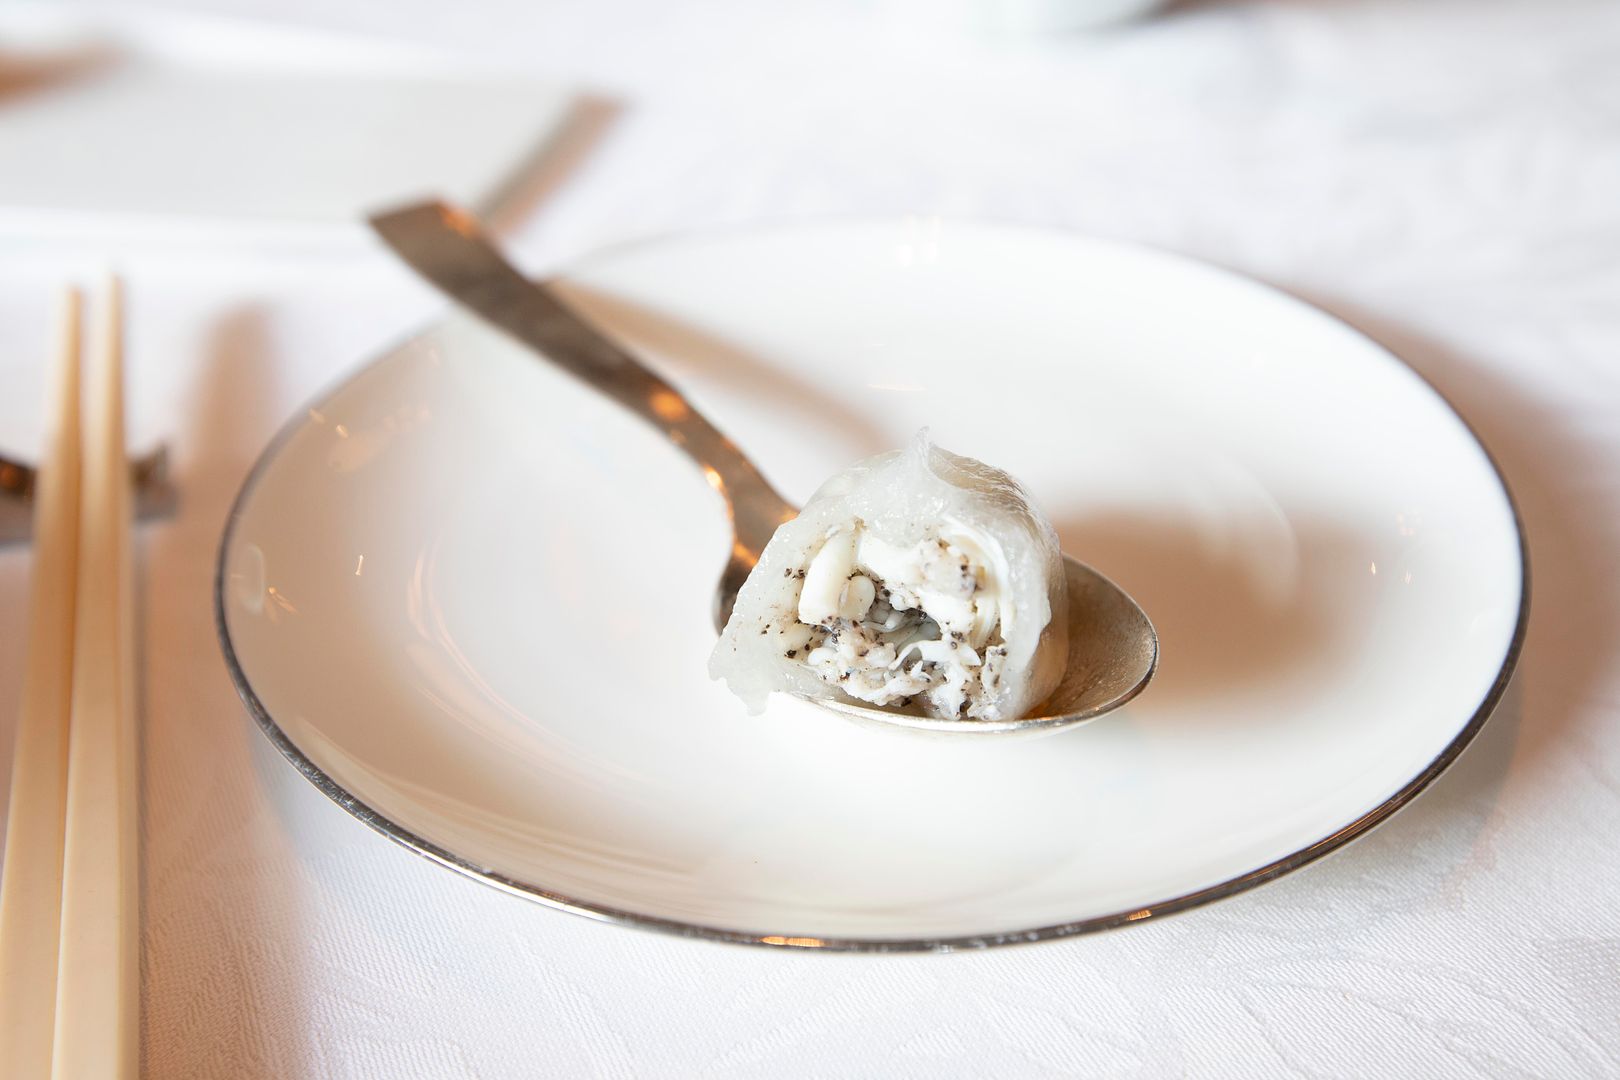
Below dish can be hard to tell from the picture, but the main ingredient was actually sea urchin, our second a la carte choice -
"Sea urchin, superior broth, egg, deep-fried."
It can be easily misunderstood by the description on the menu - sea urchin and deep-fried. It was not as simple as "fried sea urchin." In fact, one might not even be able to tell that there's sea urchin inside if not being told beforehand.
Corn starch was used for the coating, so not just crunchy, but somewhat with a tiny bit of elastic character, just a wee bit. The texture of the filling was very similar to mousse. Just like our previous dish, the supposedly main ingredient foie gras actually served as a back-end support. It's the same scenario here. The sea urchin stepped down, the main flavor was carried out by Chinese superior broth. Savory and aromatic, a fun dish to try.
Time to stop munching on sea urchin sticks. We haven't even started working on lunch set dishes.
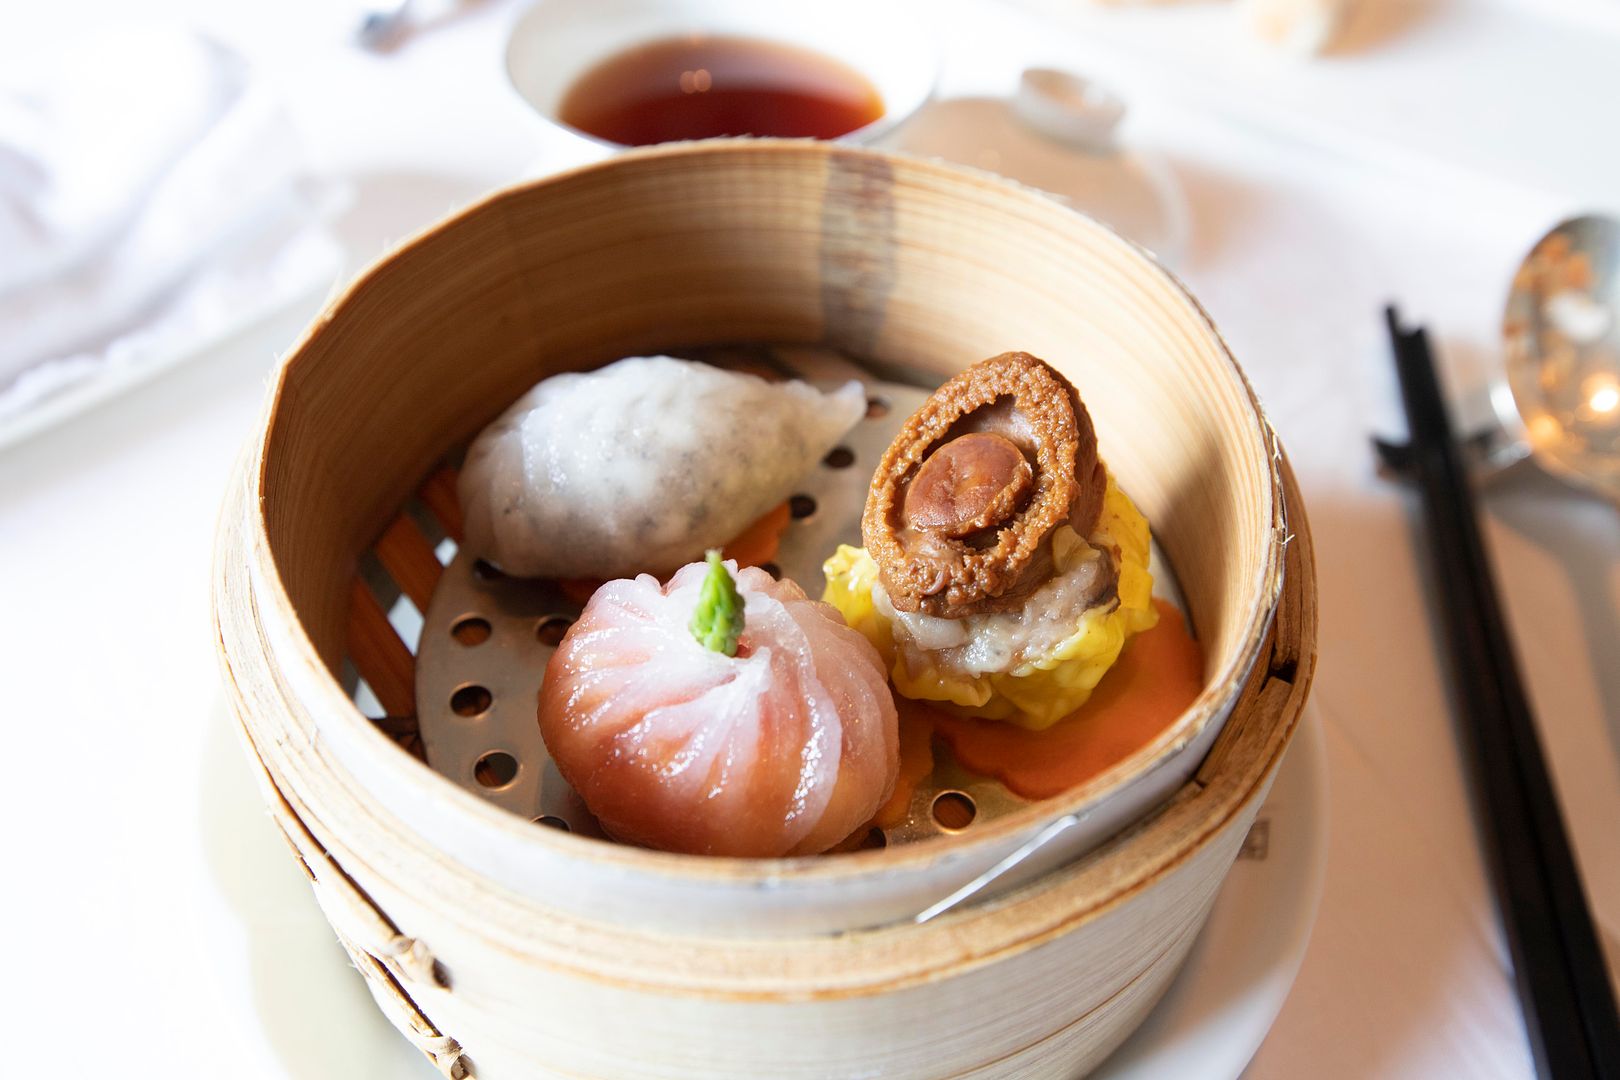
About 10 minutes passed, from here, we ventured into lunch set items. Chef's signature dim sum combination -
Left to right clockwise - "abalone, pork, and shrimp shu-mai, steamed; beetroot, scallop dumpling, steamed; crab meat dumpling, black truffle, egg white, steamed."
Good but not wow-ing. However, the least appealing one got more attention from my lunch mate. It was the plain one filled with black truffle. Black truffle, of course, it can easily be the most aromatic of all. On top of that, such ingredient is always a crowd pleaser.
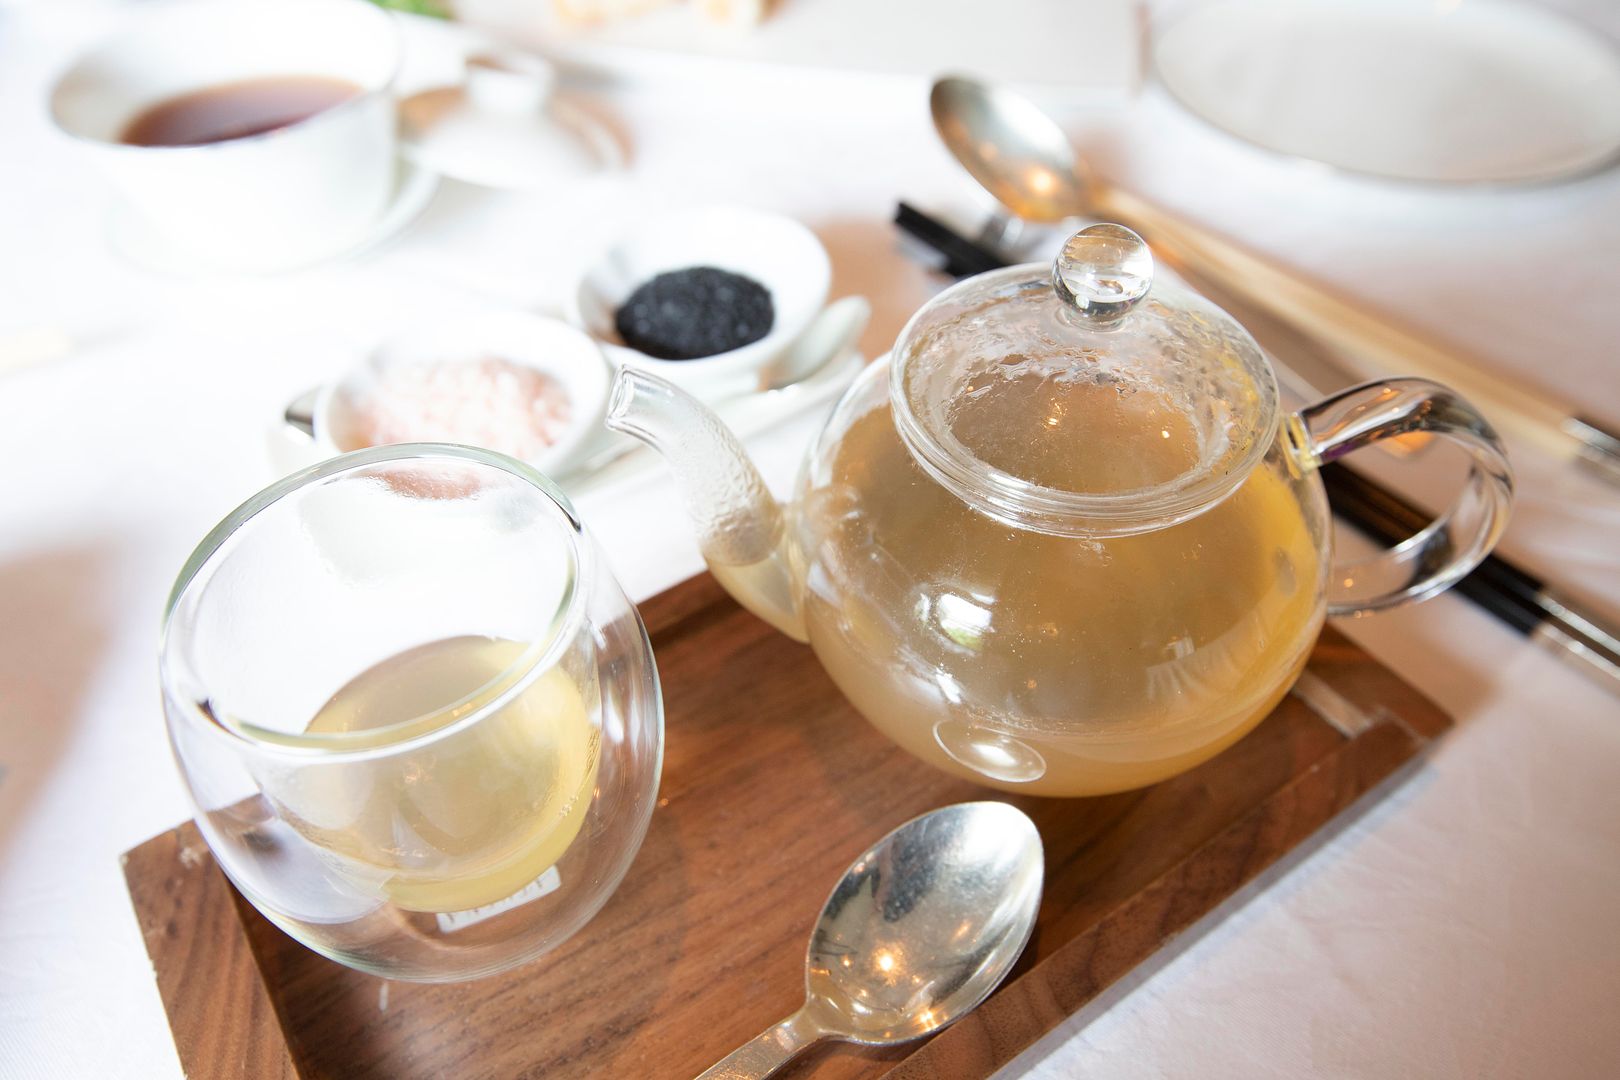
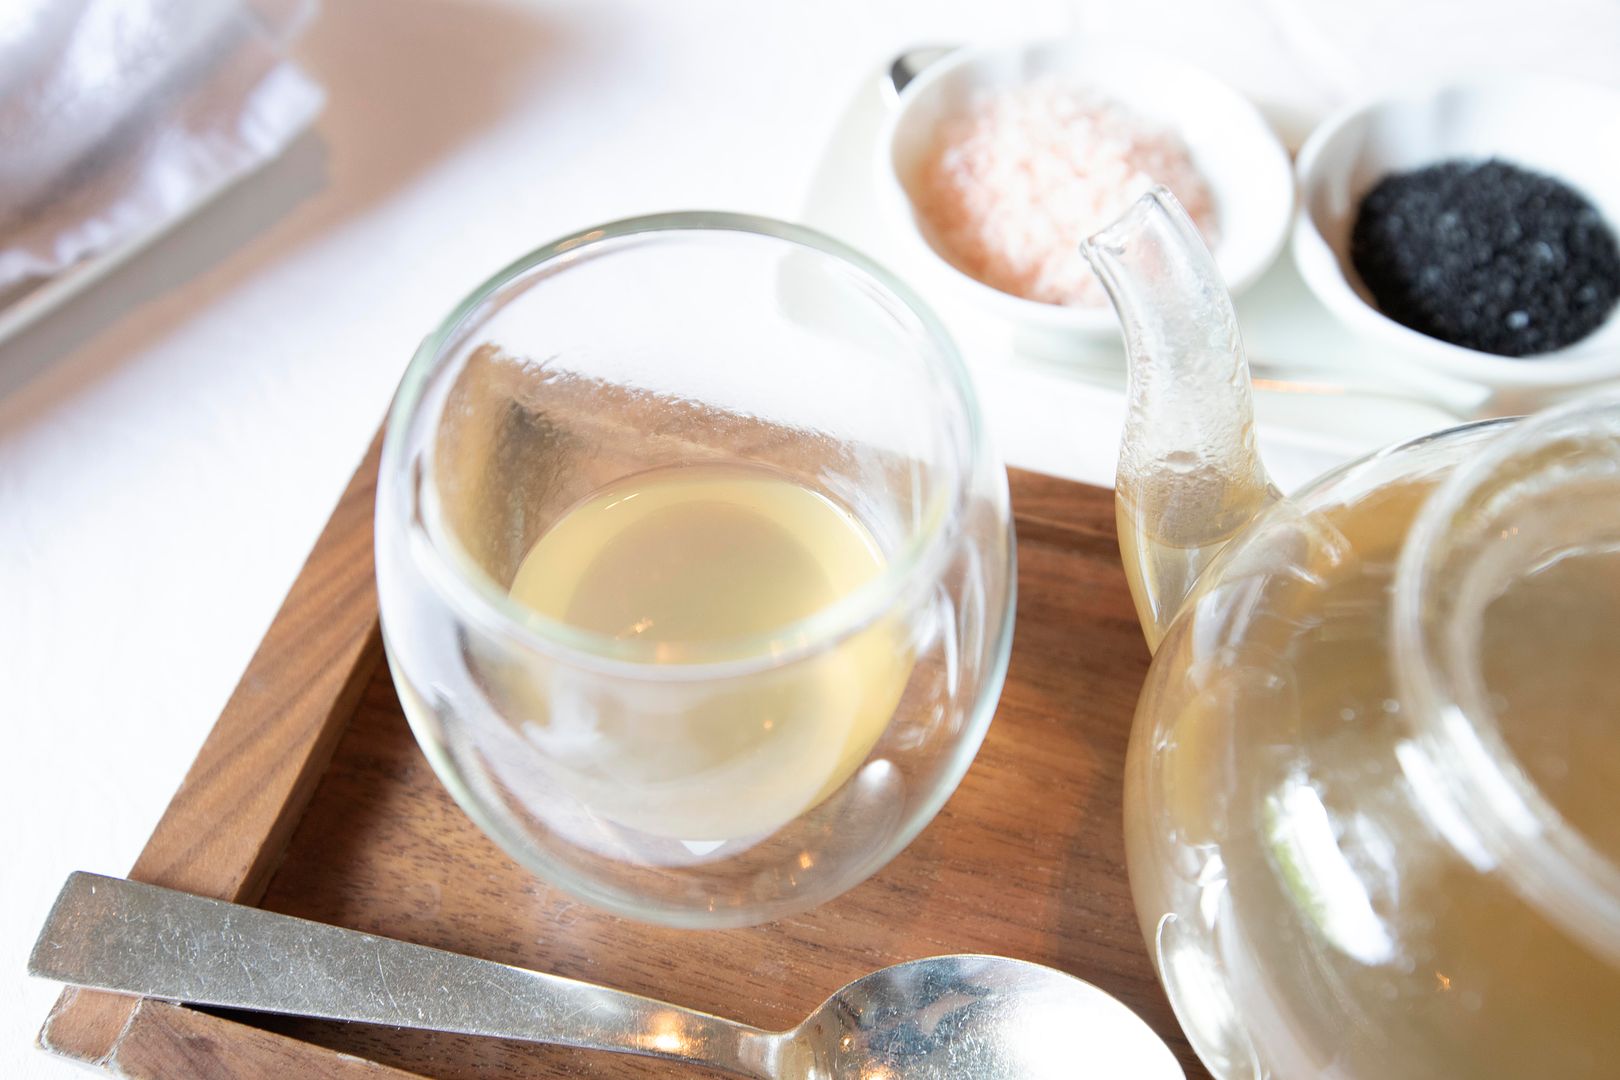
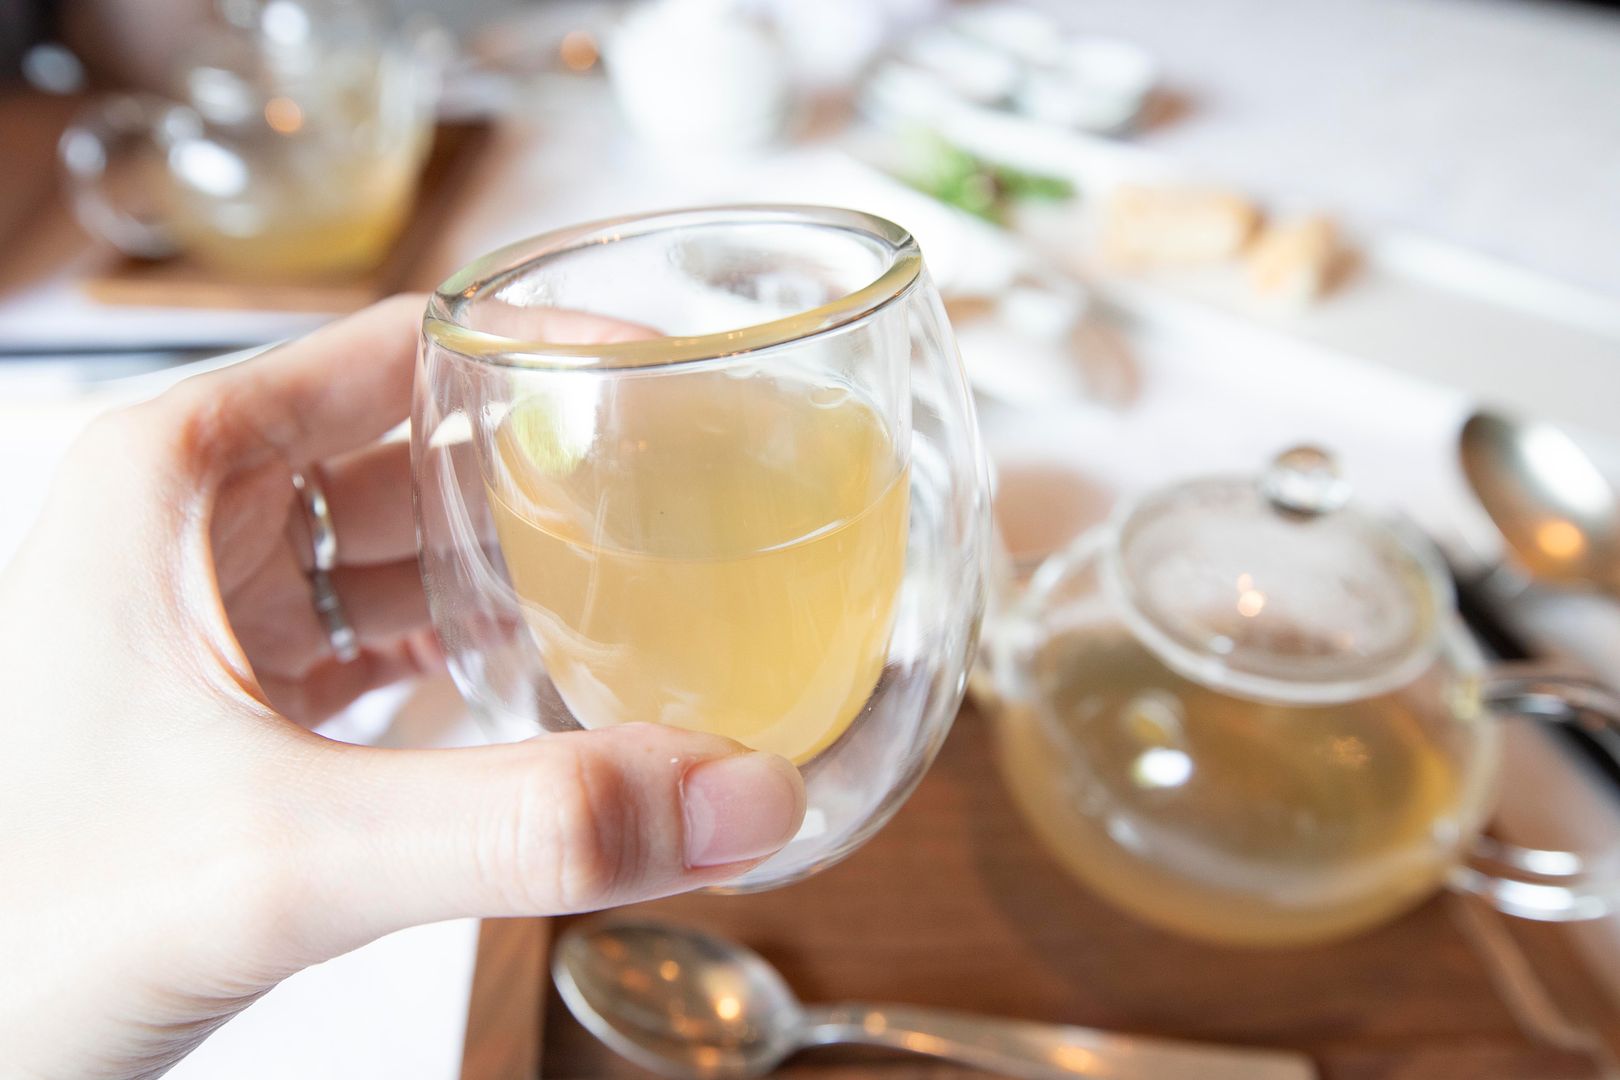
Let's wrap up the meal with some hot tea......nor not!
Served like tea, but that pale yellow looking liquid was actually chicken broth.
"Black bone chicken, P.H. 9.0 water, double-boiled."
1:1 water to chicken ratio, double-boiled to extract all the essence. At first it can be light to taste, but try to savor it. To me, that gentle touch when it hit my tongue was the key. Like soft water, softly coated the surface of my tongue, like how a mother cover her baby with blanket. Imagine Chinese stock pumped with air, full yet light at the same time.
After that, perhaps a few pinches of salt to bring up the flavors. This time, put the texture aside, umami now came into the picture.
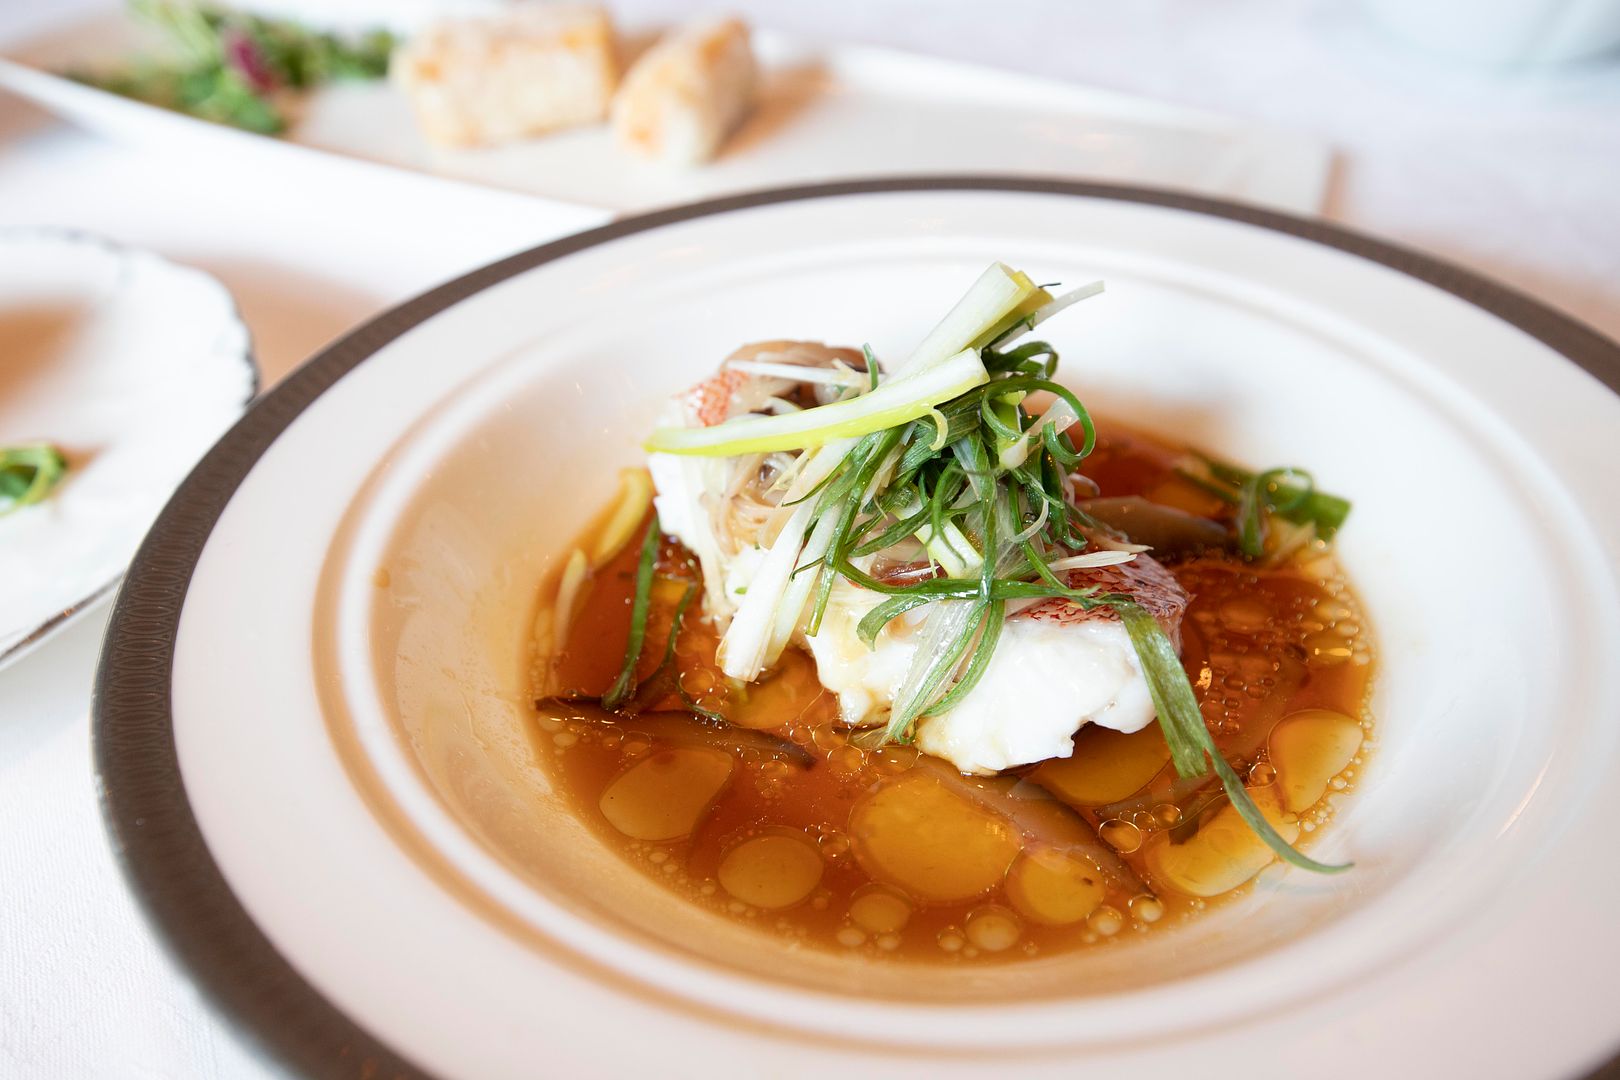
Choose between the two for entrées, so we got one of each. "Star garoupa fillet, ham, shiitake, steamed" -
If you're not sure how to pick the entrées, trust me, when dining at such high level Chinese restaurant, steamed fish might sound too easy, but it rarely disappoints. Especially restaurant like Ya Ge always get the first pick of seafood, so it's safe to say that the fish always come fresh and fat. Think about all that fat disintegrated into the sauce, what a umami burst.
The other entrée "prawn, scallop garlic, salty egg yolk, crispy" -
Earlier steamed garoupa fillet was cooked nostalgic way, familiar and comforting. In comparison, the scallop was more of a wow-factor. Packed with crunchy coating and trendy salted egg yolk seasoning.
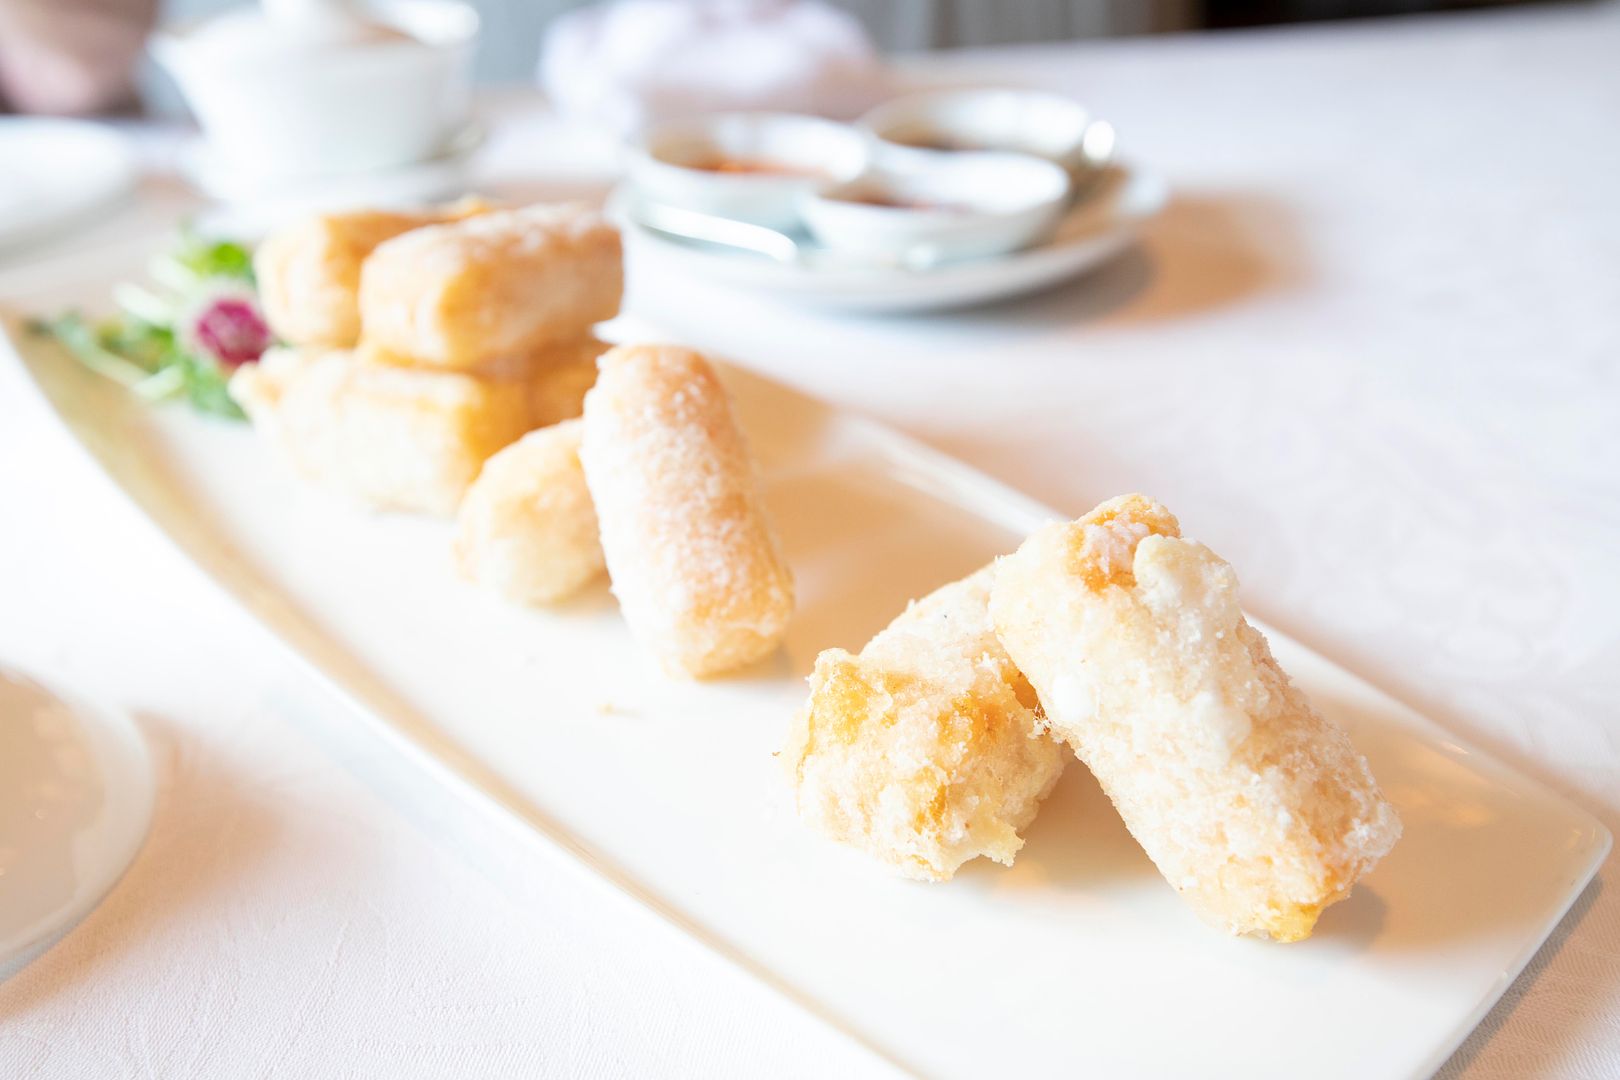
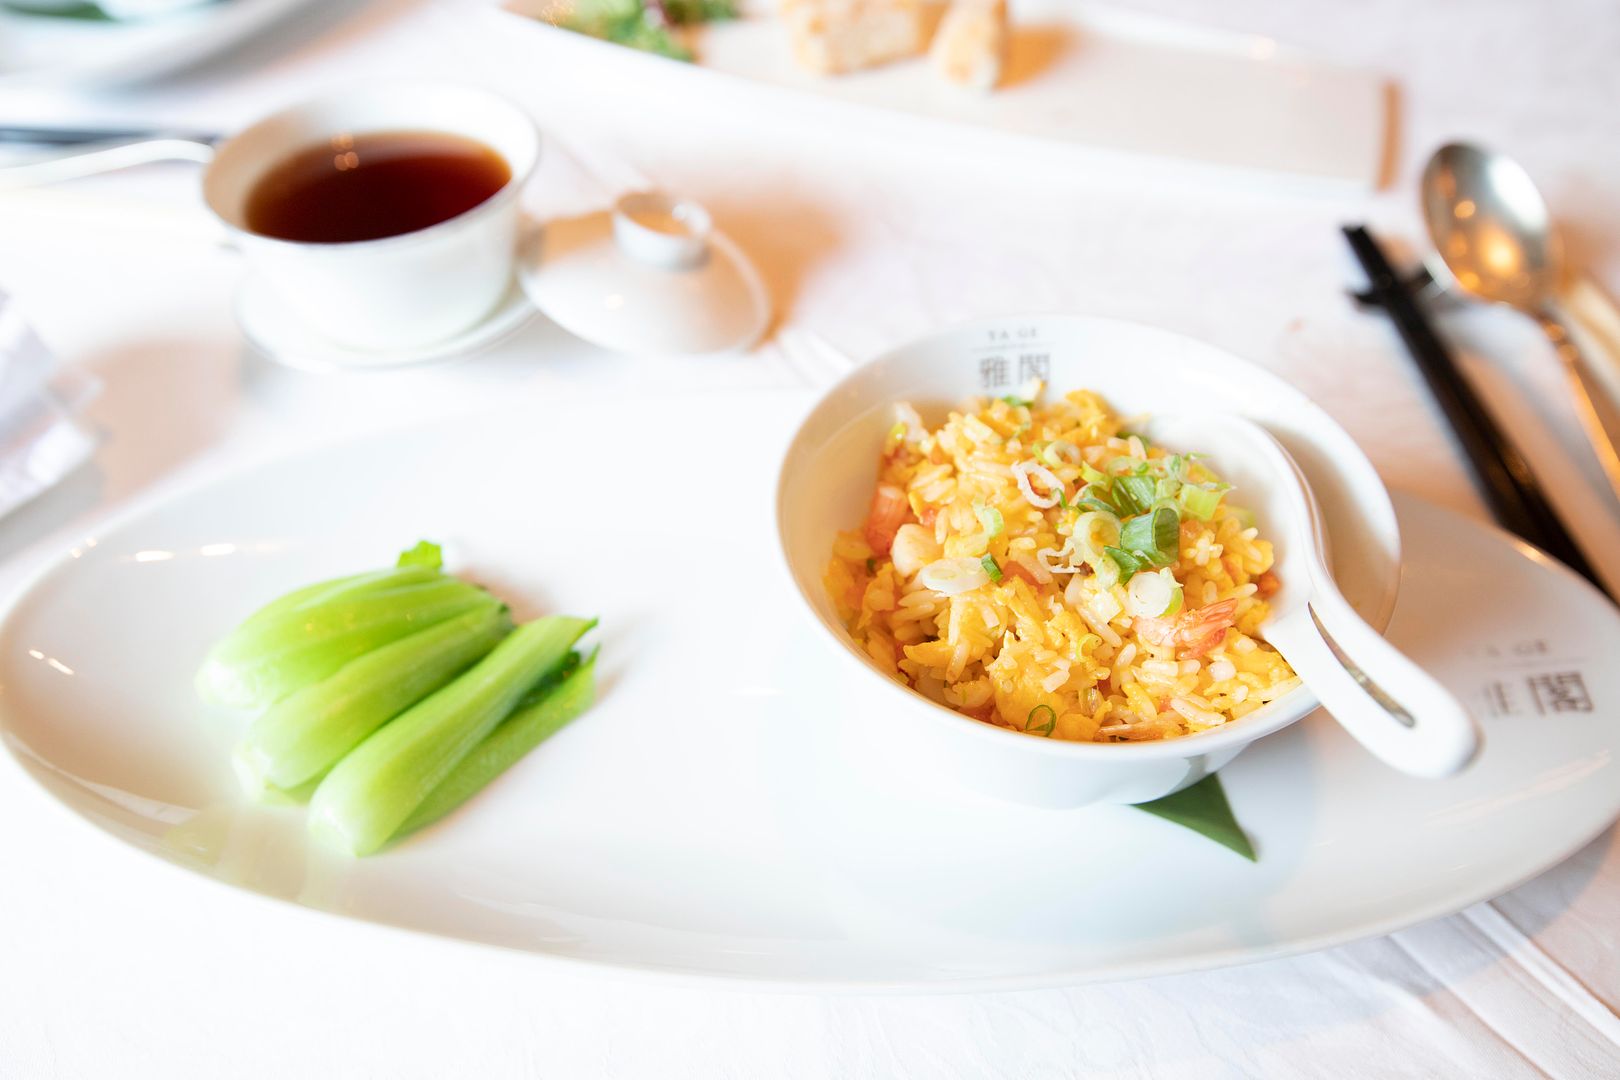
Ya Ge signature fried rice -
Approaching our tummy limit.
"Aged tangerine peel, red beans soup" -
"10 year" aged tangerine peel and red beans fully integrated to a soup form.
Tested the water this time, so far so good. Most of the dishes that day were on the lighter side, but it doesn't mean flavorless. Abandoning heavy seasonings, the idea is to let the ingredients speak for themselves, that's what I get from Ya Ge. Should be worth awhile to plan my next visit trying out some of Ya Ge's "big dishes" next time.
Ya Ge (雅閣) currently holds one Michelin star status.
Mandarin Oriental Taipei - Ya Ge
158 Dunhua North Road (3rd floor)
Taipei, Taiwan
+886 2 2715 6668
Hotel website: Ya Ge
Facebook: https://www.facebook.com/MOTPEYaGe/
Opening hours:
Monday to Friday lunch 12:00 noon ~ 2:30 p.m.
Saturday, Sunday, public holidays lunch 11:30 a.m. ~ 2:30 p.m.
Monday to Sunday dinner 6:00 p.m. ~ 10:00 p.m.
Other Michelin starred restaurants in Taiwan:
Sourcing ingredients can be a hard task in Taiwan. Like this time, I was going to use mint leaves for a more Thai style chicken recipe, but the grocery store that I went to didn't carry mint leaves that day. Don't even think about traditional market, I might have better luck finding a pot of mint plant there, but all I need was just a small bundle of fresh leaves.
So I was trying to figure something out in front of the fresh herbs section. Shiso it is. Changing from Thai to a more Japanese recipe.
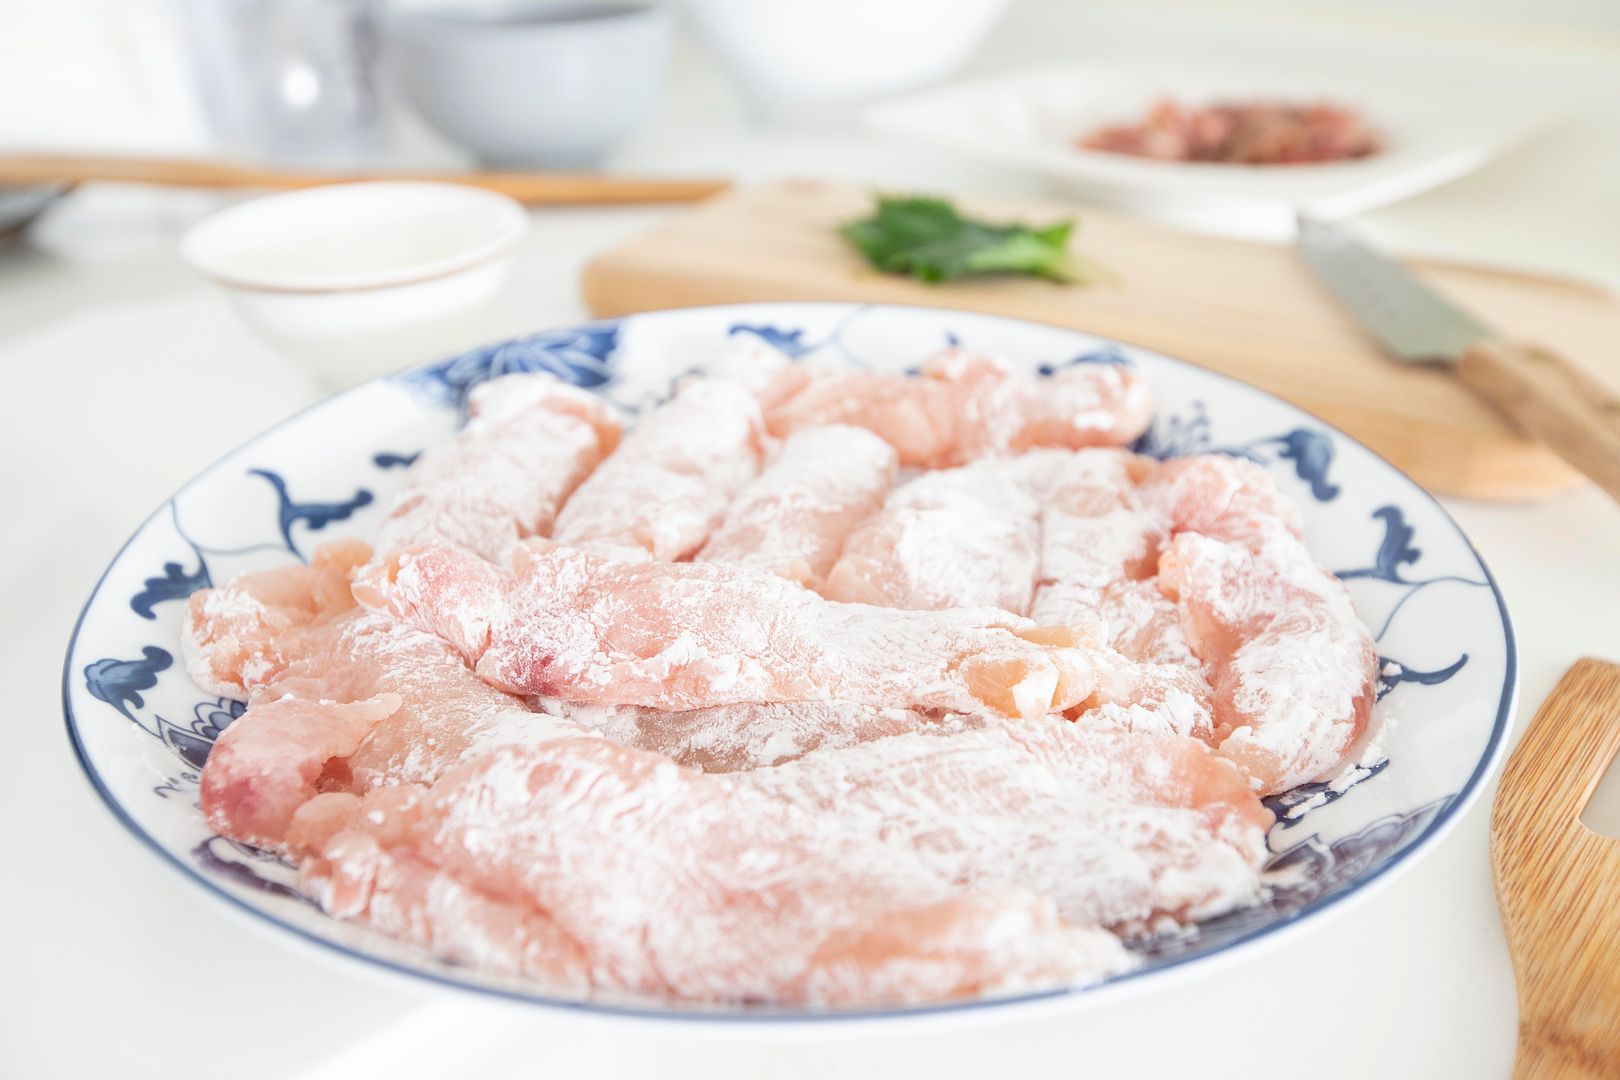
Shiso chicken tenders 紫蘇雞柳 -
Ingredients?
- 12 chicken tenders
- 8 shiso leaves
- 1 small bundle cilantro
- 1/3 cup chicken stock
- 2 garlic cloves
- 1 teaspoon grated ginger
- 1 teaspoon salt
- Some olive oil
- Some corn starch
- Some white pepper powder
How?
Julienne shiso leaves. Peel and finely chop the garlic gloves. Peel and grate the ginger. Finely chop cilantro.
Remove tendons from chicken tenders. Coat the meat with corn starch. Gently shake off excess powder.
Drizzle some oil in a non-stock pan, at least enough to evenly coat the bottom of the pan. Turn to medium high heat. Once the surface warms up, transfer chicken over one by one. Sear till colored then flip and continue to sear the other side. Once ready, scoop out the chicken tenders and set aside for later use.
Using the same pan, drizzle more oil to coat the bottom. Still using medium high heat. Add in garlic, ginger, salt, and some white pepper powder. Give it a quick stir, sear till aromatic but not burnt.
Pour in chicken stock and transfer seared chicken tenders back to the pan. Bring to a boil then keep it as a simmer for few more minutes. Add in shiso leaves and cilantro. Cook till the juice has been reduced. The sauce should thicken a little and slightly gooey, but not completely dried.
Use just a little less than one teaspoon of salt if a lighter taste is desired.
Weeks passed since I made this dish, and I successfully found a stable supply of fresh mint leaves at a nearby grocery store. Thankfully, my Thai influenced chicken tenders recipe should be up soon!
Other chicken related recipes:
Something about oozing cheese and mashed potatoes.
My first intent was to make them into patties, somehow ended up more like Japanese korokke, but seared not fried. Mixed cheese was incorporated - mozzarella for its creaminess and cheddar for a boost of saltiness, but supposedly mini Camembert should work too.
Cheesy mashed potato patties served with Worcestershire sauce -
Ingredients (makes about 6 korokke-sized patties)?
- 2/about 515 grams potatoes
- 1 cup mixed cheese (mozzarella and cheddar used here)
- 1 egg
- 3 to 4 tablespoons unsalted butter
- 1 tablespoon heavy whipping cream
- 3 tablespoons chopped parsley
- 1 tablespoon salt
- 1/4 teaspoon black pepper
- Some all purpose flour
- Some Japanese panko
- Some Worcestershire sauce
How?
Prepare a pot of water. Meanwhile, peel and cut the potatoes into medium sized cubes. Drop the potatoes to the pot, start with cold water and bring to a boil. Once boiling, lower the heat to a simmer, cover with lid and continue to cook for about 20 minutes. Test with a fork and see if it can pierce through, otherwise, continue to cook till softened.
Once ready, drain well and let them cool down for 10 more minutes, the remaining moisture can further evaporate during this time. Afterward, mash these potato cubes. Ideally, use a masher to do the job, if there's really no suitable tools, blender can be your last resort.
I actually store mashed potatoes in the fridge overnight, so I can save some troubles when ready to cook. In that case, remove mashed potatoes ahead of time to bring it to room temperature.
To the mashed potatoes, add in 1 tablespoon heavy whipping cream, chopped parsley, 1 tablespoon of salt, and 1/4 tablespoon of black pepper. Mix till incorporated.
Shape and squeeze mixed cheese into small ball shapes. Wrap the cheese ball with mashed potato. If mashed potato gets too sticky and hard to work with, mix in some flour. Shape into medium sized patties, similar to Japanese korokke.
Prepare three plates, one filled with flour, 1 with beaten egg, and 1 with some Japanese panko. Transfer potato patties one by one, first coat the patties with flour, then dip in beaten egg, lastly cover with panko.
Take a non-stick pan. Add in unsalted butter and turn to medium heat. Once melted, gently add in the patties one by one.
Sear till colored then flip to sear the other side, add more butter if the surface of the pan appears too dry after flipping.
Serve with some Worcestershire sauce.
Mashed potatoes can be hard to work with, they can get too sticky and make it very hard to form into patties. In that case, on top of mixing some flour to the mixture, try wearing gloves and dust both hands with flour.
Time to melt away with that oozing cheese filling.
Other recipes with potatoes:
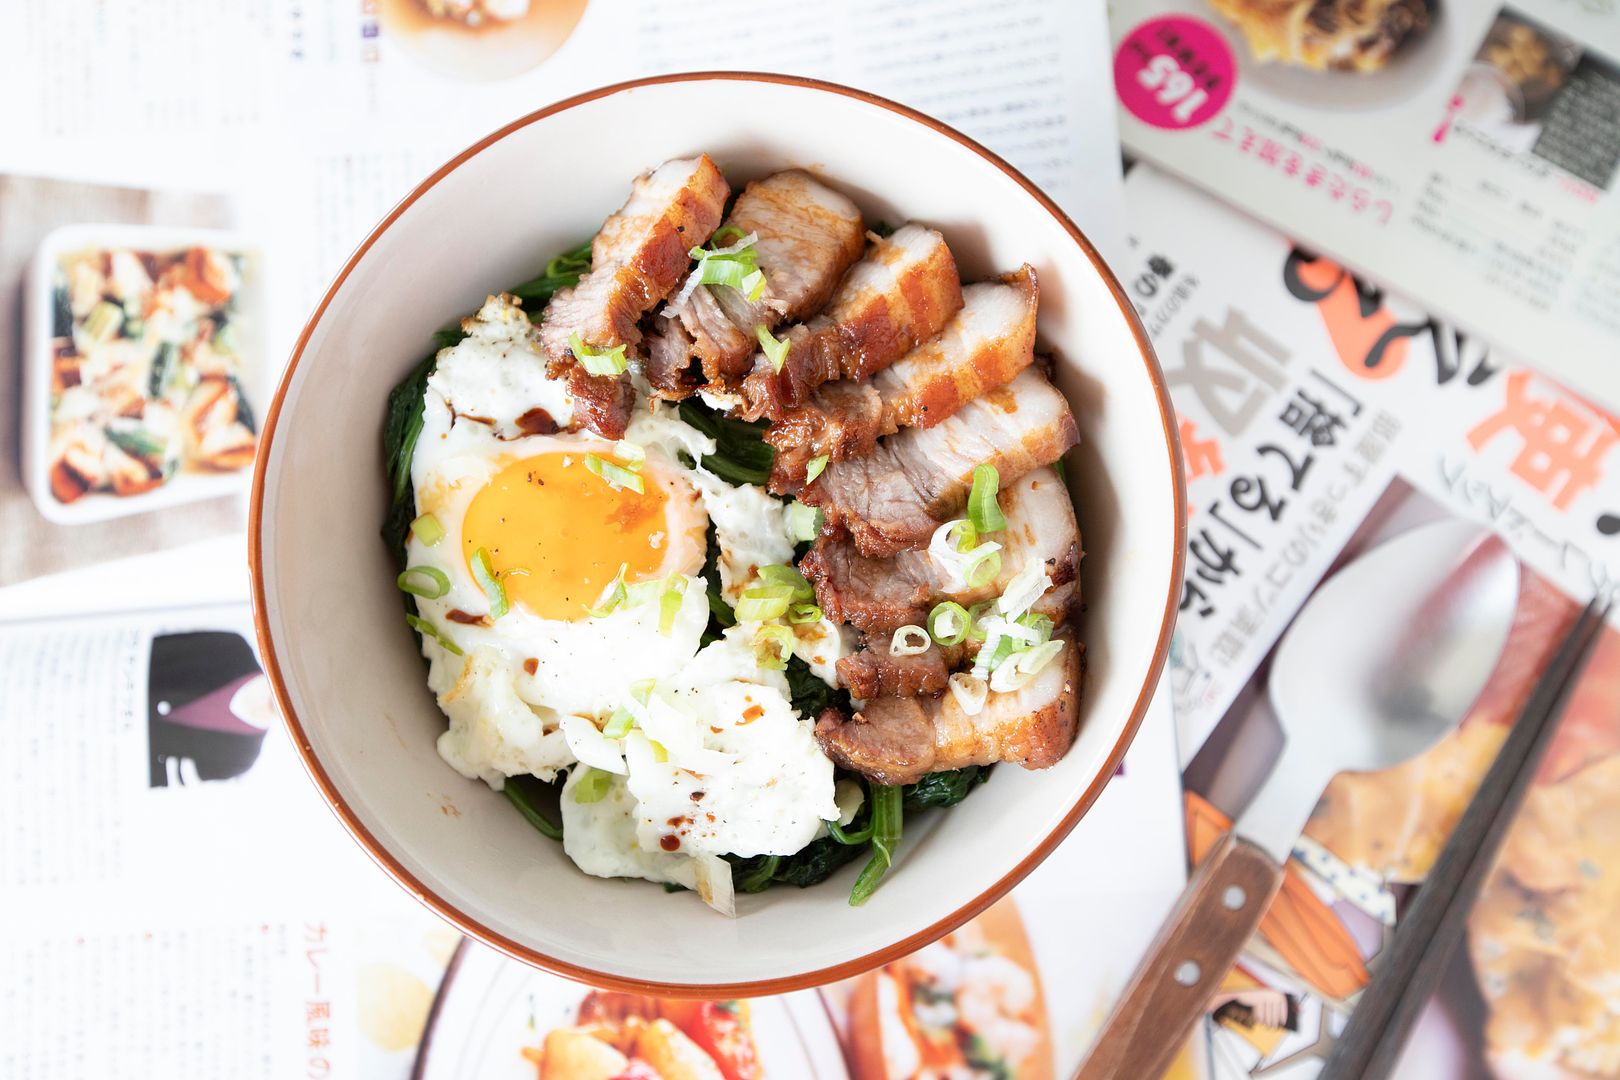
Monday blue, so comfort food came to a rescue. This recipe got all the elements for my type of Asian style comfort food - steamed rice top with braised pork belly, veggies, and to make it even better, a sunny-side up egg.
Shaoxing pork rice bowls 紹興豬肉丼 -
Ingredients (for 3 to 4 portions)?
- 1 lb pork belly strips
- 1 big bundle spinach
- 8 garlic cloves
- 2 ginger slices
- 1/2 cup soy sauce
- 1/3 cup aged Shaoxing wine
- 2 star anise
- 2 cubes crystal sugar
- 1 stalk scallion
- Some olive oil
- Some salt
- Some black pepper
- 3 to 4 portions steamed rice
- 3 to 4 eggs
How?
Cook the rice first and keep it warm.
Peel garlic cloves, save 5 as a whole and roughly chop the other 3. Cut the spinach into shorter sections. Destem and chop the scallion. Slice old ginger, about 1.5 mm thickness. Cut the pork strips into two shorter sections, just make sure the meat can fit into the clay pot.
Use a pan first to prepare the sides. Drizzle enough olive oil to coat the bottom of the pan and turn to high heat. Before the oil gets hot, add in chopped garlic and 1/2 teaspoon of salt. Once aromatic but not burning the garlic, add in spinach and cook till wilted. Scoop out and set aside for later use.
Wipe the pan with a kitchen towel and drizzle more oil. Turn to medium high heat and wait till the surface gets hot. Crack in one egg at a time to make some sunny-side ups. During the process, dust the eggs with some salt and black pepper. Cook till the edges of the egg whites turn slightly browned and crisp, but the center yolk remains gooey and semi-cooked through. Remove from heat and set aside for later use.
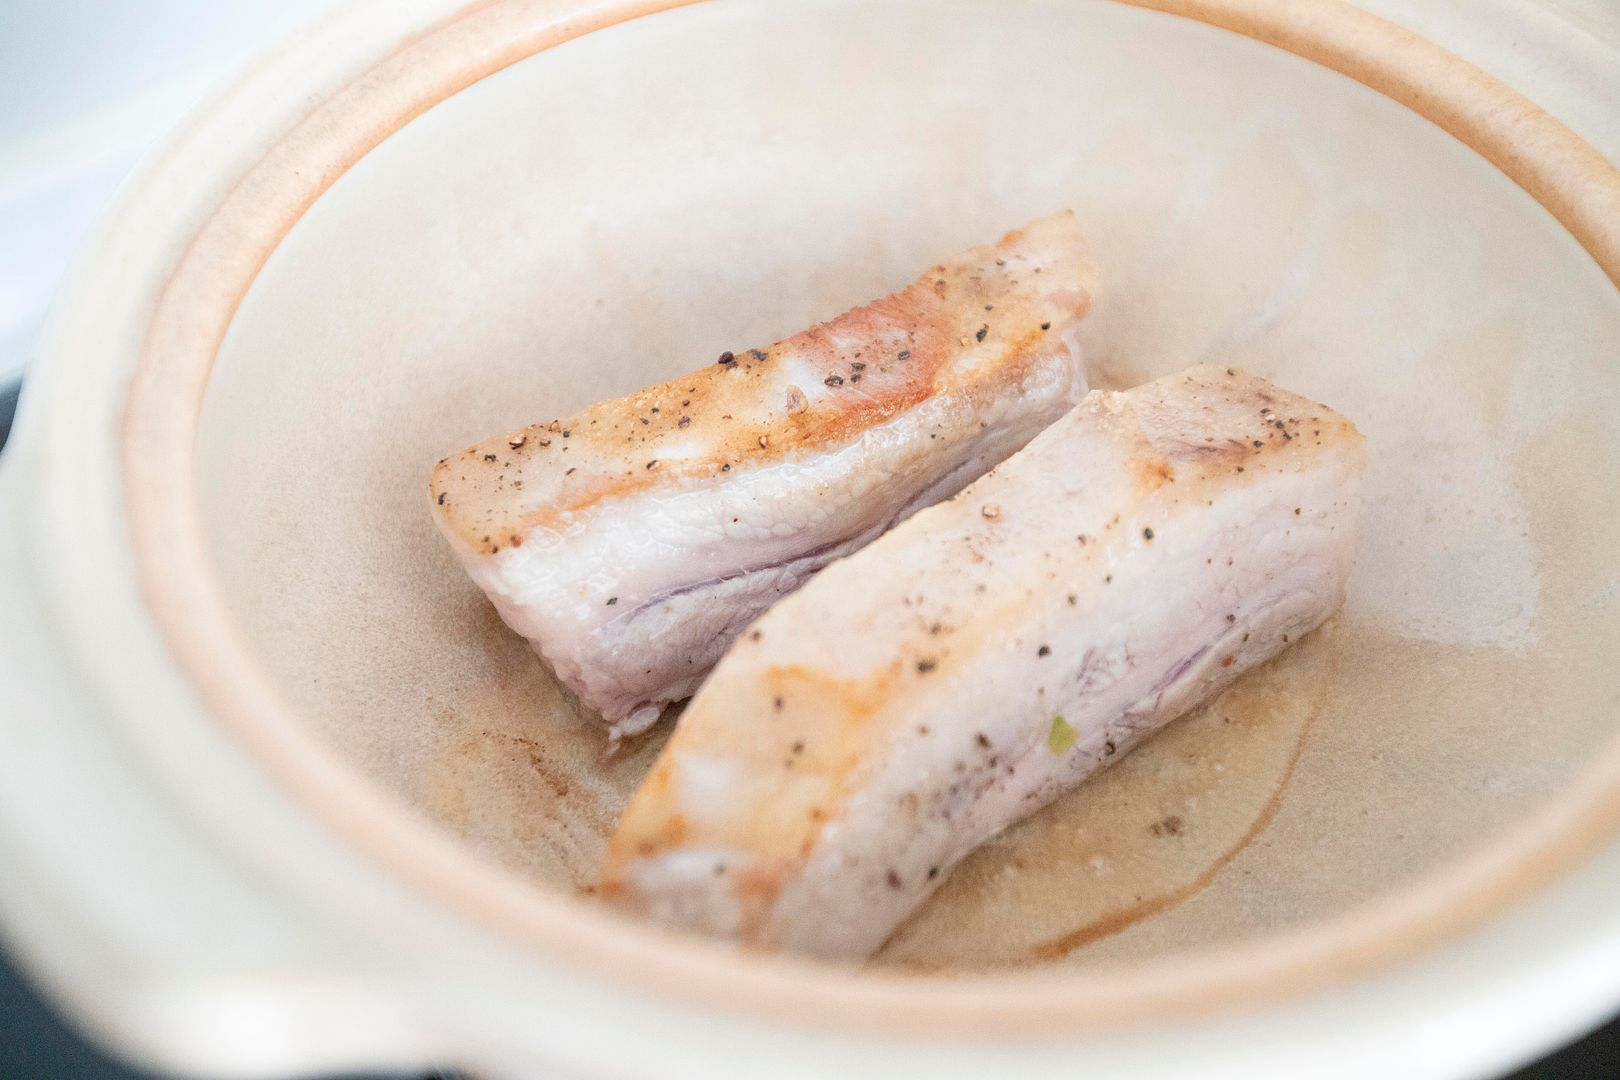
Now bring out the clay pot. First, season the top and bottom sides of the pork belly with some salt and pepper.
Second, lightly oil the surface of the clay pot and turn to medium high heat. Once the oil gets hot, transfer the pork over and sear till colored. Flip and sear the other side.
Once both sides get that delicious looking color, pour in 1/2 cup of soy sauce, 1/3 cup of Shaoxing wine, 2 star anise, 5 garlic cloves, and 2 ginger slices. Bring to a boil then lower to a simmer. Cover with lid and braise for about 20 minutes. Check and flip the meat once awhile to ensure even cooking.
Towards the end, add in 2 crystal sugar cubes. Put the lid back on and turn off the heat. Wait till the sugar has been fully dissolved and blended with the sauce.
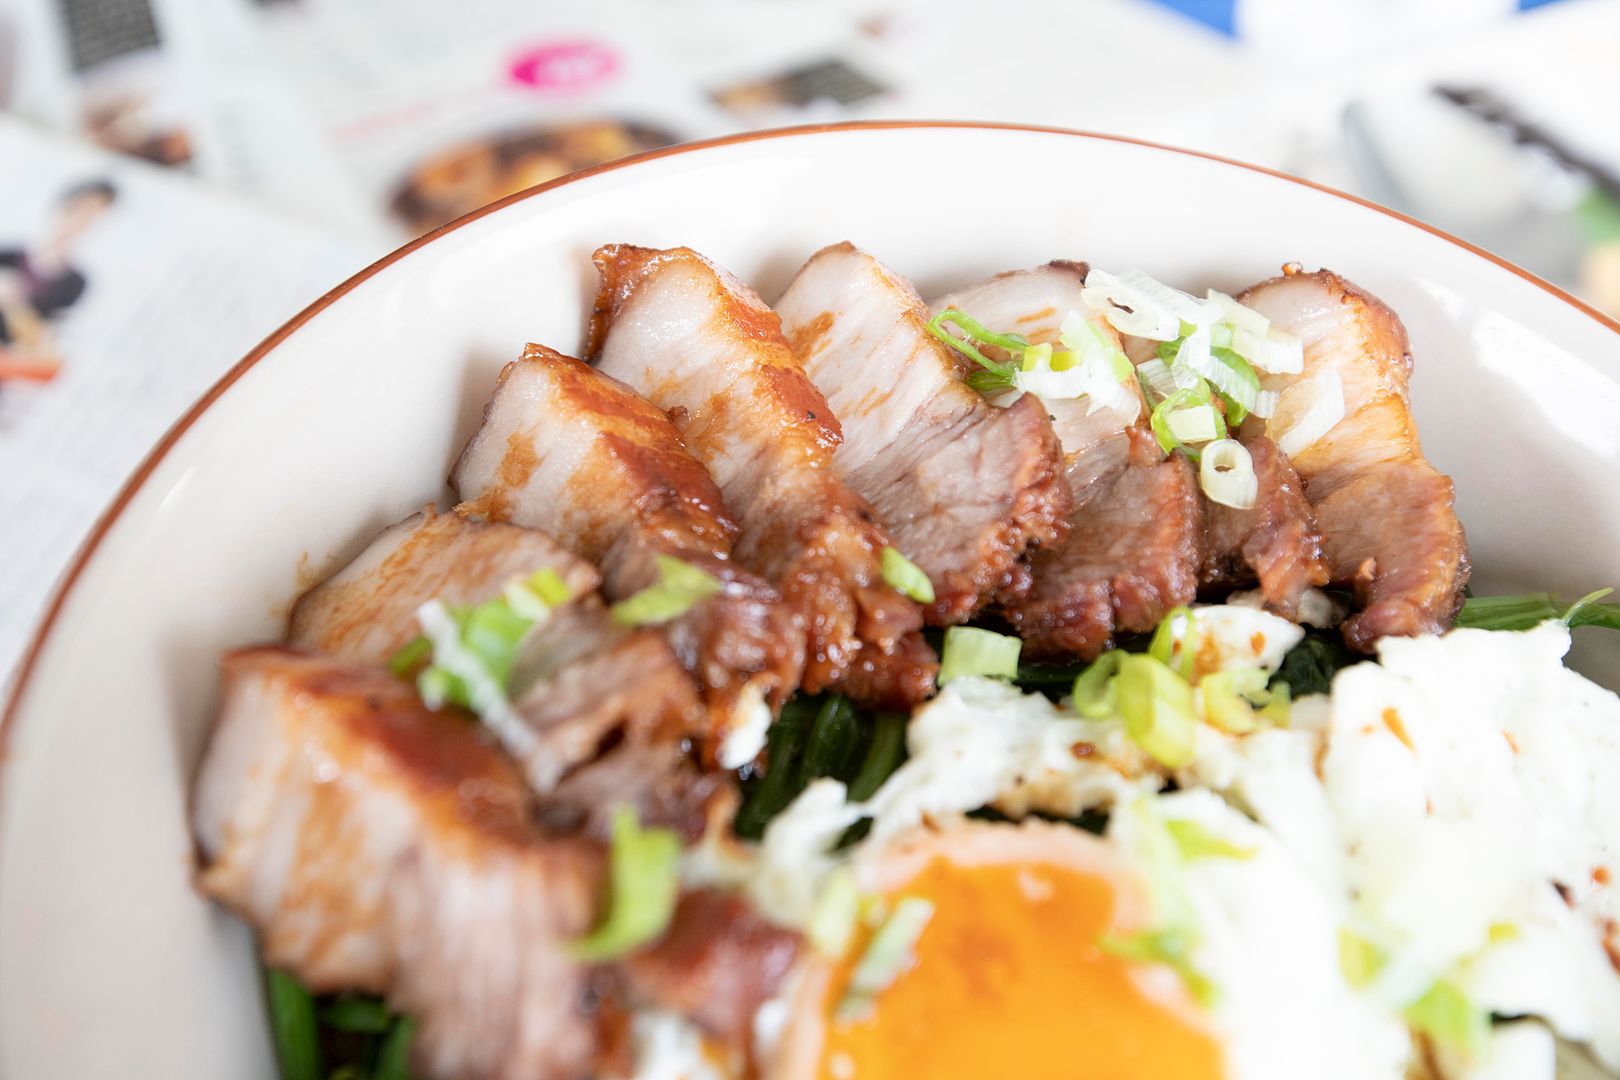
Take the pork belly out and rest for 5 to 10 minutes. Once cools down, slice the pork, about 2 mm to 3 mm thickness.
To serve the meal, scoop some steamed rice to serving bowls and top with a layer of simple spinach stir-fry. Add the egg on one side and lay down pork slices on the other side. Drizzle some thickened sauce all over and sprinkle some chopped scallion.
This braised pork belly is on the saltier side, so I purposely made the sides lighter with less salt. Adjust the flavors per your reference if needed.
This Monday not so blue anymore.
Other rice bowl recipes:
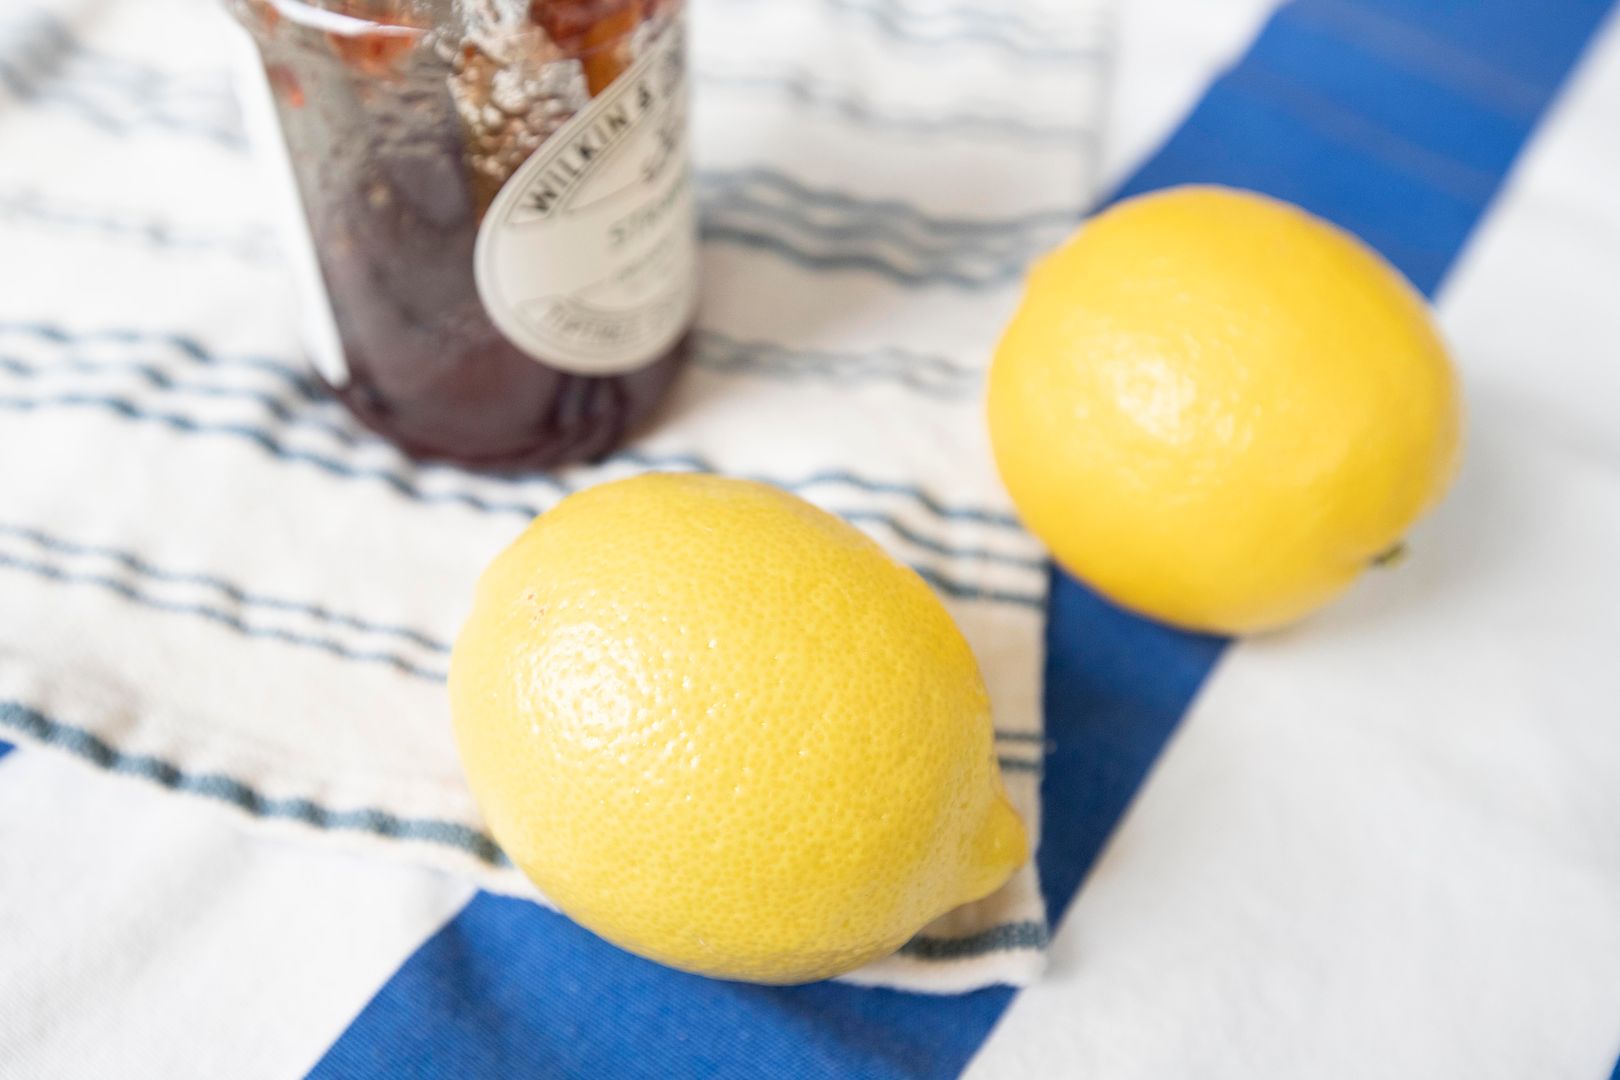
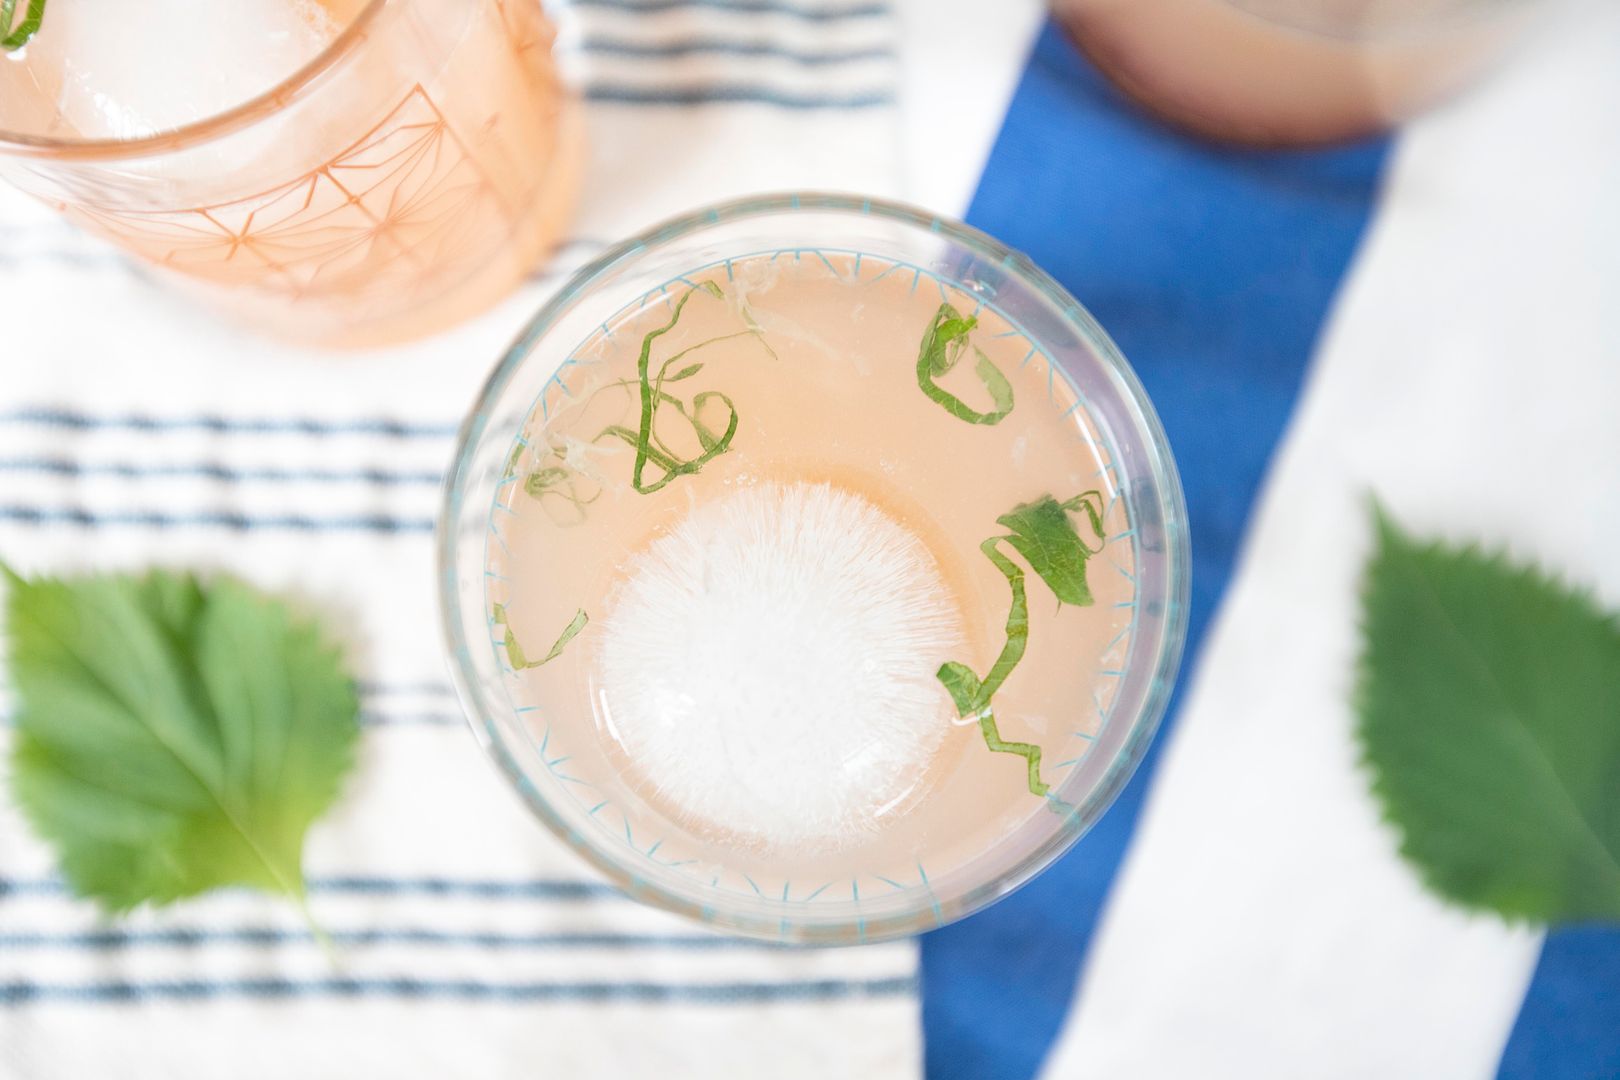
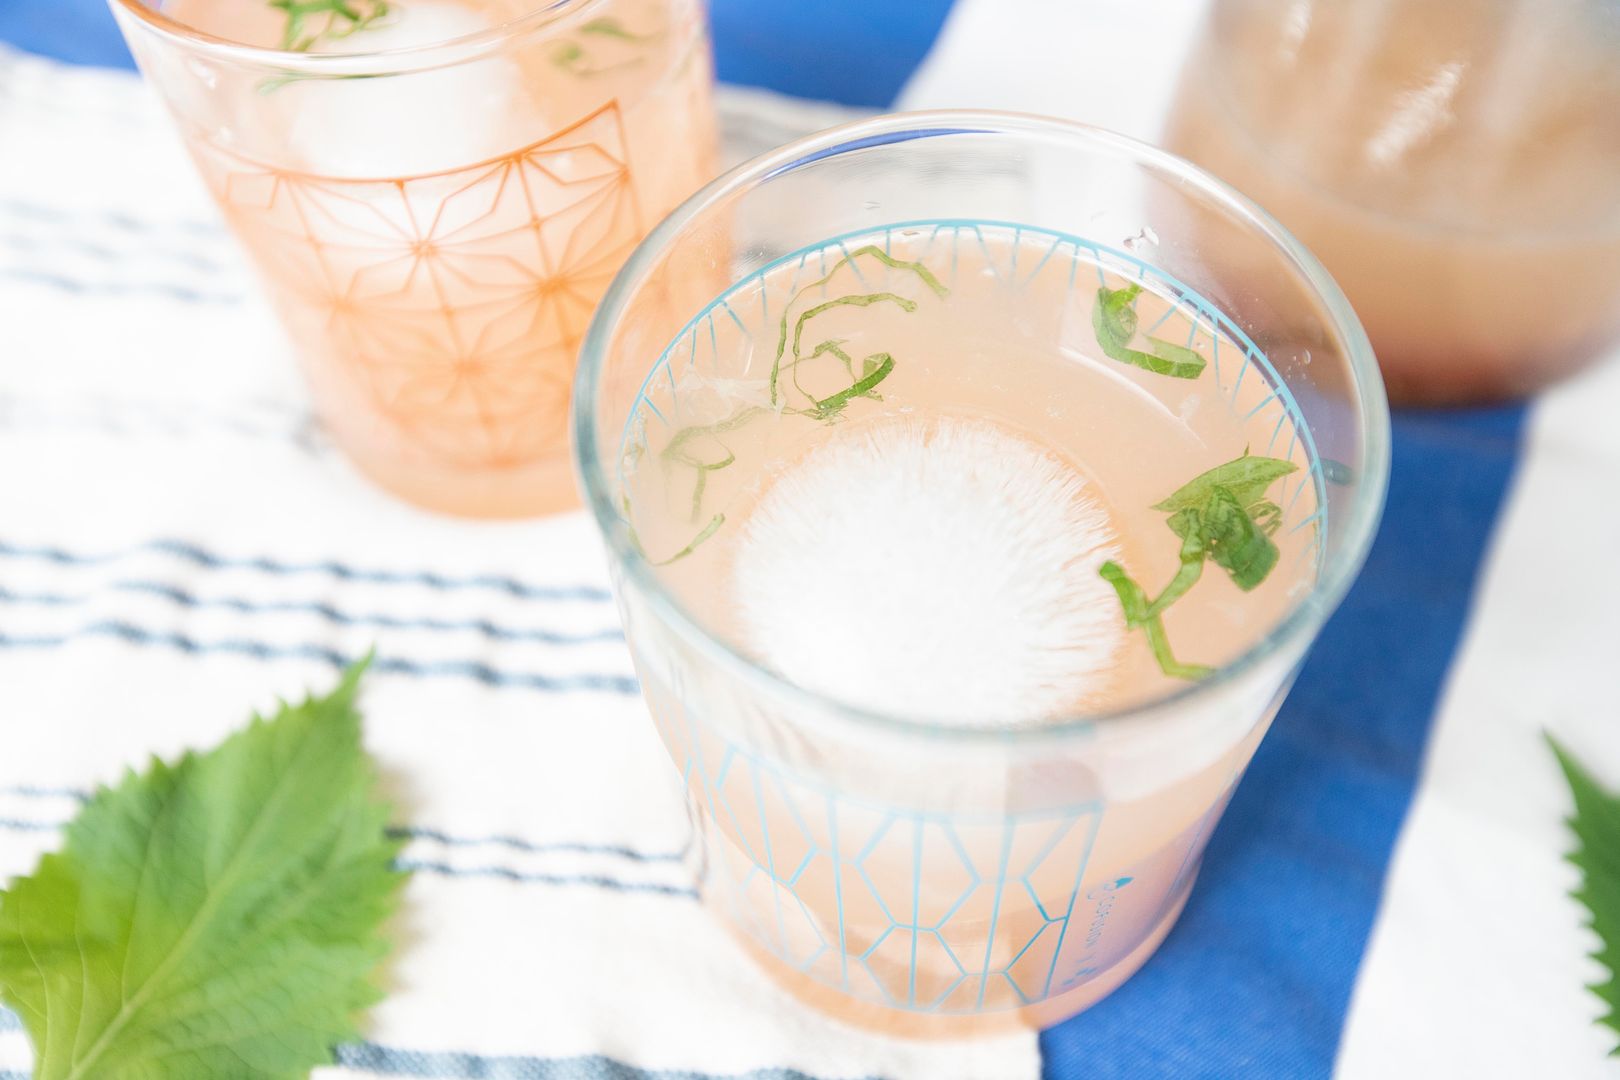
Believe it or not, I couldn't find any squeezer so indeed it was truly freshly "squeezed" lemon juice, by hand. A little workout before sipping on my lemonade.
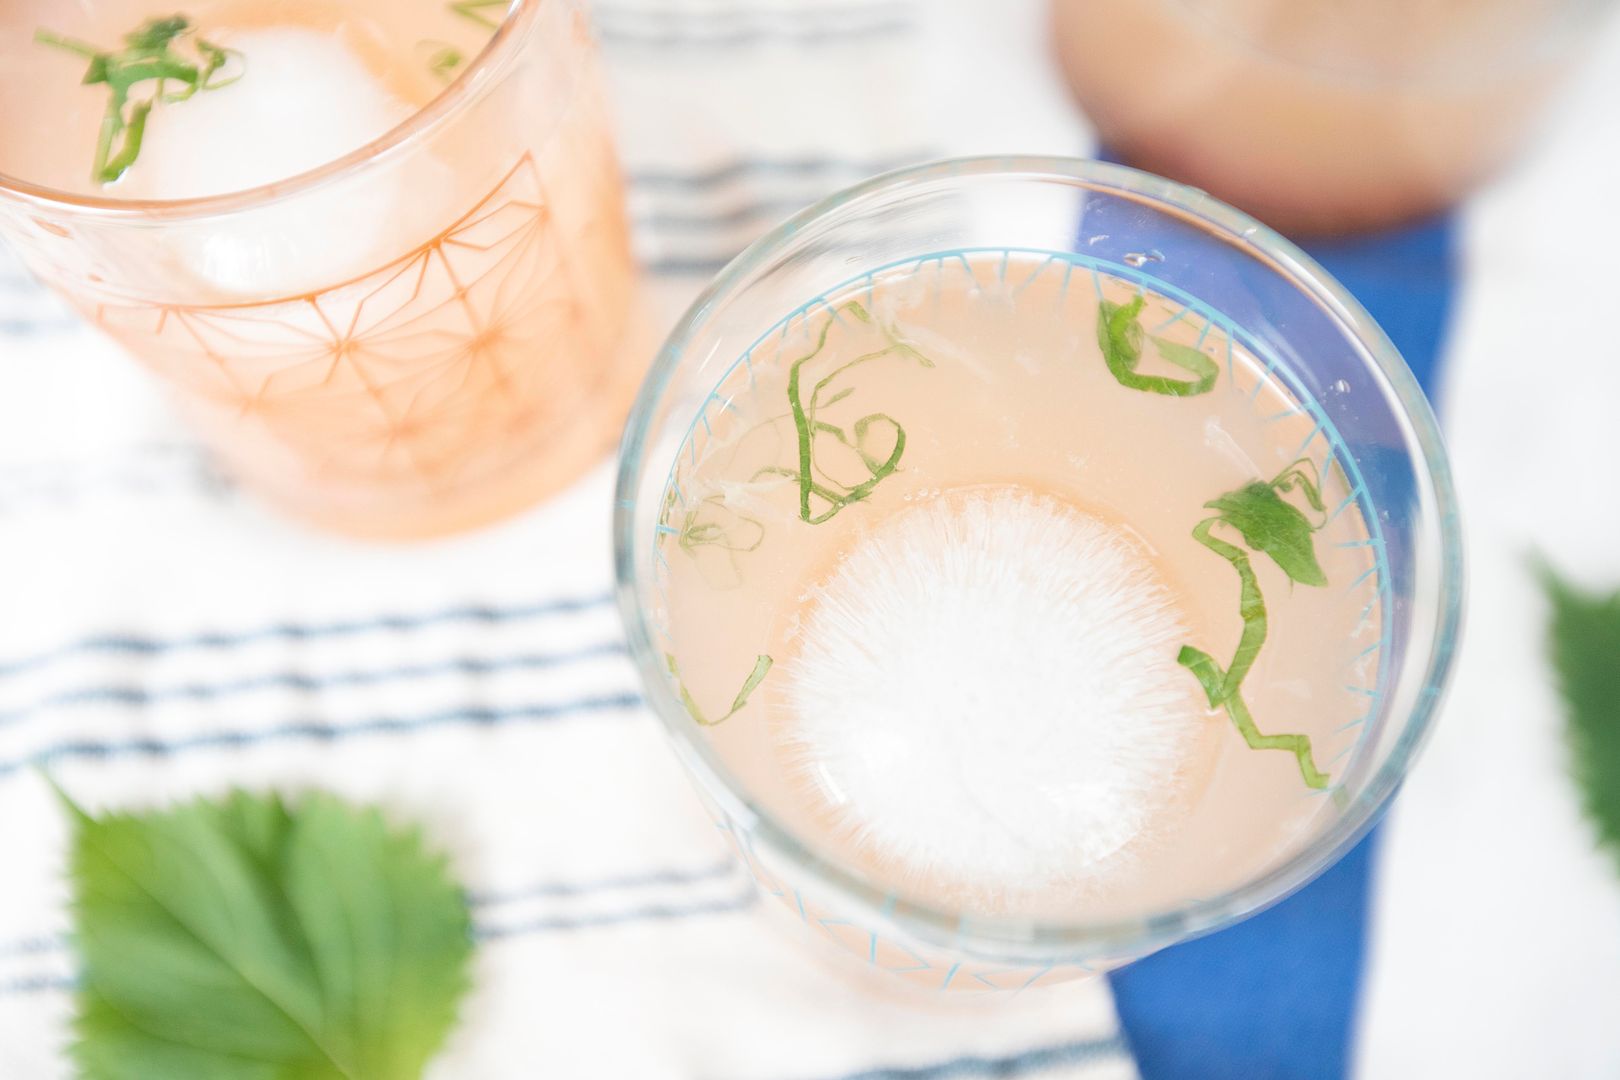
Strawberry lemonade -
Ingredients (makes 3 medium portions or 2 medium/large portions)?
- 1/2 cup fresh lemon juice (about 2 lemons)
- 1/2 cup hot water
- 1 1/2 cups cold water
- 2 tablespoons strawberry jam
- 2 tablespoons raw cane sugar
- 1 shiso leaf
- 2 to 3 big ice cubes
How?
Squeeze lemons and get 1/2 cup of juice. Julienne shiso leaf.
Take a pitcher, mix in raw cane sugar along with hot water. Mix or cover with lid and shake till the sugar has been fully dissolved.
Pour in lemon juice and 1 cup of cold water, shake or stir to mix. On the side, mix the strawberry jam with 1/2 cup of cold water till almost dissolved. If the jam used comes with chunky fruit, just let it be and don't bother too much to break them apart perfectly. Pour that into the pitcher and shake or stir till incorporated again.
Store the lemonade in the fridge to speed up the cooling process, or just add ice cubes to serving cups then pour in the lemonade. Garnish with shiso leaf, it'll add an elegant herbal note to the drink. Mint leaves work just as well.
This recipe yields a more sourish lemonade, so if a sweeter taste is preferred, go ahead and double the amount used for either cane sugar or strawberry jam.
Two tablespoons of sugar plus sweet jam, that means 1 tablespoon of sugar for one larger serving. Sounds like a lot of sugar? You'll be amazed, or so scared by knowing how much sugar actually put in sweetened drinks. I'm not telling you to quit sugar completely. After all, we all need that happy boost in life once a while. But do try to lower the sugar intake once a while, yep?
Other recipes using fresh lemons: