I've always stocked some frozen meat and canned vegetables at home just in case the food runs out. In order to keep these stored ingredients fresher, I try my best to finish a portion and restock a new batch after a certain period.
There were a few lower quality frozen steaks sitting in the freezer for quite some time. In order to switch these steaks into the wagyu beef I've been eyeing on, it's time to finish them off, in a delicious way!
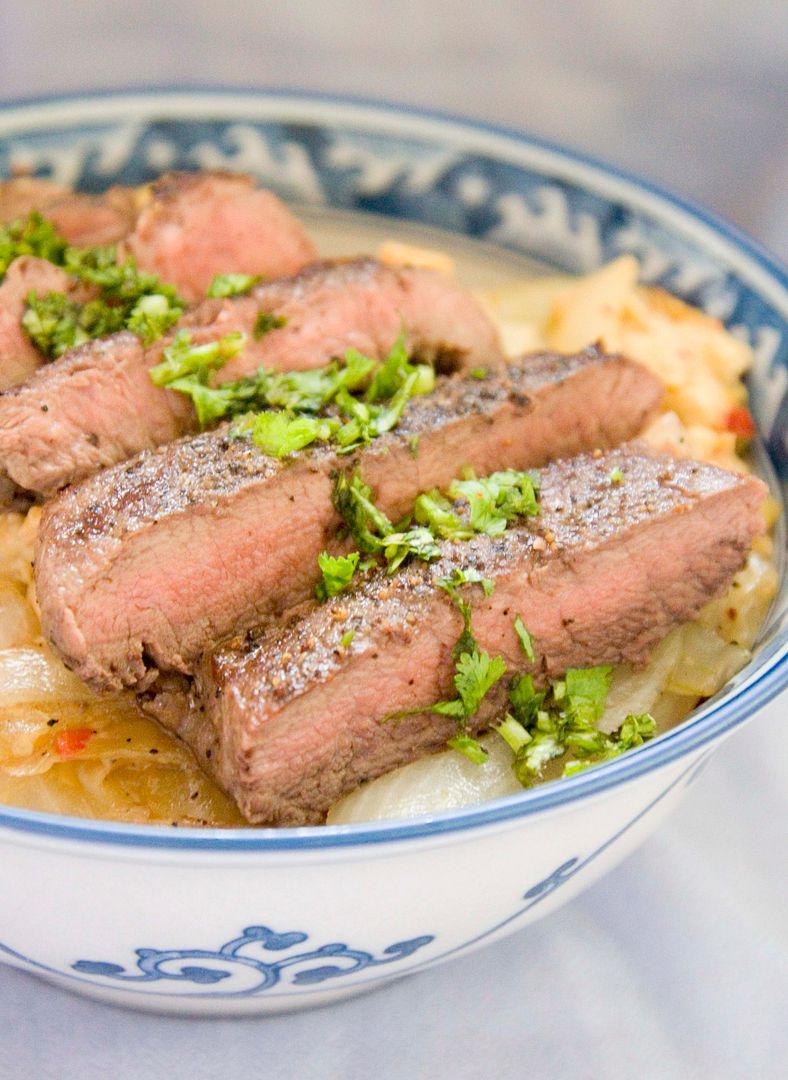
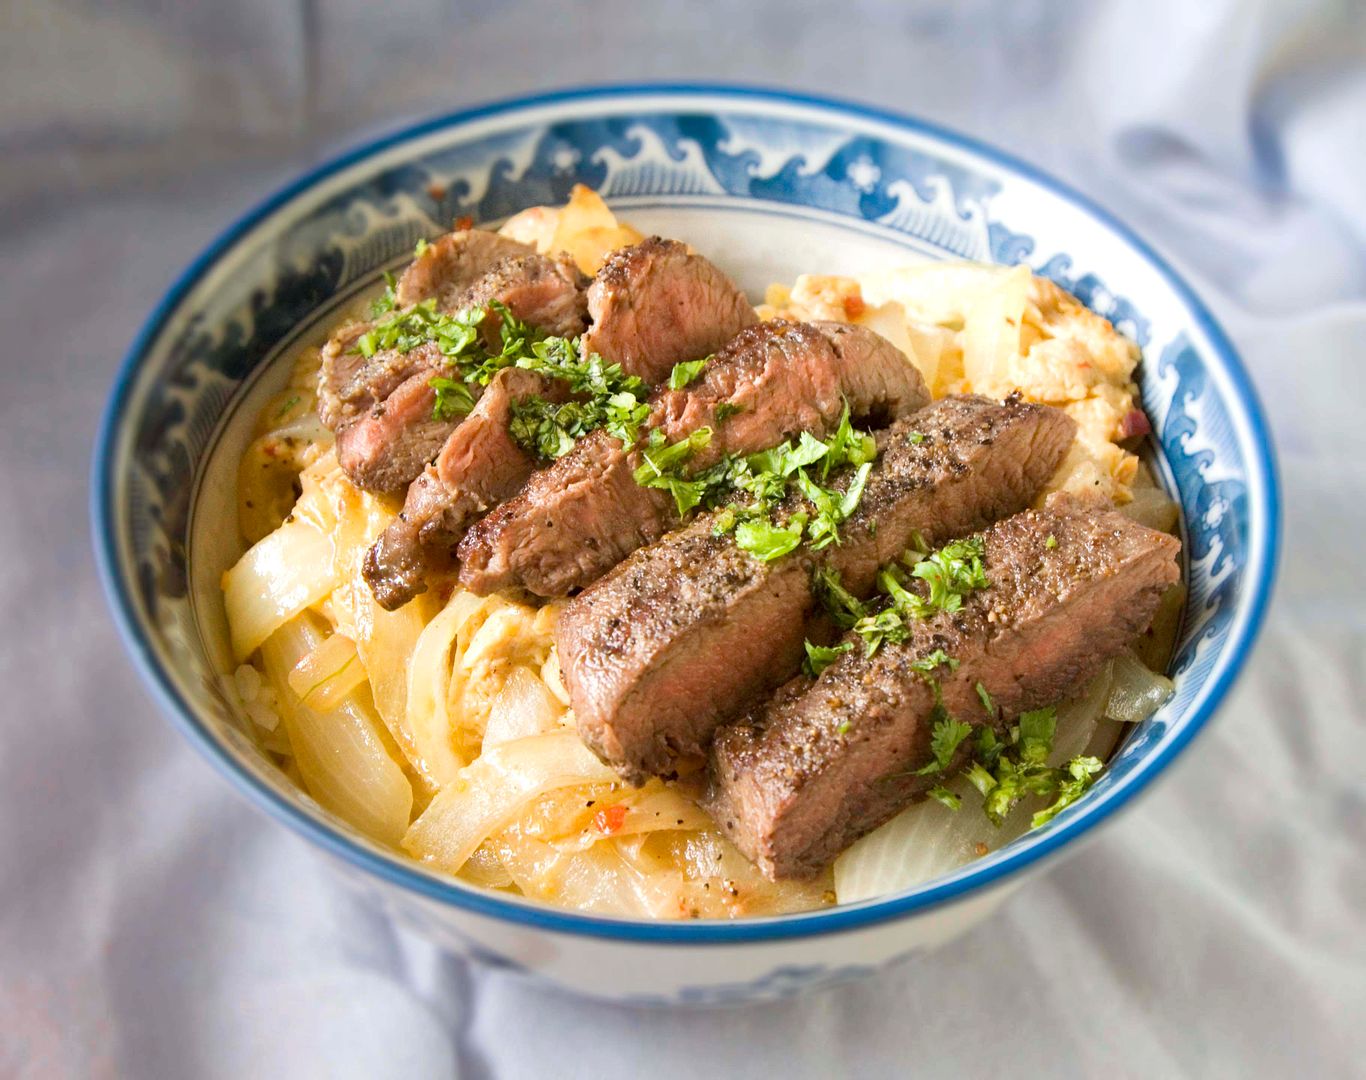
Grilled steak oyakodon style -
Ingredients (for two)?
- 2 small steaks (mine is about 240 grams each)
- 2 eggs
- 2 red chilies
- 1 onion
- 2 tablespoons of tsuyu/dashi (I used triple concentrated katsuo flavored tsuyu)
- 1 tablespoon of mirin
- 1/2 cup of water
- Some sea salt
- Some freshly ground black pepper
- Some olive oil
- Some cilantro
- Some steamed white rice
How?
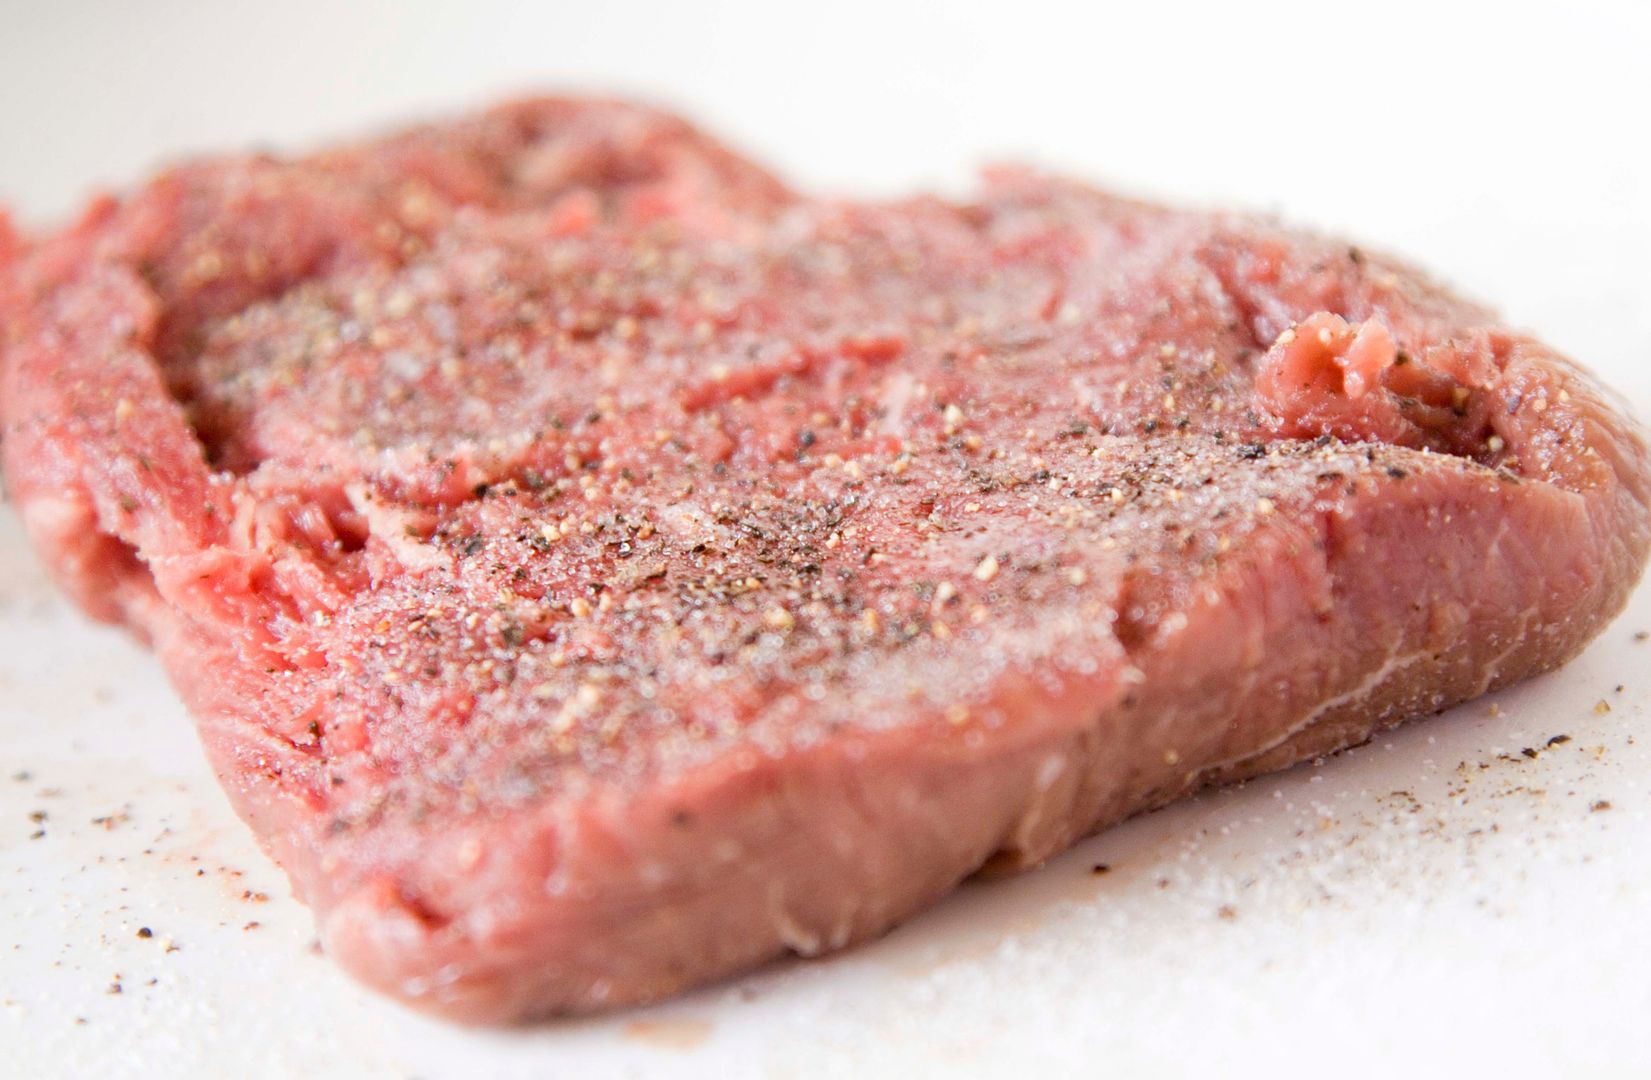
Make sure to take out the steaks from the fridge and wait till the meat reach room temperature before cooking. Sprinkle a thin layer of sea salt and freshly ground black pepper on both sides.
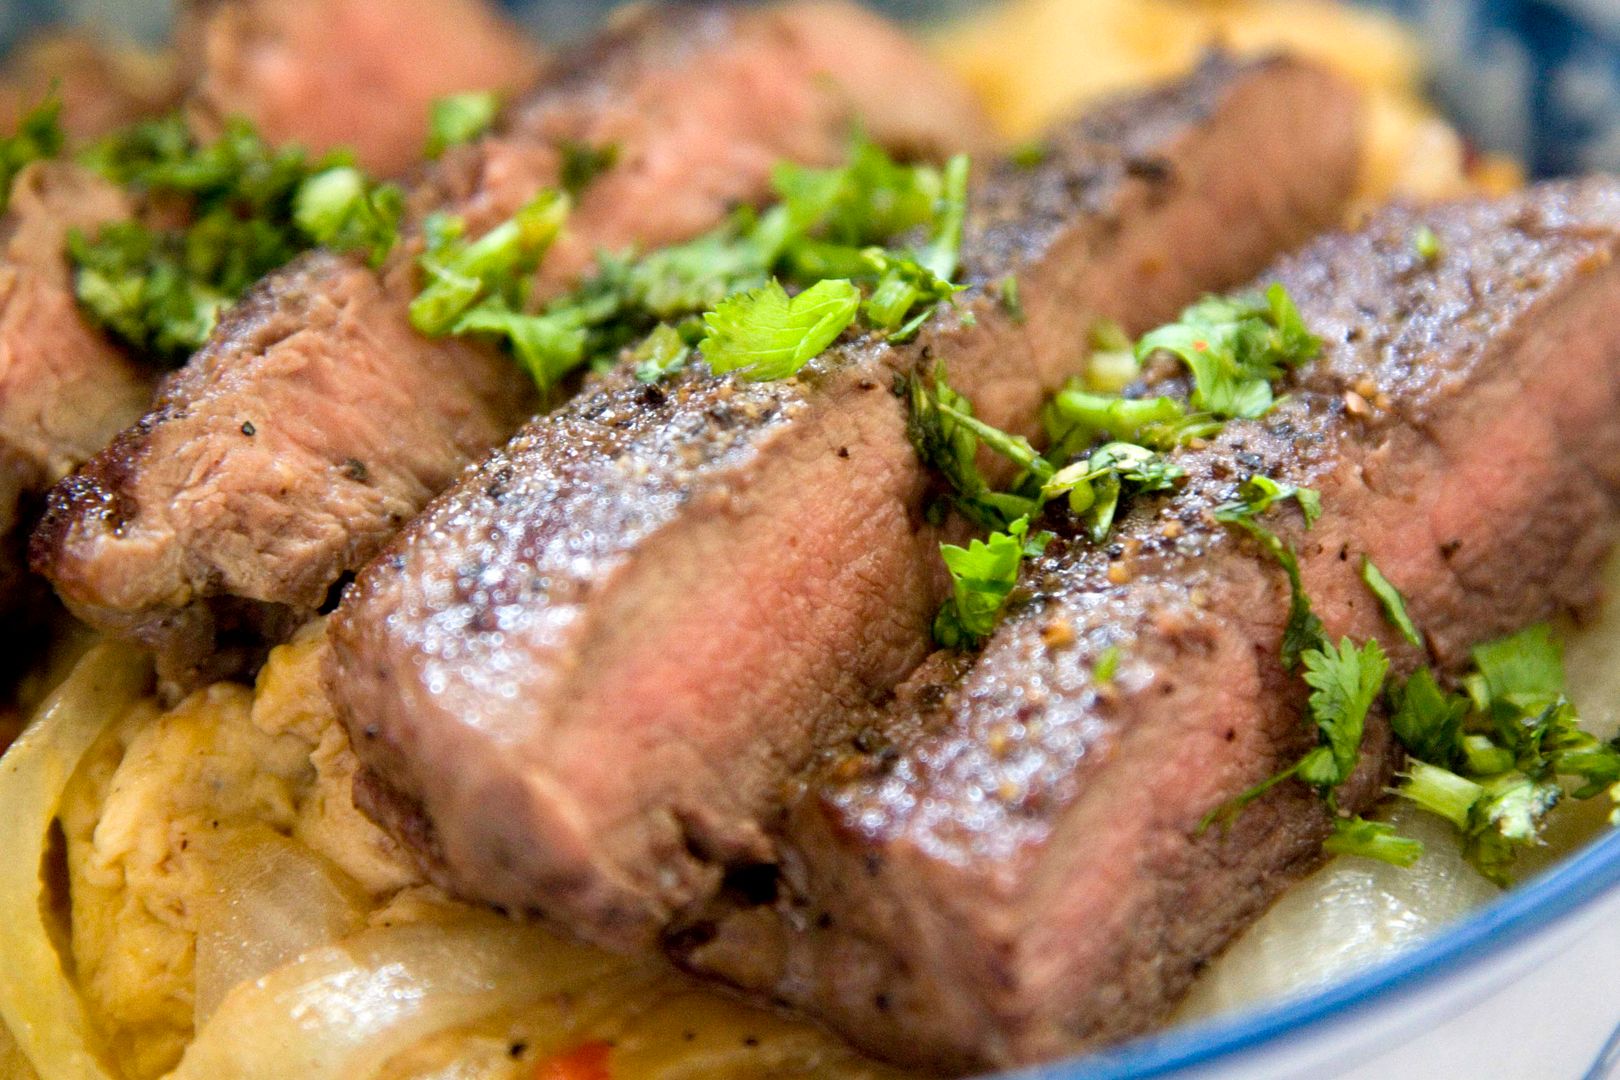
Drizzle about one tablespoon of olive oil on the grill pan and turn to medium high heat to warm up the pan first. Once the pan gets hot, add in the steaks and make sure not to move them around. The beef is still raw and might stick onto the grill, so we have to wait a little bit first. Sear the steaks about 3 to 4 minutes on each side, depending on the preferred rareness. For this recipe, I prefer the surface of the meat to be nearly burned and still slightly pink on the inside.
Once done, remove from heat and let the beef rest for about 5 minutes before slicing. Again, the thickness of the steak slices all depends on your own preference. I was in the mood for chunky meaty bites so my steak slices here are fairly thick.
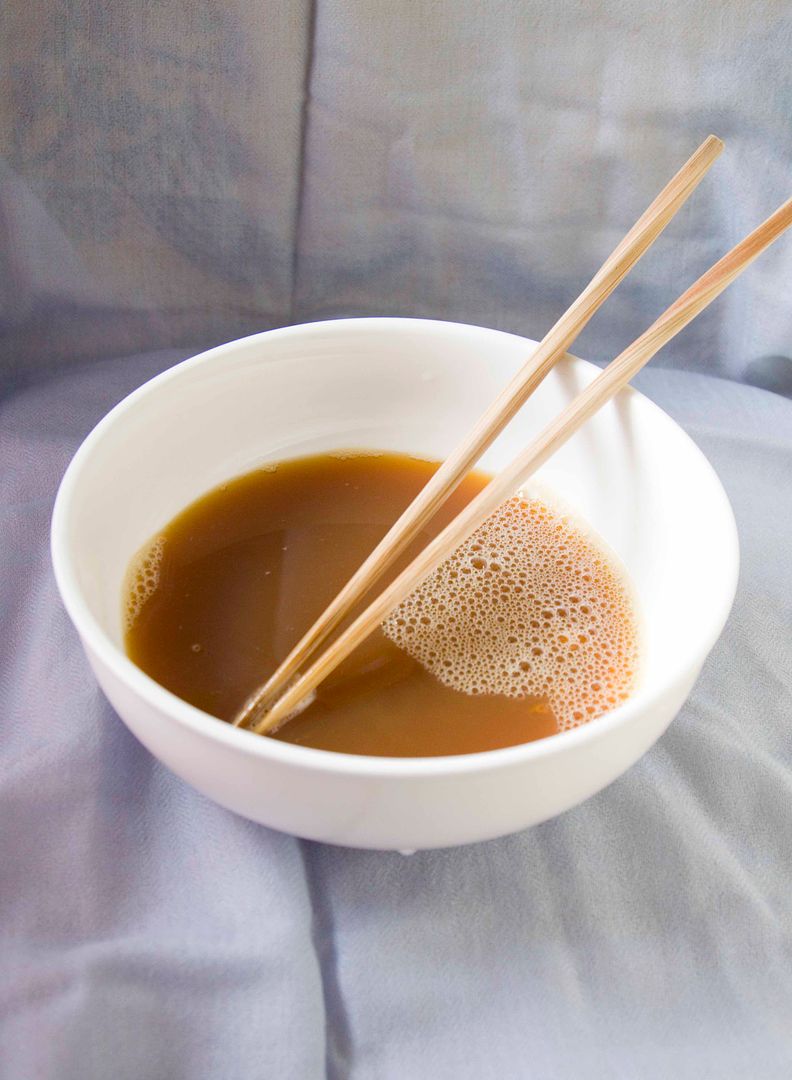
To make the egg mixture, break two eggs into a bowl. Also add in 2 tablespoons of tsuyu/dashi, 1 tablespoon of mirin or Chinese cooking wine, 1/2 cup of water. Mix all the ingredients and set aside for later use.
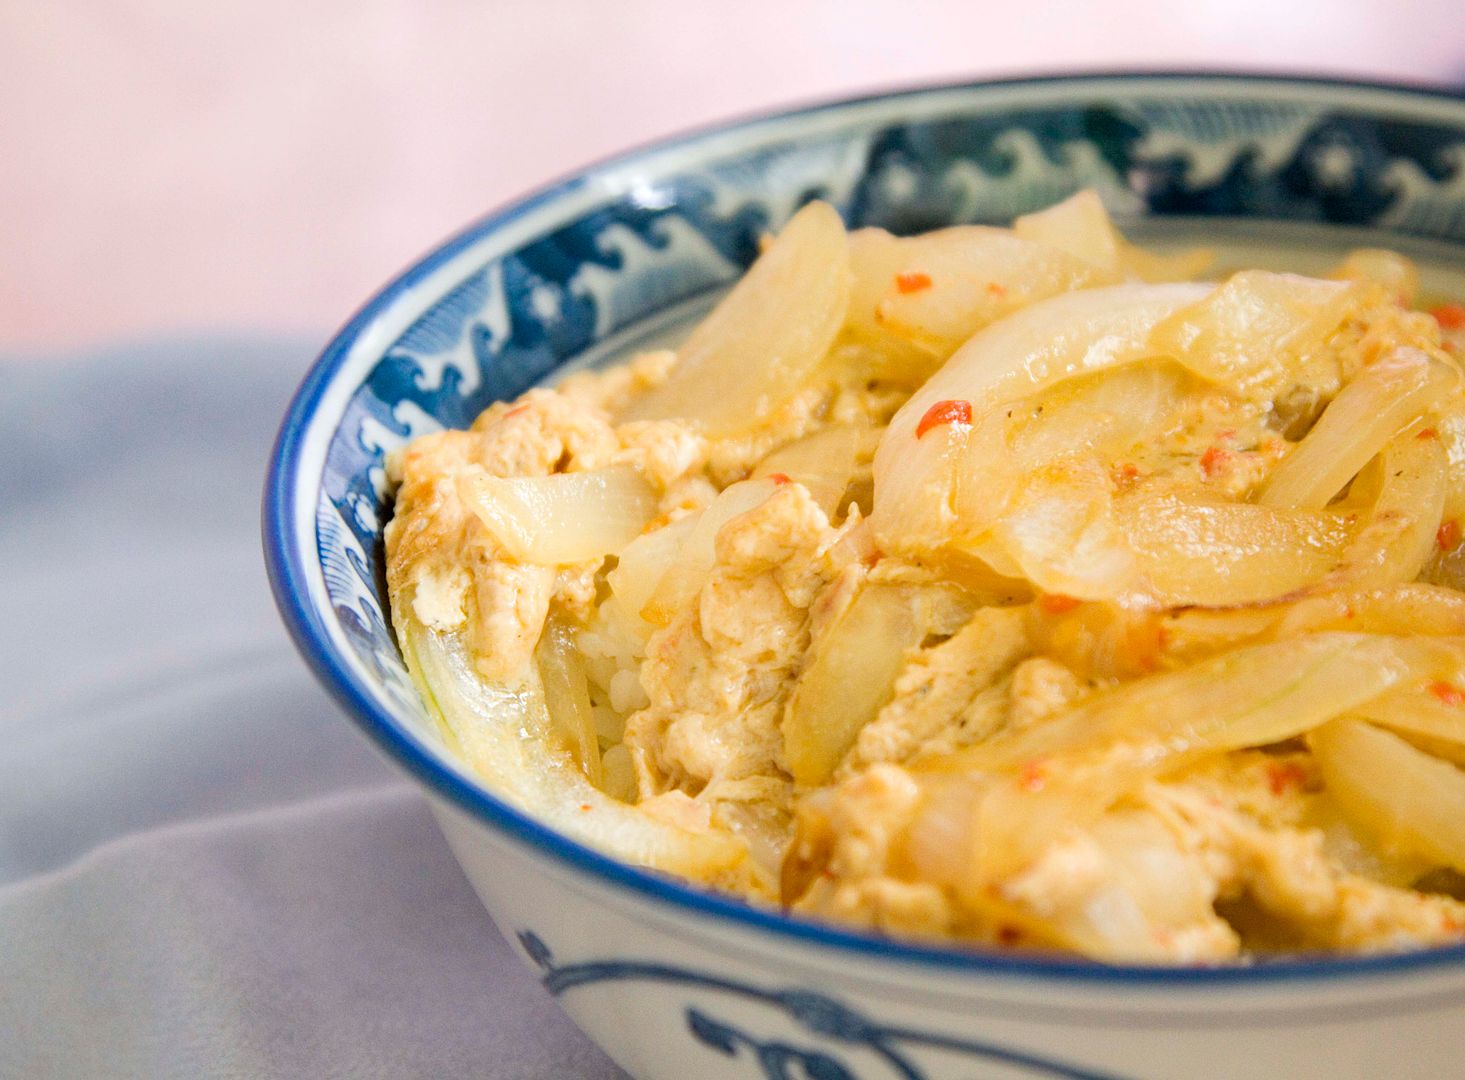
In the same pan, add in two more tablespoons of olive oil and turn to medium high heat. Add in peeled and sliced onion, sprinkle just a little bit of salt, some freshly ground black pepper, and finely chopped red chilies. Give it a quick stir and cook till the onion turns translucent.
Turn to high heat when the onion slices are done. Pour in the egg mixture and give it a quick stir so all the onion slices are "soaked" in the mixture. Turn off the heat right away and let the remaining heat continue to cook the eggs till about 80% doneness.
Scoop some rice into a bowl and pour the onion and egg mixture on top -
Top the mixture with steak slices and garnish with chopped cilantro -
Cilantro has recently becoming one of my favorite ingredients to use as a garnish and as a fresh "pop" of flavors for Asian dishes. It doesn't carry a strong kick as scallion or chives, but can still help in bringing out the flavor just as well.
In addition, cilantro won't leave such strong after-taste or bad breadth in your mouth as uncooked scallion or chives. If you ever wanna give this recipe a try on a date night, cilantro will definitely be a good option that leads you to a romantic and odor free evening!
My mom was nagging about the wall colors started to fade, it was once vibrant and clean, now changing into pale yellow and dirty hue. Unfortunately my cooking took about 1/3 of the blame...seems like she thinks I failed to keep the kitchen grease away from the rest of the house because I didn't do the following:
The kitchen door has to be closed during the entire cooking process to block the oil and smoke from tainting the furniture. The full on ventilation needs to be operating at all times from the beginning till the end. The fan "outside" the kitchen needs to be on to help dissipating any greasy coming from the kitchen...and the list goes on...
Seriously, the walls still look white and the furniture still has it wooden shines seeing through my eyes. What can I say, I can stand up and fight for equality, fight for human rights, and fight for world peace. However, under my mother's reign, I'd better keep my mouth shut.
To make the situation better, I've decided to cook something less oily and easier to clean up. In fact, I'm gonna make this dish in her 30 minutes nap time, so she won't even notice a single trace of grease "lingering" in the house.
Chinese inspired tofu and mixed veggies -
Ingredients?
- 1 box/400 grams of semi-firm tofu
- 2 cups of beech mushroom and white beech mushroom mix
- 1 dozen okra
- 1 medium carrot
- 1 small bundle of cilantro
- 1/4 cup of dashi (I used triple condensed, katsuo flavored tsuyu)
- 1/4 cup of black vinegar
- 1/4 cup of black bean soy sauce
- 2 cups of water
- 1 tablespoon of sake
- 1 teaspoon of grated ginger
- 1 teaspoon of chili sauce
- Some corn starch/water mixture
- Some sesame oil
How?
Discard the okra stems and slice the remaining. It might get a little bit slimy but it'll help to create a smooth texture later on for this recipe.
Chop off and discard the very bottom stems from the mushroom. Halve lengthwise for the mushroom that are too large in size. Chop off the ends from the carrot, peel, and slice the remaining. Peel and finely chop the ginger. If the ginger is too fibery, grate it instead. Finely chop the cilantro.
Prepare a pot, pour in 2 cups of water, 1/4 cup of dashi, 1/4 cup of black bean soy sauce. Also add in chopped or grated ginger and some chili sauce. Bring to a boil then add in the mushroom and carrot. Give it a quick stir. Bring to a boil again and lower the heat to keep the mixture simmer, about 5 minutes.
Toss in sliced okra along with chopped cilantro. Mix well and cook for another 3 minutes.
Carefully remove the tofu from the box and discard the liquid. Gently transfer the tofu to the pot and cook in the mixture for about 4 minutes on each side. Don't worry about getting the center part of the tofu fully cooked through and colored with the sauce. In fact, the lighter flavored tofu actually works better with slightly salty veggies and sauce.
Once the tofu is done, transfer to a big plate or a bowl -
Mix some corn starch with already boiled water. I used about one tablespoon here but the stickiness can vary greatly depending on the corn starch. I might need 4 tablespoons if using the ones back in CA. Test it with smaller amount first, you can always use more corn starch/water mixture later on.
Slowly pour in the corn starch/water into the pot while stirring the vegetable mixture at the same time to prevent clumping. Adjust the amount used till it reaches desired consistency. Pour the vegetable mixture to the tofu plate. Lastly, drizzle some sesame oil and garnish with cilantro leaves.
The sauce is good with steamed white rice. This dish taste quite like the ones served in an actual Chinese vegetarian restaurant. Don't think of it as a plate of dull veggies. In fact, the sauce got so much flavors. It's salty, sourish, with a touch of sweetness from the black bean soy sauce. There's even a slightly spicy kick down the throat! Thanks to my homemade chili oil!
As for my mom, my plan is to just let her nag. After all, that's what most moms do.
Here's a simple summer frozen treat recipe. The ingredients used below either yields two smaller portions or one big serving all for yourself!
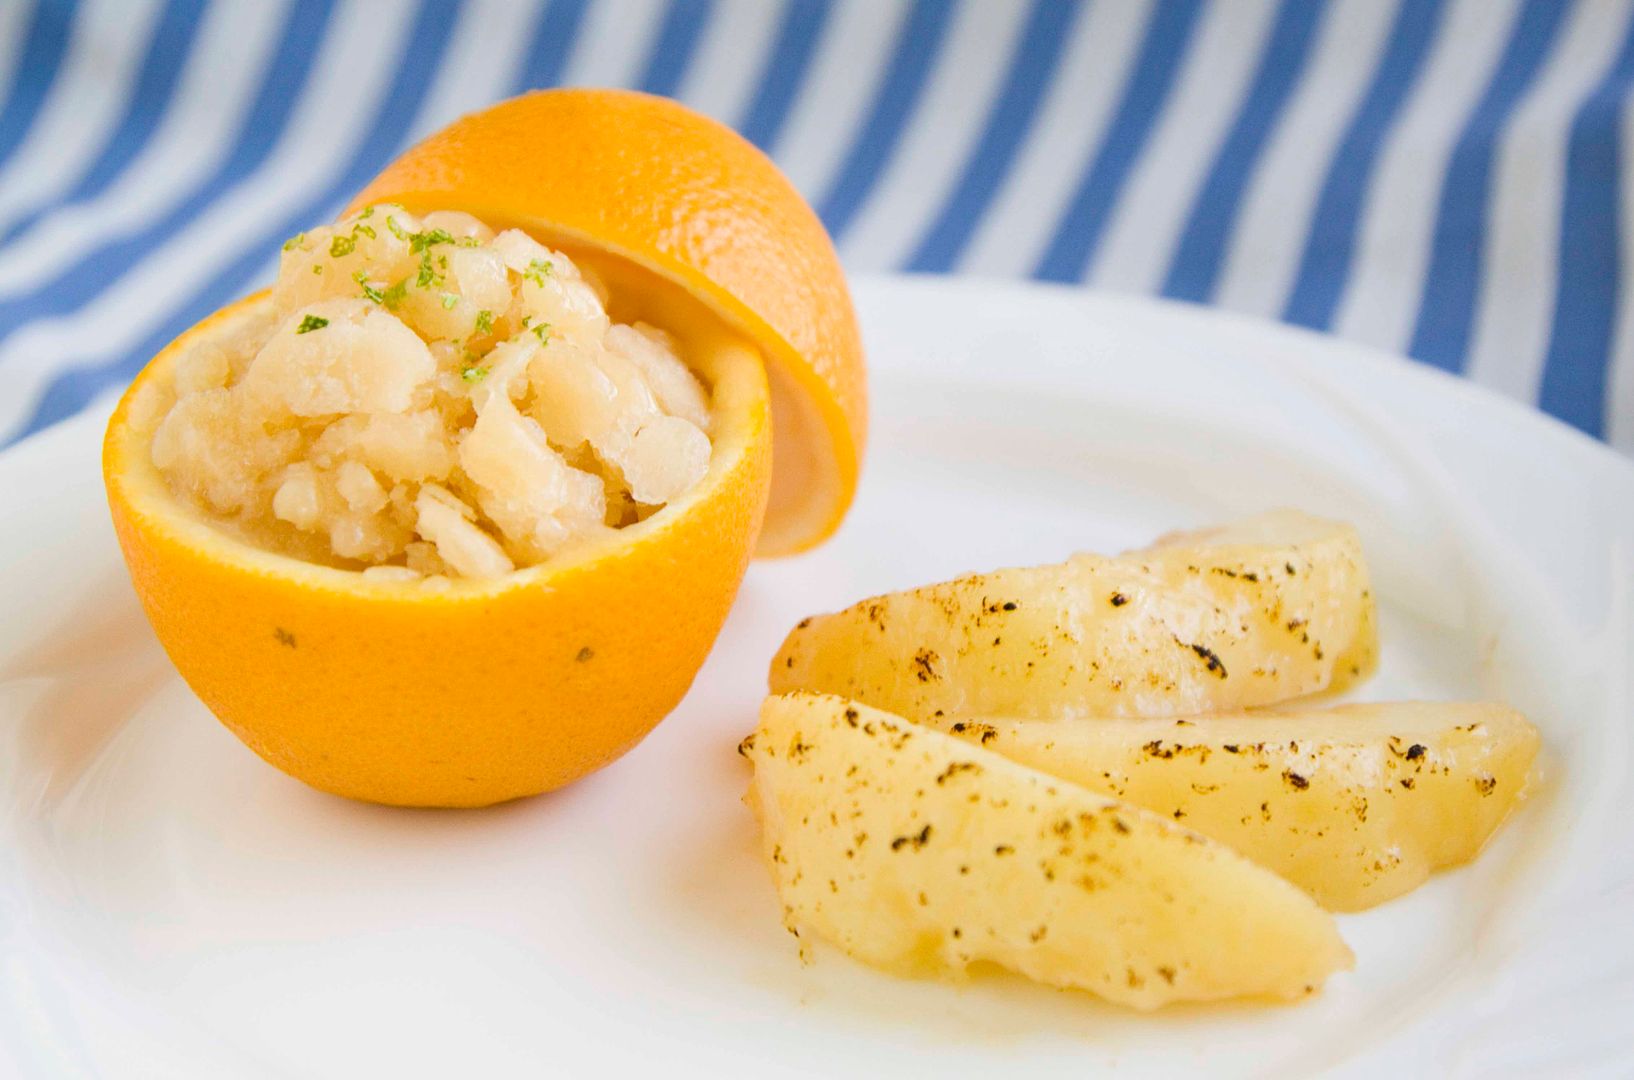
White peach granita -
Ingredients (for two)?
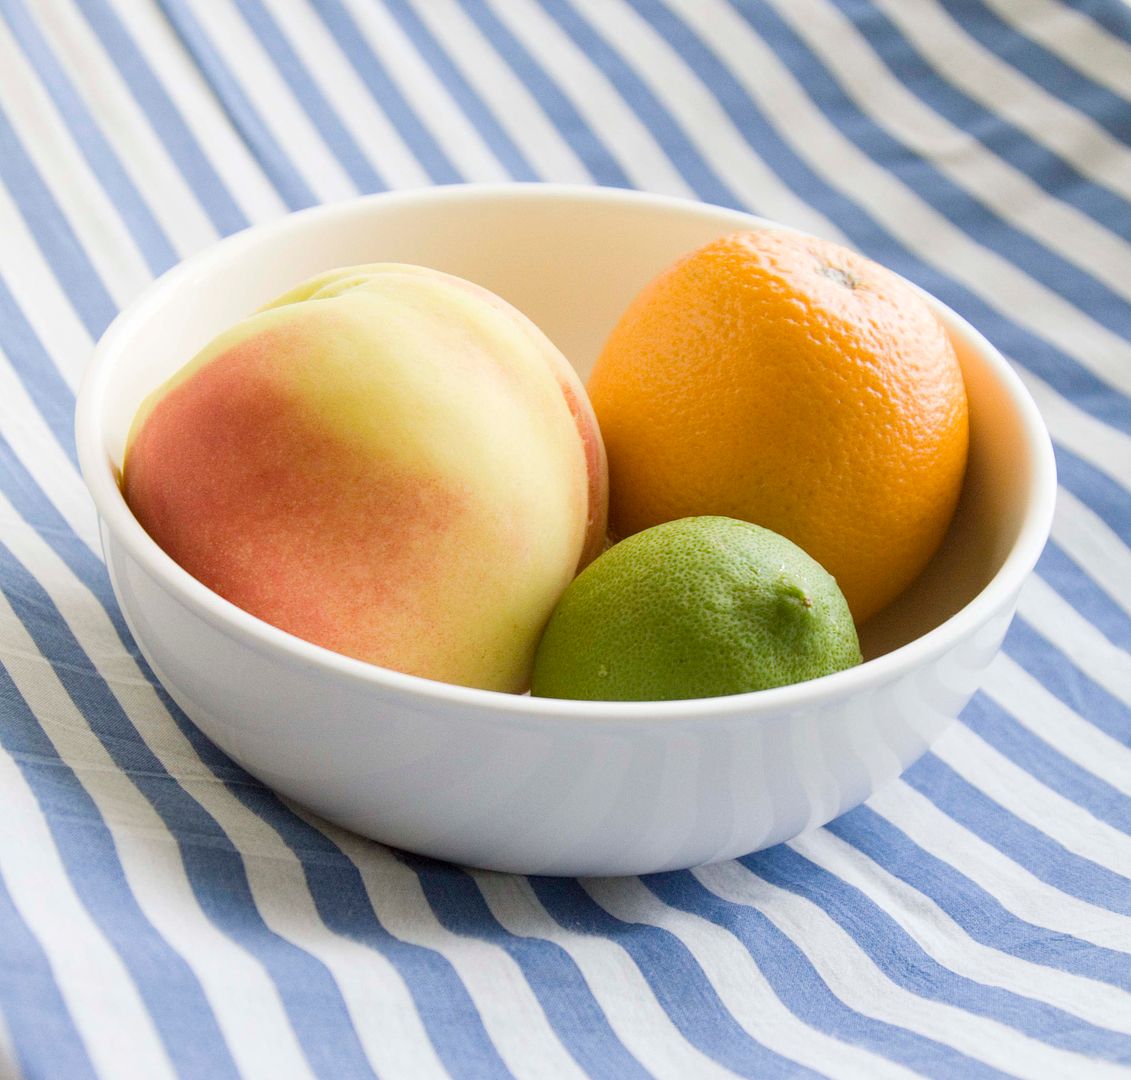
- 1 large white peach
- 1 lemon or lime
- 1 orange
- 2 teaspoons of granulated sugar
- Some sweet champagne or rosé (optional)
How?
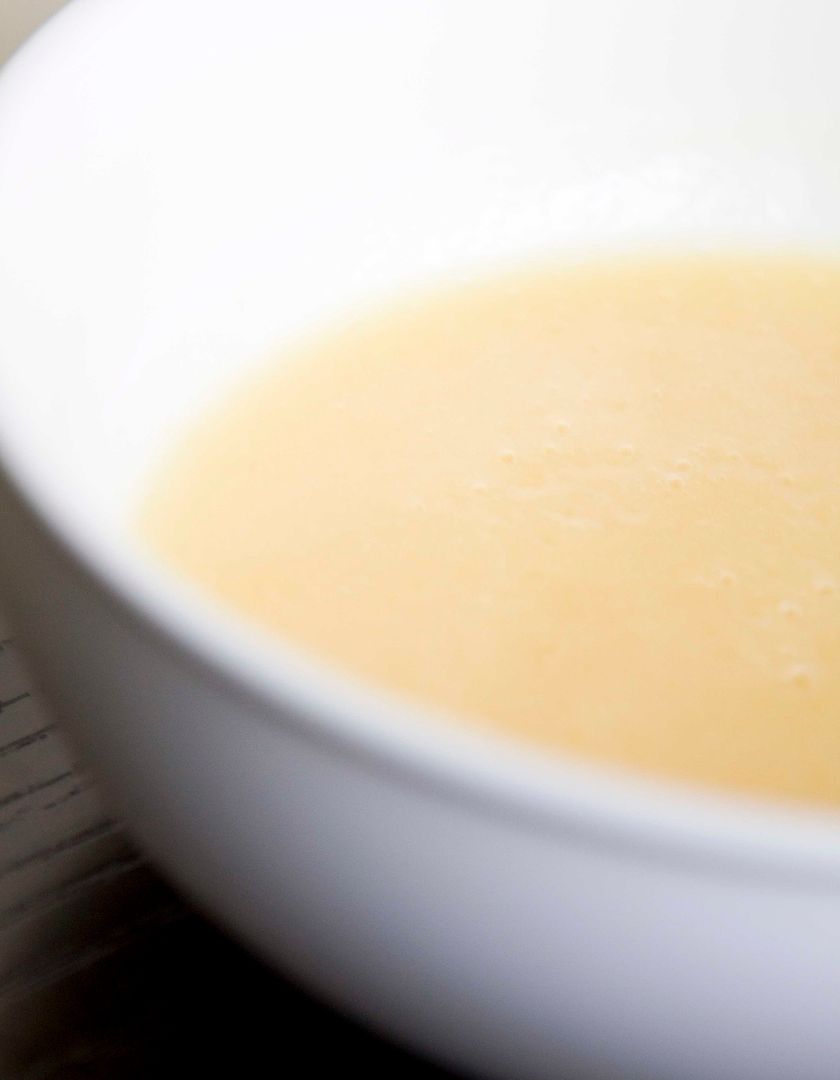
Roll the lime or lemon while pressing it down with your palm first before cutting in half. This will help drawing out even more juice. Squeeze 1/2 of the lemon juice into a blender. Also squeeze one orange juice into the blender. You can substitute the orange juice with champagne or rosé for a more adult fancy treat.
Peel the skin off the peach, remove the pit, and slice the remaining. Add 1/2 of the peach slices along with about 2 teaspoons of granulated sugar into the blender. Taste the mixture and see if more sugar or acidity is needed. Blend till smooth and slightly frothy.
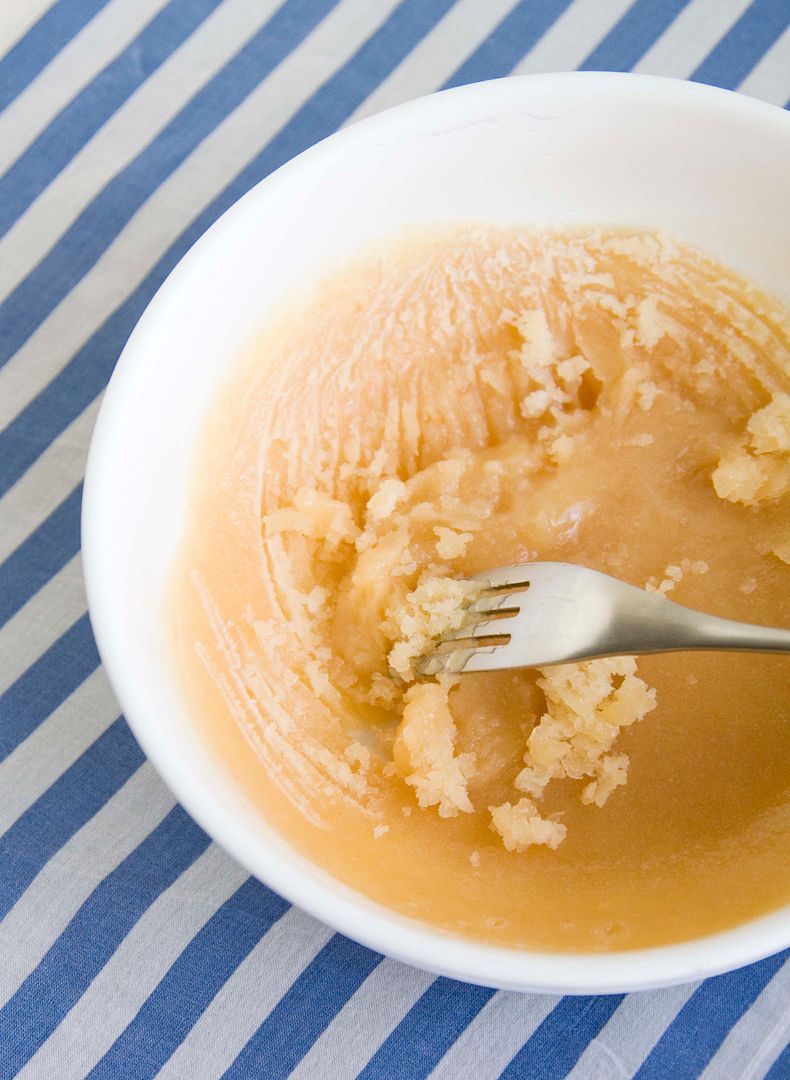
Pour the mixture to a bowl, cover with foil, and transfer to the freezer. Wait for at least 30 minutes or till the mixture has been set slightly. Take a fork and gently scrape the surface. Put the bowl back to the freezer and repeat the steps till all the mixture has been scraped, resulting in texture similar to thin icy flakes. Don't let it sit in the freezer for too long, otherwise you might end up with a chunk of tough ice too hard to be scraped, even with a metal fork.
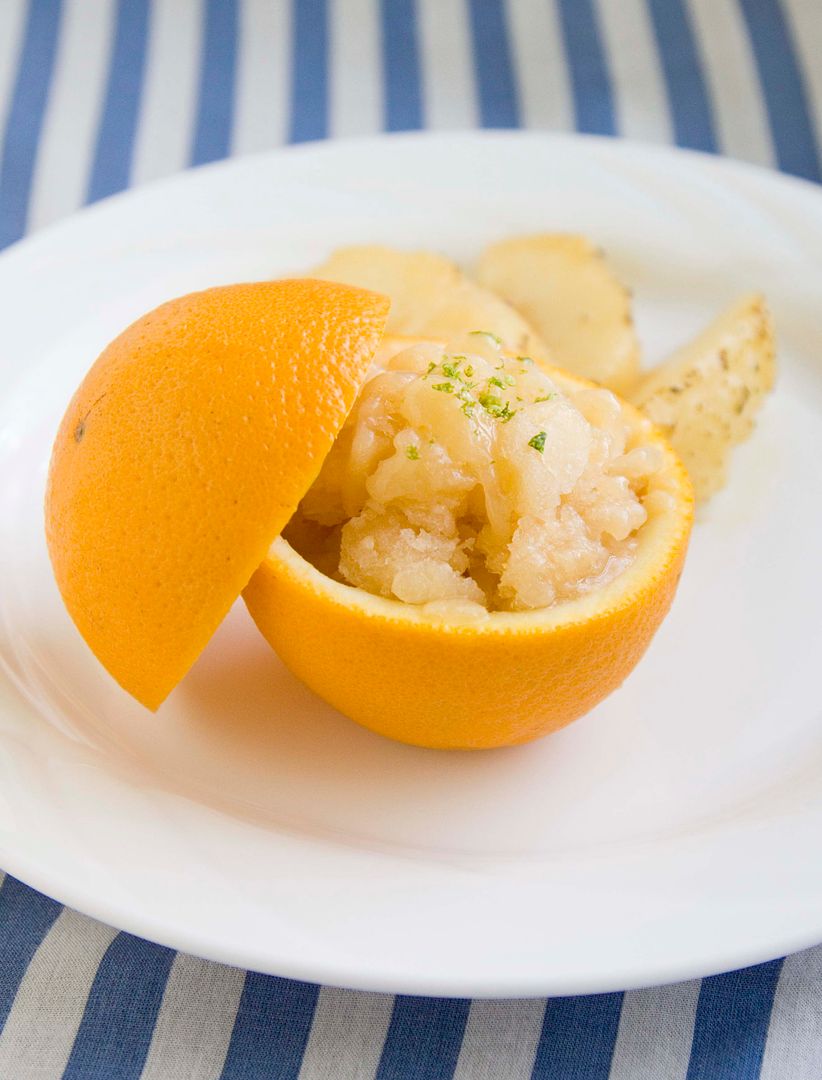
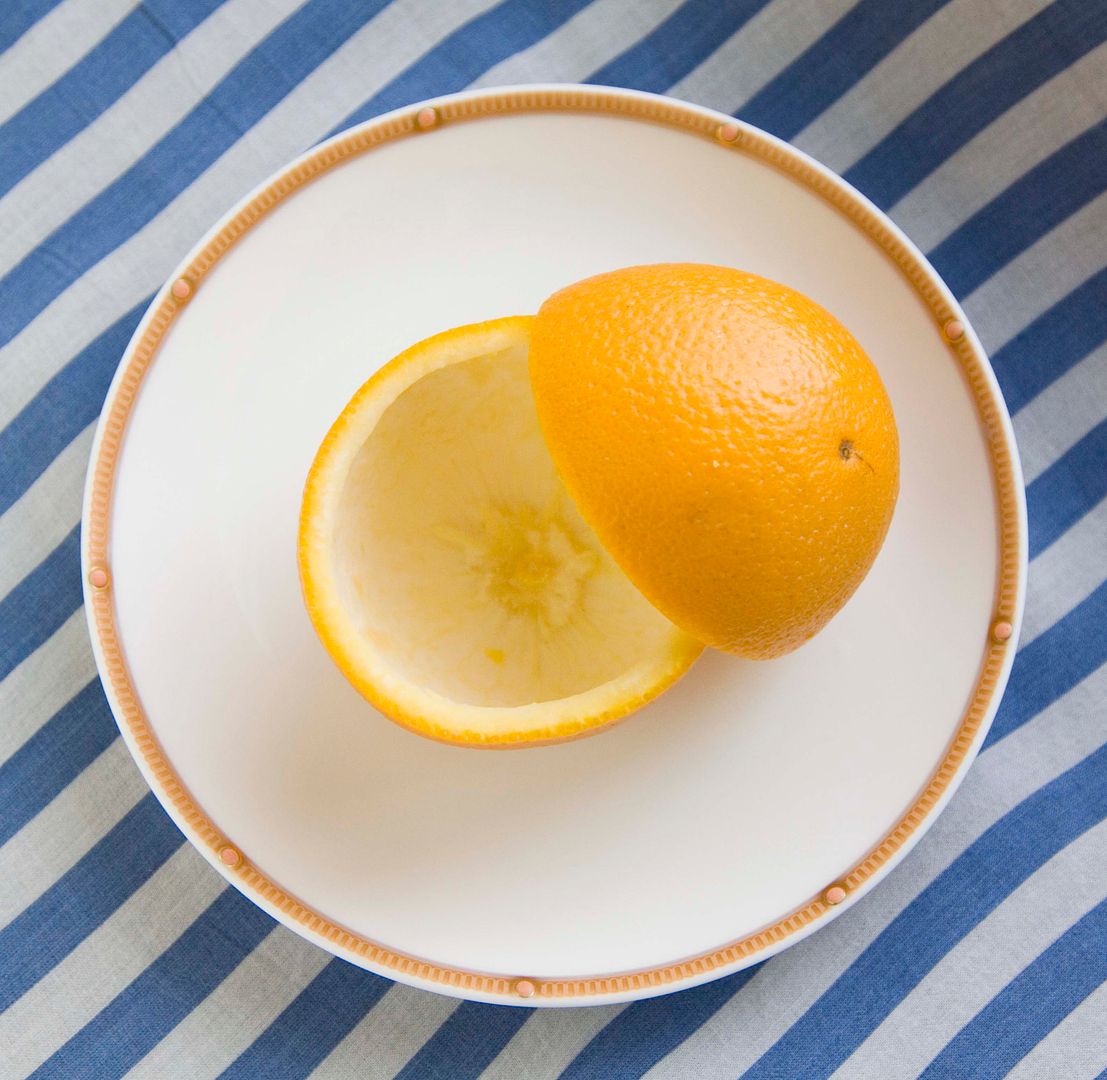
Meanwhile, remove the meaty part from the orange peel, basically we are trying to "empty" the orange here. If you used an orange for this recipe, then just take the one that has been halved and juiced. Use a spoon and run through the edges between the orange pulps and white colored peels. The meaty part should be removed fairy easy with some force.
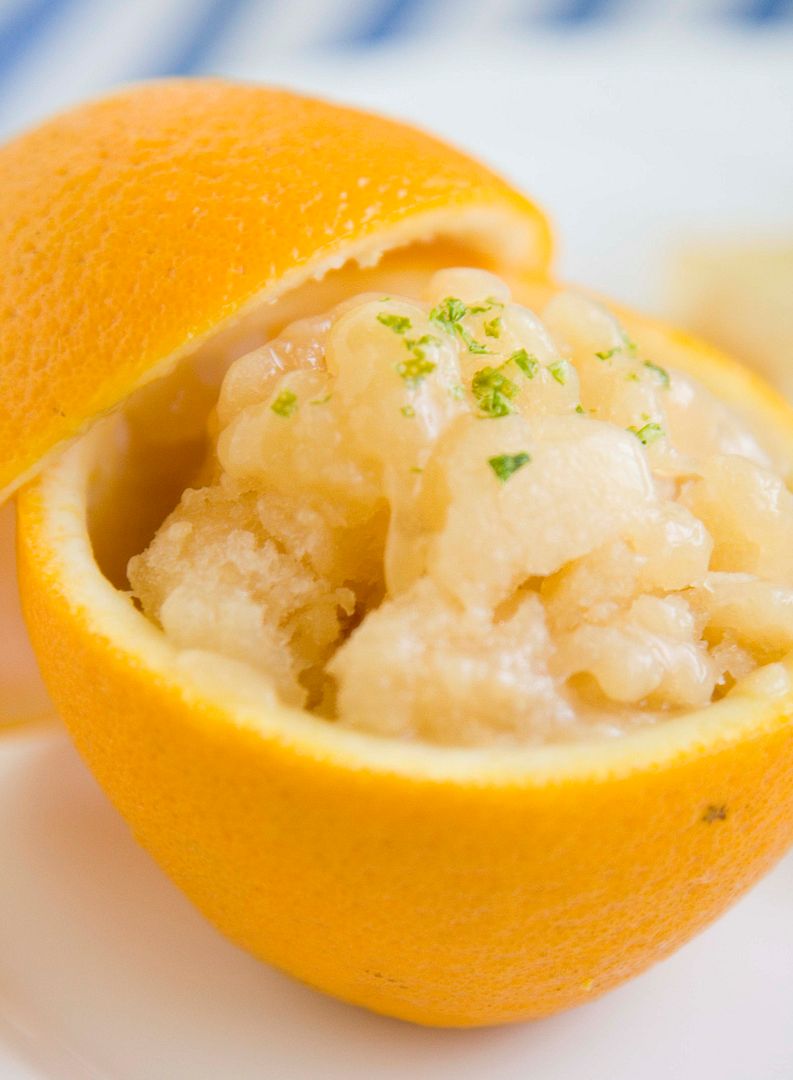
Once the granita is ready, scoop them into the orange peel container and garnish with some lemon zest.
I also served the granita with some slightly torched peach slices. It should look much better if the peaches weren't so rugged looking, clumsy me.
Happy summer time!
Other granita recipe:
Dragon Well tea with coconut milk granita
Pearl rice balls got the name from its appearance. Generally speaking, it's a traditional Chinese steamed dish made with pork meat balls coated with glutinous rice. The rice has a mild and slightly oiled pearl-like shine after steaming, thus the name pearl rice balls. It's easy to make and little cleaning required. On top of that, pearl rice balls can be a great afternoon snack or perfect Asian style party food!
Celery and pork pearl rice balls 芹菜珍珠丸 -
Ingredients (for 10 to 12 pieces)?
- 0.8 lb of ground pork
- 1 cup of glutinous rice 糯米 (preferred shorter grains)
- 1 tablespoon of chicken stock or water
- 1 teaspoon of grated ginger
- 1 small stalk of celery
- 2 water chestnuts 荸薺
- 2 teaspoons of salt
- Some Sriracha sauce
- Some cilantro
How?
Gently rinse the glutinous rice just like preparing regular white rice. Shorter grain is preferred because it tends to get sticker compared to longer grain version, which will better stick on the pork balls during the steaming process.
Soak the glutinous rice in water for about 2 hours. You can substitute with lukewarm water and cut down the soaking time by half when in a hurry. Once done, drain well and set aside for later use. I also use a kitchen towel to pat dry the remaining moisture.
Have a bigger container ready for the meat ball ingredients. Chop the celery into tiny cubes, only need about 1 1/2 tablespoons here. Finely chop the cilantro stems, about 1 tablespoon. Peel and chop the water chestnuts into tiny pieces. The water chestnuts provide a crunchy bite to the pork balls, so make sure not to over-chop them, otherwise we'll lose the texture.
Add the chopped celery, cilantro roots, water chestnuts, and ground pork into the container. Also add about 2 teaspoons of salt and 1 teaspoon of grated ginger. Mix all the ingredients. Add about 1 tablespoon of chicken stock or water to the pork mixture then keep stirring till the liquid has been fully absorbed by all the ingredients. You can also add a small spoonful of corn starch, which will yield a more tender meat mixture after steaming. Once done, let the ingredients "rest" for about 5 minutes before forming into balls.
Use both hands to grab some pork mixture and form them into pork balls. I also use the "toss in between my palms" technique for each pork balls to drive out the air inside the mixture. It's kind of like slapping the meat in between my palms for each pork ball portion. This will also help the meat to stick together and not falling apart.
Roll the pork balls in the glutinous rice. Gently apply some pressure so the rice can better stick on the pork mixture.
Arrange the rice balls onto a plate or container you used for the steamer. Steam for about 40 minutes.
Test the doneness by sticking a toothpick inside the pork balls, if it feels soft then the food is ready. You can also taste some glutinous rice on the side and see if the grains have been fully cooked.
Garnish with some Sriracha sauce, cilantro leaves, and celery leaves before serving. This recipe calls for quite a bit of salt so no dipping sauce is required. However, you can adjust the recipe and use less salt and serve the pearl rice balls with various dipping sauce. Some use sesame sauce, which is similar to the one used for satay. You can also thinly chop the ginger and soak in Zhen Jiang vinegar 鎮江醋 as other type of dressing.
Let your creativity runs wild, if the sauce fails, rest assure that at least we've still got yummy celery and pork pearl rice balls here!
Other party food recipes:
Sushi Sushi has been recommended by several friends for countless times. The only reason stopping me and Mr. K (my boyfriend by the way) from going is just that the distance is too far for us lazy OC people. However, I guess the urge of trying out new Japanese restaurant finally overwhelmed the hesitation, so one day we were determined enough to step on the gas pedal and made our "long journey" to LA County. Good thing the entire dining experience worth the 58 miles drive - one way.
Omakase is usually the way to go for when trying out high end Japanese restaurant, especially for the first time. However, Sushi Sushi also offers other more affordable sushi and tekkadon combinations starting at $24.
It's a more traditional Japanese style sushi joint, so do not except to find items like rainbow roll, Philadelphia roll, katsu don, or even ramen on the menu. The name of the restaurant already implied not only once, but twice that this is the place for "Sushi Sushi."
Omakase course generally comes with three different prices - $65, $95, $125 and up. I'm not quite sure which one we picked, most likely $95. Either way, to give you a better idea, our entire bill wound up being close to $300, that's including a 720ml bottle of sake.
Harashika 春鹿生酒 Junmai Ginjo Shiboribana, first draft pure rice sake -
Very light and smooth, just how I like my sake to be.
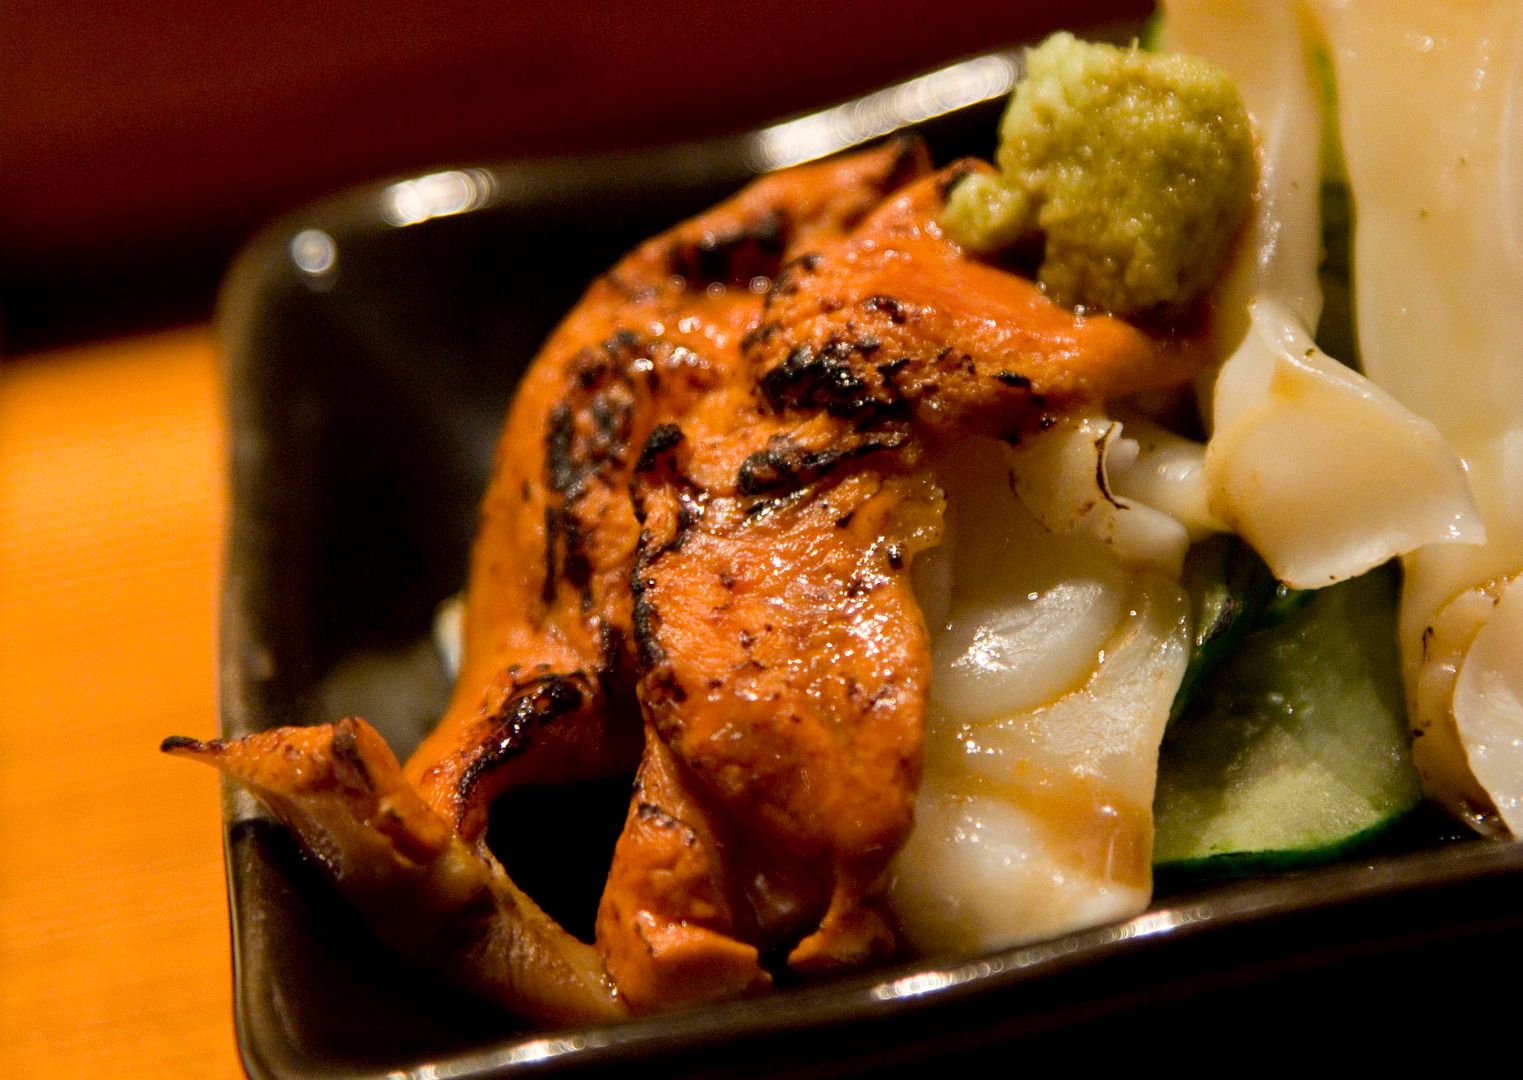
Hotaru ika/firefly squid/螢光烏賊 -
Try to Google the words firefly squid if you never heard of it and you'll be amazed by this night glowing marine life. Fishing season is around March to May, in which visitors also flocking to Toyama Bay in Japan to observe the magnificent blue light glowing along the shore.
Unlike most light tasting squids, the firefly squid seems to have more condensed flavor, partly from its bursting innards when biting into the meat and partly from chef's touch of ponzu seasoning.
I called it pleasure trio -
There is also other type of ika/squid underneath the uni.
Then an array of nigiri begins -
My memory fades since this visit was few months ago. However, the pictures should show that every fish used for nigiri were fresh and smooth in texture.
I like the portion of sushi rice used at Sushi Sushi. The amount is just right for one single bite and in perfect balance with the fish. Bigger is not always better in this scenario, if you get a bigger piece of the fish, then you'll need more rice to balance the flavor. Otherwise might as well just order sashimi if you're looking for a mouthful of fish chunk.
It won't taste as good when you have to shuffle the entire thing in your month and acting like a chipmunk munching on food that make your cheeks twice as big.
I called it hula nigiri -
Light and silky -
Aji nigiri -
Kohada/gizzard shad nigiri -
Tamago/egg and oshi sushi -
Some hot dishes -
Ikura maki -
I like the overflowing effect.
Our feast continues with even more uni, sweet shrimps, octopus, and several types of shellfish -
Slightly torched uni close up -
It definitely helps in drawing out the sweetness from the uni. Slightly tarred paired with higher level of sweetness, creating a different sensation in the mouth.
Fish soup with the sweet shrimp head (I picked out the head already) -
See the camera lens cap and cell phone on the table? That's how busy I was trying to take pictures with my camera, my cell phone, and quickly finish the food before the temperature rises. The chefs were very friendly despite seeing me taking so many pictures. They were actually discussing about why some sushi restaurants do not allow guests taking pictures.
I might be biased since I'm one of the food picture frenzy member. However, as long as it doesn't disturb other customers and the chefs of course, and as long as you don't take too much time and spoil the fresh taste of the food, I think pictures can be part of the dining experience that help customers to"regurgitate" the delicious memories in the future.
Dessert menu -
We picked lemon sorbet and matcha pudding -
Lemon sorbet was very refreshing and not overwhelmingly sourish. I felt like I can eat even more after this dessert, highly recommended. Matcha pudding in the other hand, works more like a real dessert treat after dinner, creamy and slightly sweet to end the perfect evening.
Cindy's rating: 8 (definitely get more than $100 worth of food and experience)
Sushi Sushi
326 1/2 S. Beverly Hills Drive
Beverly Hills, CA 90212
(310) 277-1165
http://www.sushisushibh.com/index.html
Business Hours:
Lunch - Tuesday through Friday, noon to 2 p.m.
Dinner - Tuesday through Saturday, 6:30 p.m. - 9:30 p.m.
*Street parking (meter) available
*Make sure to call in advance for reservation, just to be safe
This recipe was created with the memory from my last trip to Vegas. If you ever dine at a Korean restaurant then you'll notice plates after plates of refillable simple appetizers taken over the entire table. Banchan, the general name for all the small and yummy dishes that serve on the side of main meal. Typically you'll see items like assorted kimchi, stewed potatoes, fish cakes, and some type of sesame oil and salt marinated vegetables. On a higher scale, you might find marinated seafood and stewed beef tendon as your banchan selection.
However, the Korean joint in Vegas was serving some kind of seared eggs with zucchini encased inside. The dish has a slight touch of sesame oil and tastes even better when I dumped a spoonful of kimchi on top. Since I'm now far away from Vegas, why not recreate this dish with the memory from my palate?
Seared zucchini and scallion eggs -
Ingredients?
- 2 eggs
- 1 zucchini
- 1 stalk of scallion
- 1 big pinch of sea salt
- Some olive oil
- Some sesame oil
- Some white pepper powder
- Some Sriracha sauce
- Optional - cilantro
- Optional - kimchi
How?
Chop off the very top and bottom ends from the zucchini. Slice the remaining section, about 2 mm in width. Discard the stem from the scallion and chop the remaining into smaller pieces.
Break two eggs into a big bowl. Add in one big pinch of sea salt, some white pepper powder, and chopped scallion. Beat well and set aside for later use.
Drizzle some olive oil and sesame oil to the pan, about 3 to 1 ratio. Usually I'll say drizzle enough oil to evenly coat the bottom of the pan. However, this time drizzle enough oil to coat the bottom plus about 1 more tablespoon of the oil mixture. Both eggs and zucchini can suck in a lot of oil and that's why this recipe calls for more oil.
Turn to medium high heat and evenly lay the zucchini slices on the bottom. I used about 14 zucchini slices here. Just make sure all the slices are in contact with the oil, otherwise you might end up with uncooked zucchini slices on the edges.
Sear for about one minute, flip all slices to the other side and sear for another minute. Pour in the egg mixture and just wait till the mixture settles a little bit. Press the eggs down with a spatula, making sure the zucchini slices are "encased" inside the egg mixture. Carefully flip the whole seared eggs when it's about 70% cooked through.
It might be a wee bit tricky to successfully flip the seared eggs. Well, there's always a way to go around it. Just slide the eggs onto a big plate first. Take another plate to cover the eggs. Hold both plates and flip it the other way around, like how you do it with turnover cakes. So now you'll see the already seared side on the top, just carefully slide the eggs back to the pan to finish searing the uncooked side, about another minute or two or till the bottom turns slightly browned.
I cup the eggs in half to fit into my rectangular shaped plate -
You can serve it with some Sriracha sauce and top the eggs with chopped cilantro. To make it even better, simply dump a big spoonful of kimchi over the eggs. The acidity and spicy kick from the kimchi will definitely bring the flavors of this side dish to another level.
Other Asian side dish recipes: